Patients
The Patient tab is where you find people in the system, register new patients, and open a patient's medical record.
The patient list
Open the Patient tab. You'll see a count of all registered patients and a table of patients.

Searching and filtering
A search and filter bar stays visible while you scroll:
- Search box — type a name (
Lastname, FirstnameorFirstname Lastname), ID (PIN), or email. Results update as you type. - Branch filter — narrow to patients whose origin branch matches the selected branch. Defaults to your current branch and follows the top-bar branch switcher.
- Category filter — narrow to patients in a particular category. (Categories are set up by your clinic; if none exist, this list is empty.)
- Status filter — All Status, Active, or Pending.
- Doctor filter — start typing a doctor's name to show only patients tagged to that doctor.
- My patients toggle — instantly limits the list to patients tagged to you. Useful for doctors checking their own caseload.
The table
| Column | Notes |
|---|---|
| (checkbox) | Visible if you have bulk-delete permission; tick to select rows for bulk delete. |
| ID | The patient's PIN. Click the header to sort. |
| Patient Name | Photo (or initials) and name as "LASTNAME, Firstname Middlename". Click the row to open the medical record. |
| Birthday | Patient's date of birth. (Hidden on small screens.) |
| Category | The patient's category, or "+N more" if they have several; "NA" if none. (Hidden on small screens.) |
| Status | A colored badge — Active, Pending, etc. |
| Actions | A pencil icon to edit the patient's details, an eye icon to open their medical record. |
Use the pagination controls at the bottom to move between pages.
Bulk delete
If your account has bulk-delete permission, a checkbox column appears. Tick individual rows or use the header checkbox to select everyone on the current page. A blue bar above the table shows the count and a Delete (N) button. Click it, confirm in the dialog, and the selected patients are removed.
Registering a new patient
Click Add Patient.
Check for an existing patient first. A small form asks for First Name, Middle Name (optional), Last Name, and Birthdate. Click Check for Duplicates.
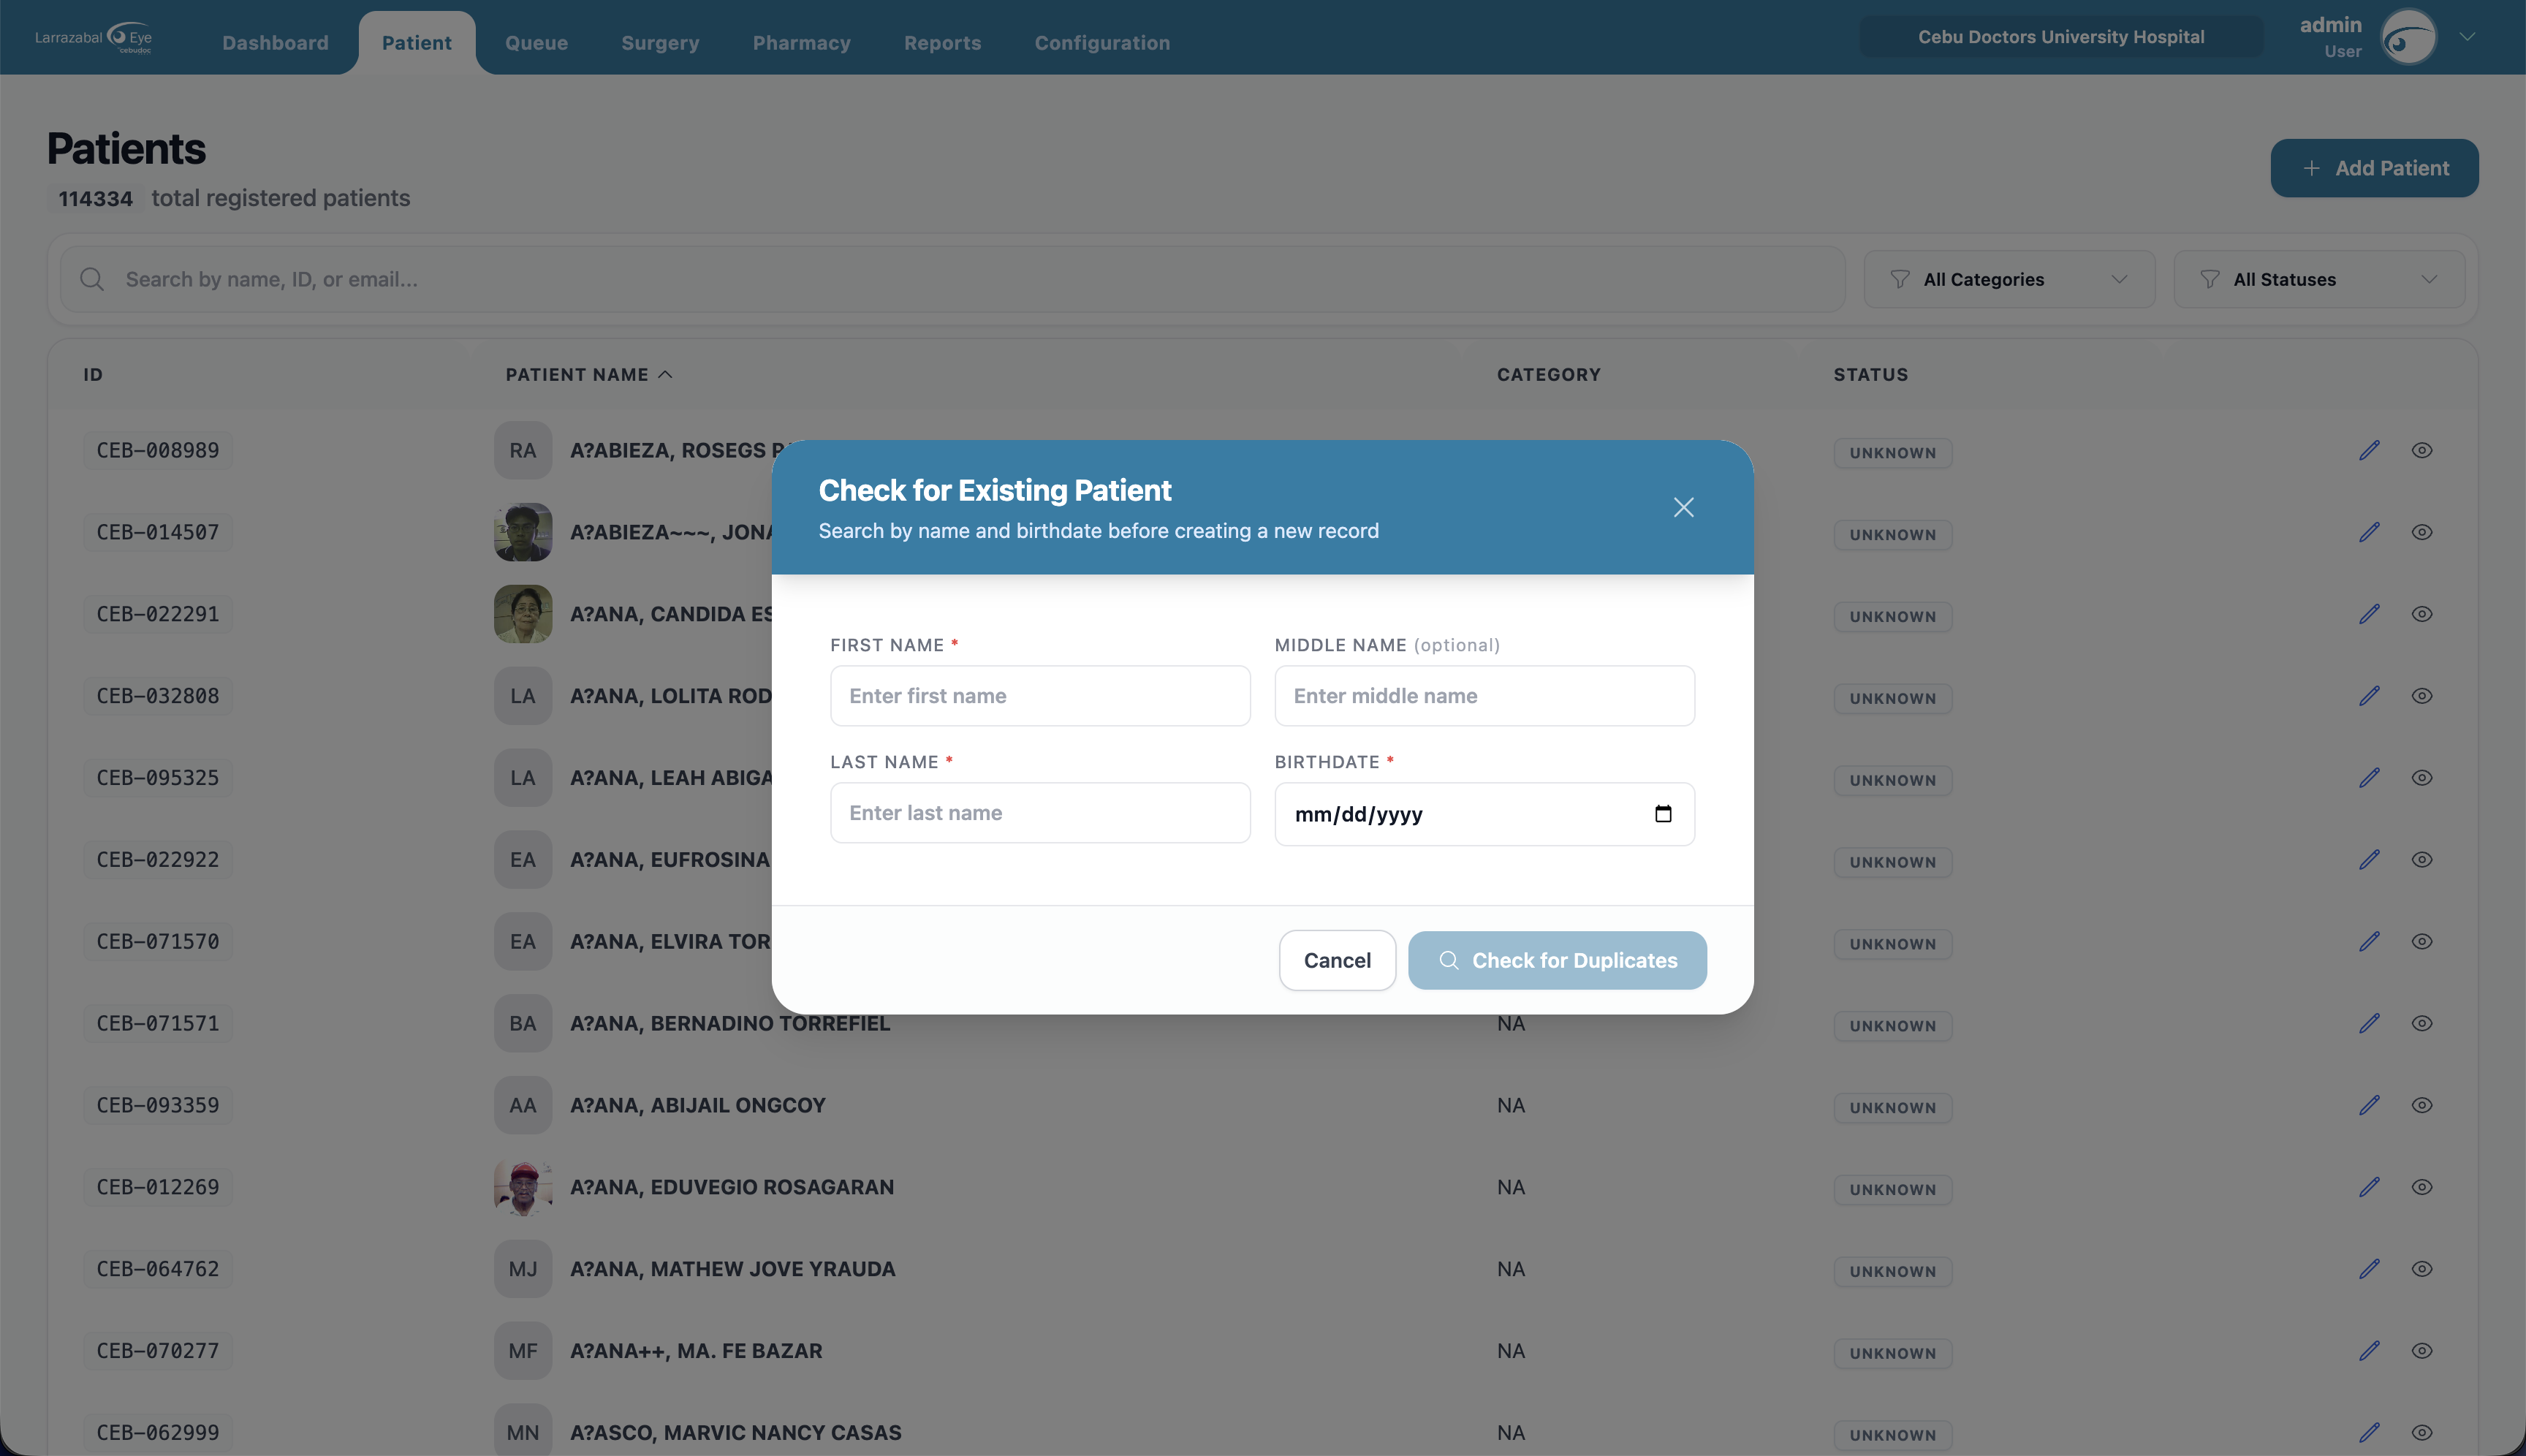
- If the system finds an exact match (same name and birthdate), it shows it in a red box. If that's the same person, click Open Profile instead of creating a duplicate.
- Possible matches (similar but not identical) appear in an amber box.
- If none of them is your patient, click These aren't them — Continue creating. You can also go Back to Search.
The Add New Patient form opens. The patient photo control, name fields, and birthdate sit on the left; on the right, three tabs — General Information, Contact Details, Referral — switch between the main field groups. An Assigned Doctors section sits below the tabs.
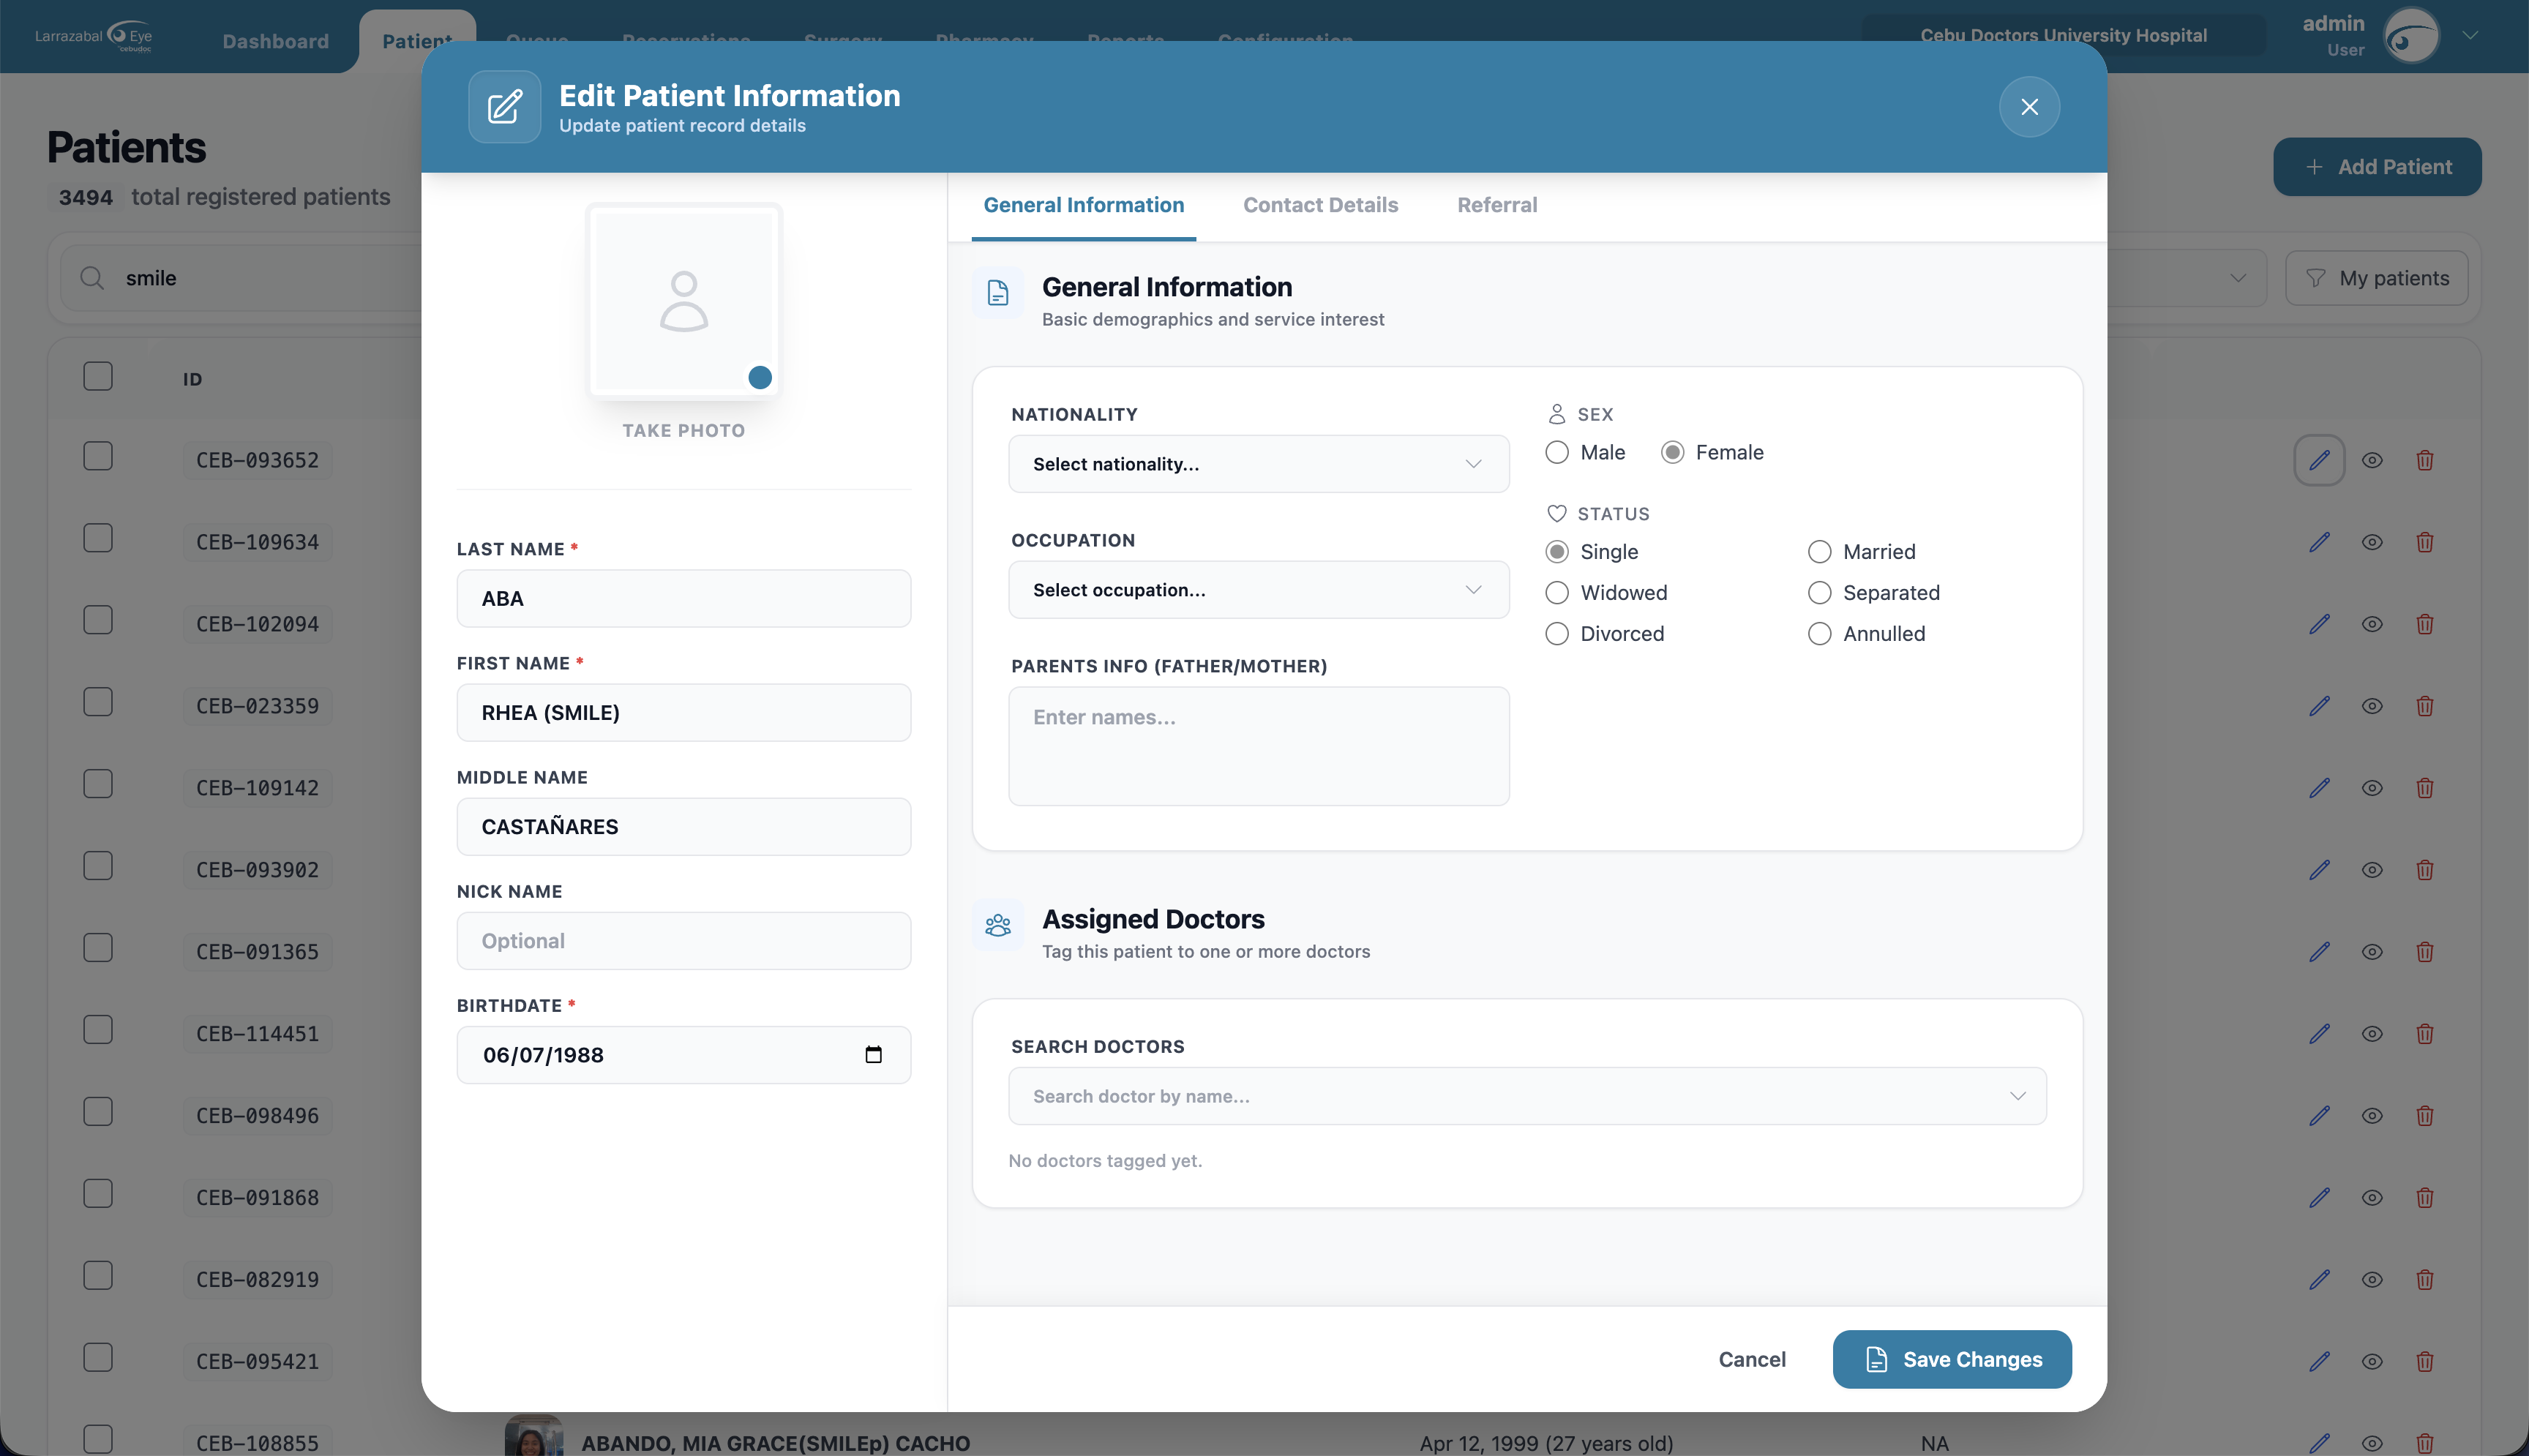
General Information tab
- Nationality — searchable list (driven by the system's nationality catalog).
- Occupation — searchable list (driven by the system's occupation catalog).
- Parents Info (Father/Mother) — free text (optional).
- Sex — Male or Female.
- Status — Single, Married, Widowed, Separated, Divorced, or Annulled.
Contact Details tab
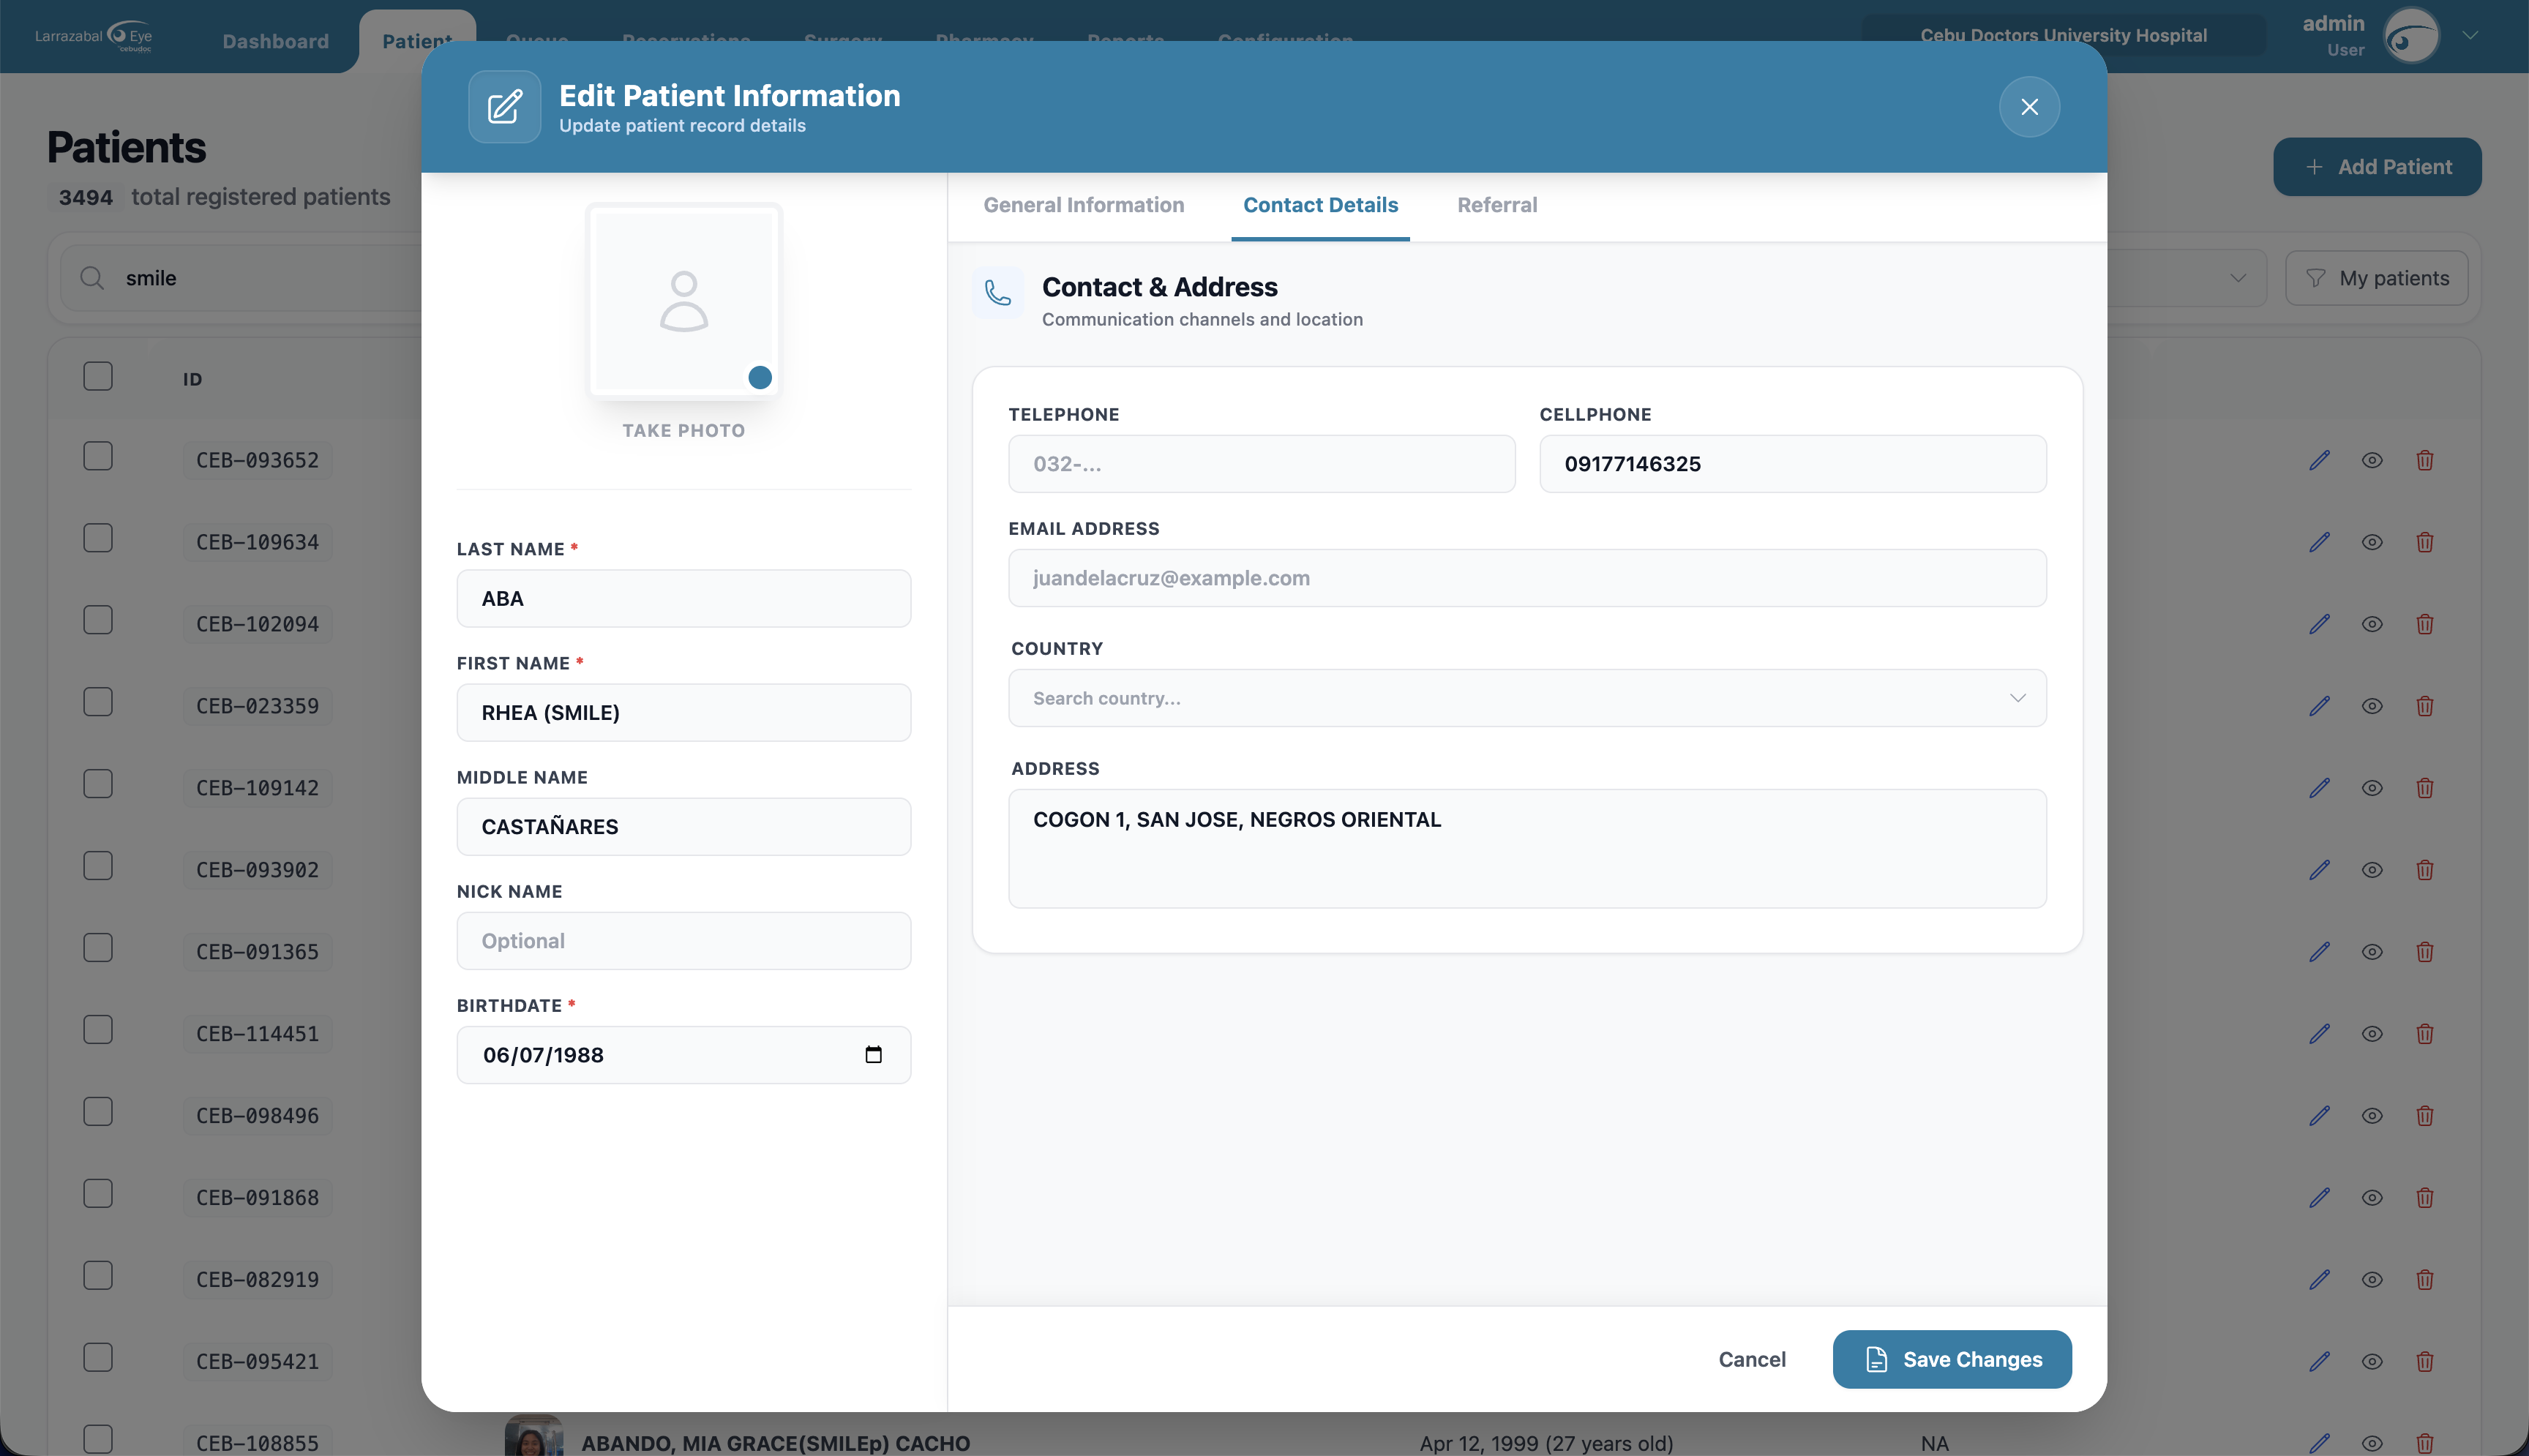
- Telephone and Cellphone — phone numbers.
- Email Address — must be a valid email.
- Country — start typing to search.
- If the country is the Philippines, an address picker appears: Region → Province → City/Municipality → Barangay, each filling the next.
- Address — free text for the full street address.
Referral tab
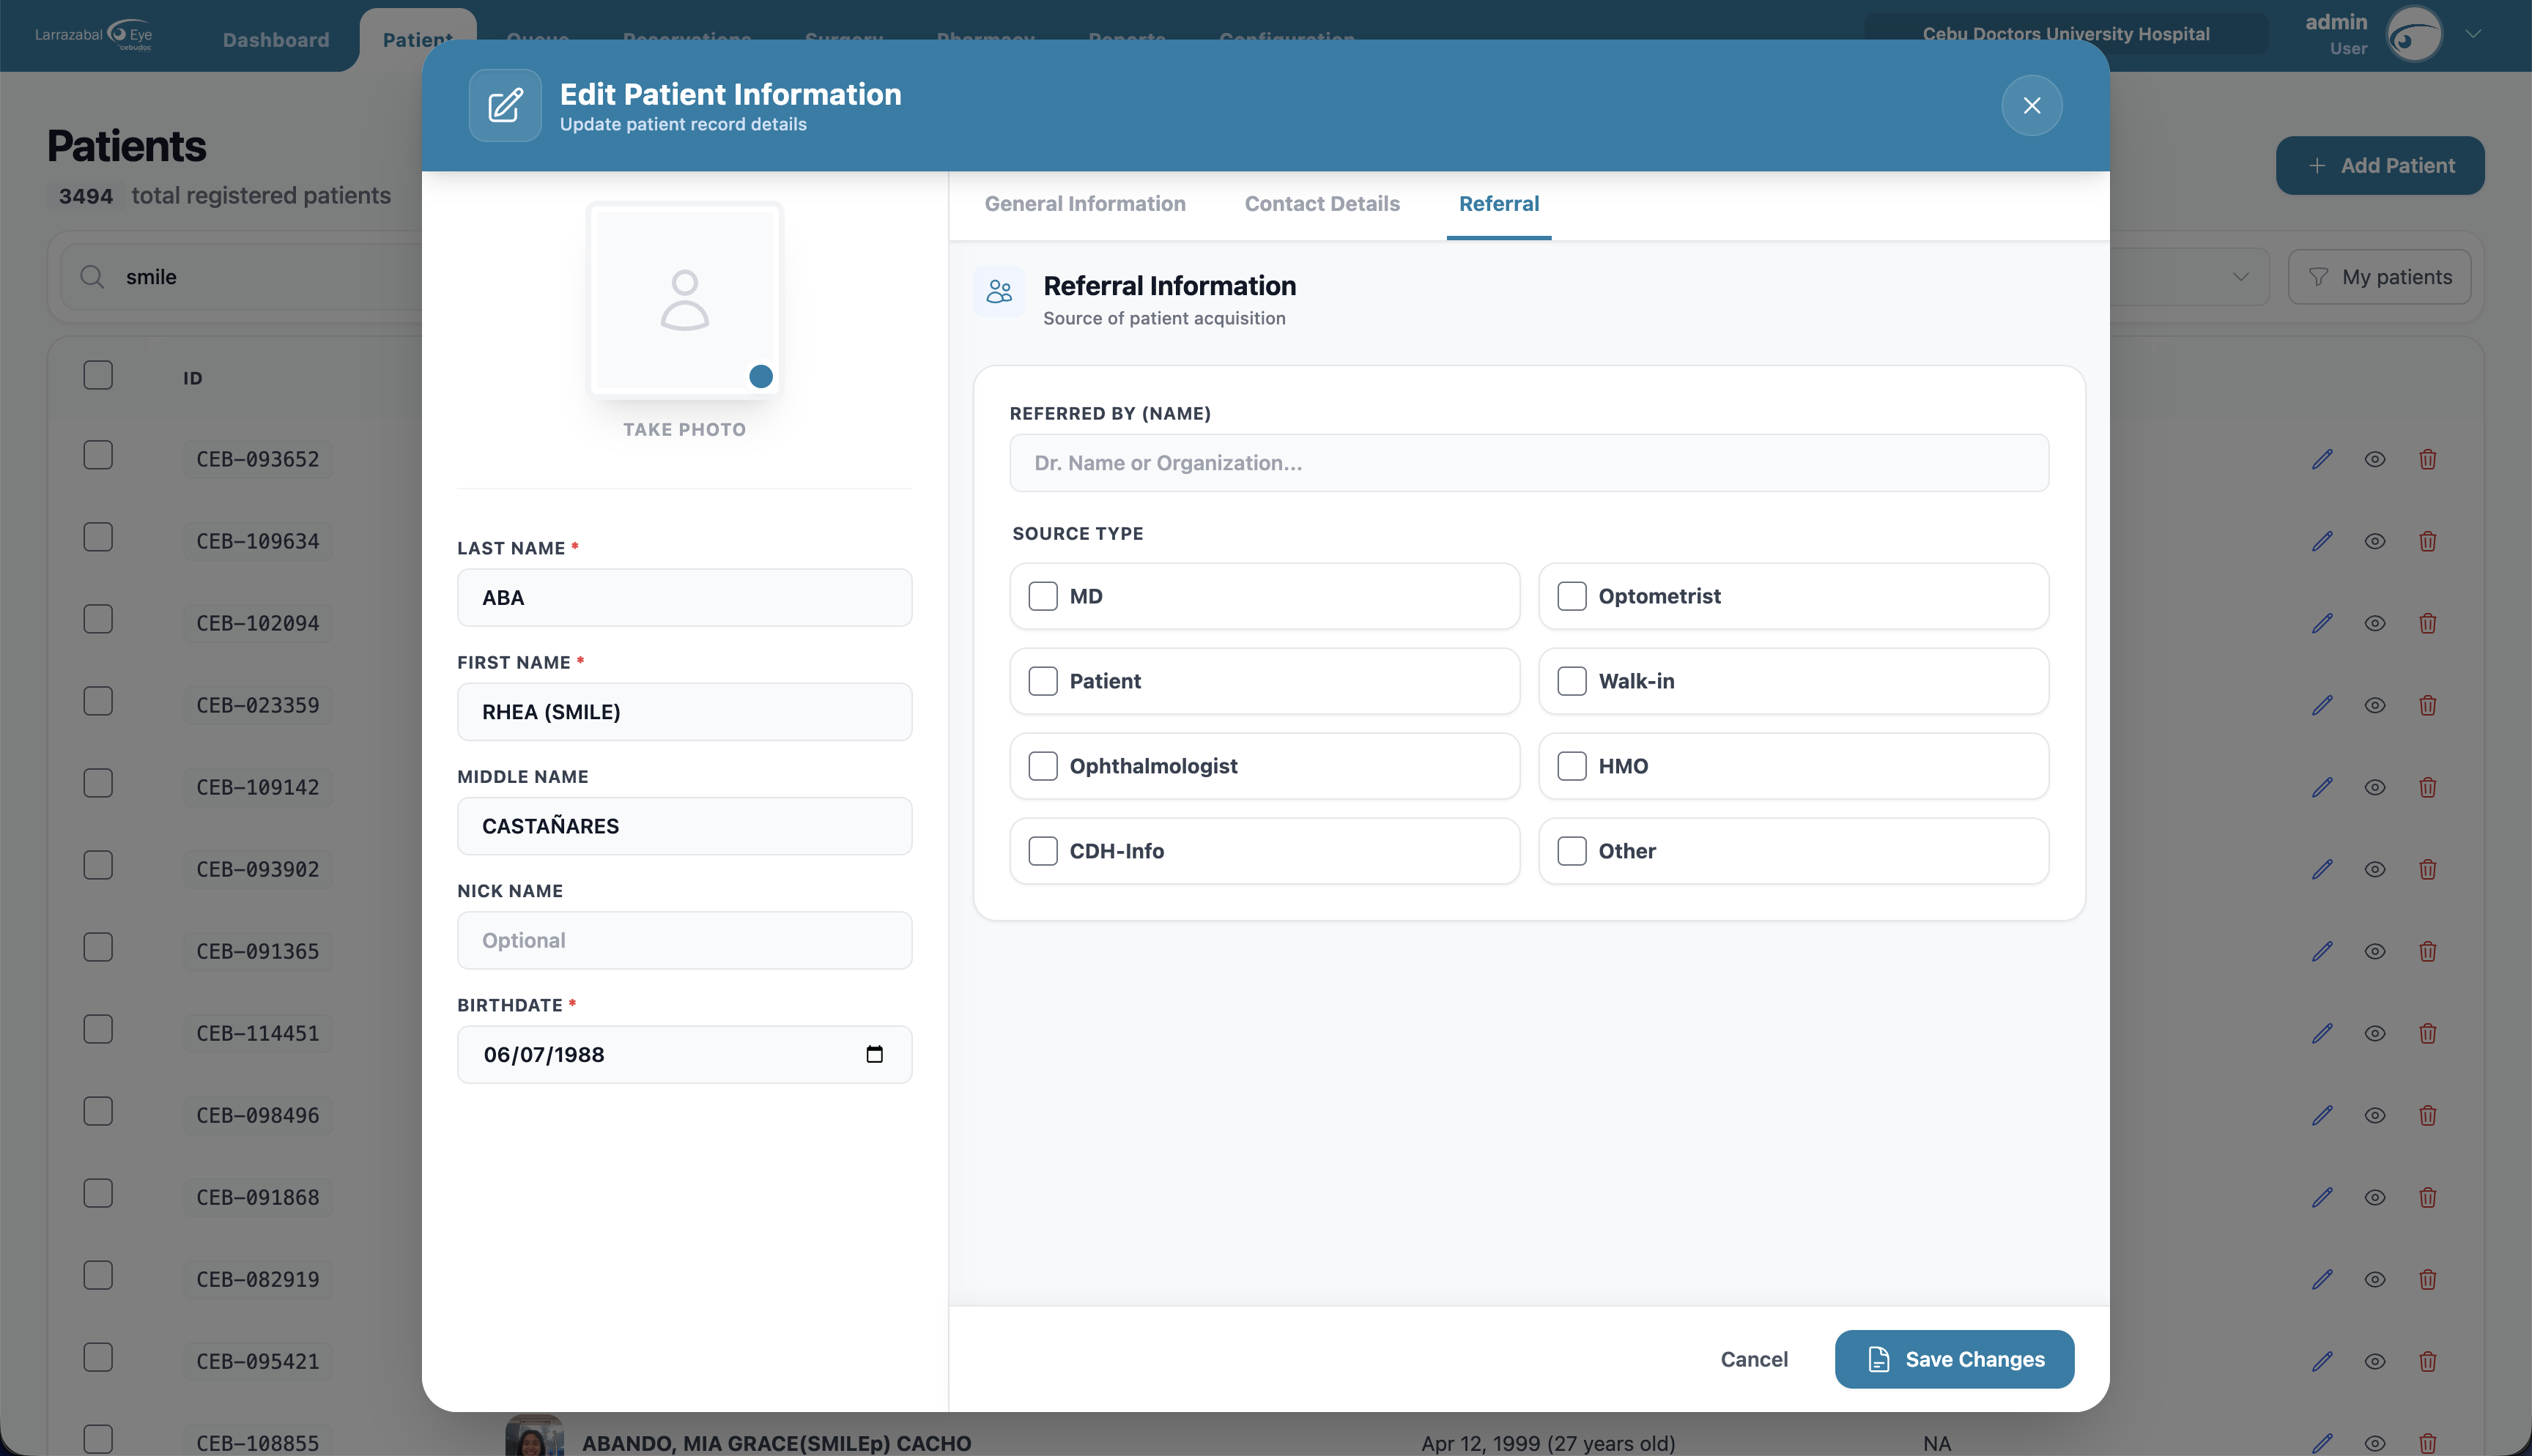
- Referred By (Name) — the referring doctor or organization.
- Source Type — tick all that apply: MD, Optometrist, Patient, Walk-in, Ophthalmologist, HMO, CDH-Info, Other.
Assigned Doctors
Below the tabs, an Assigned Doctors card lets you tag the patient to one or more doctors. The Search Doctors field accepts a doctor's name; click a result to add them. Selected doctors show as chips with an X to remove them — "No doctors tagged yet." appears when the list is empty.
Doctor tagging powers the My patients toggle and the Doctor filter on the patient list, and the doctors set here are pre-selected when generating certificates, admitting orders, and referrals.
Saving
Add a patient photo if you have one, then click Save Record. A toast confirms it and the new patient shows up in the list. (When editing, the modal stays open after a successful save so you can keep working — close it manually when you're done.)
Editing a patient
Click the pencil icon on a patient's row (or the edit option inside their record). The same form opens titled Edit Patient Information with everything filled in. Make your changes and click Save Changes. Edit and add controls only appear if you have patients.update; otherwise the form opens read-only with all fields and the photo upload disabled.
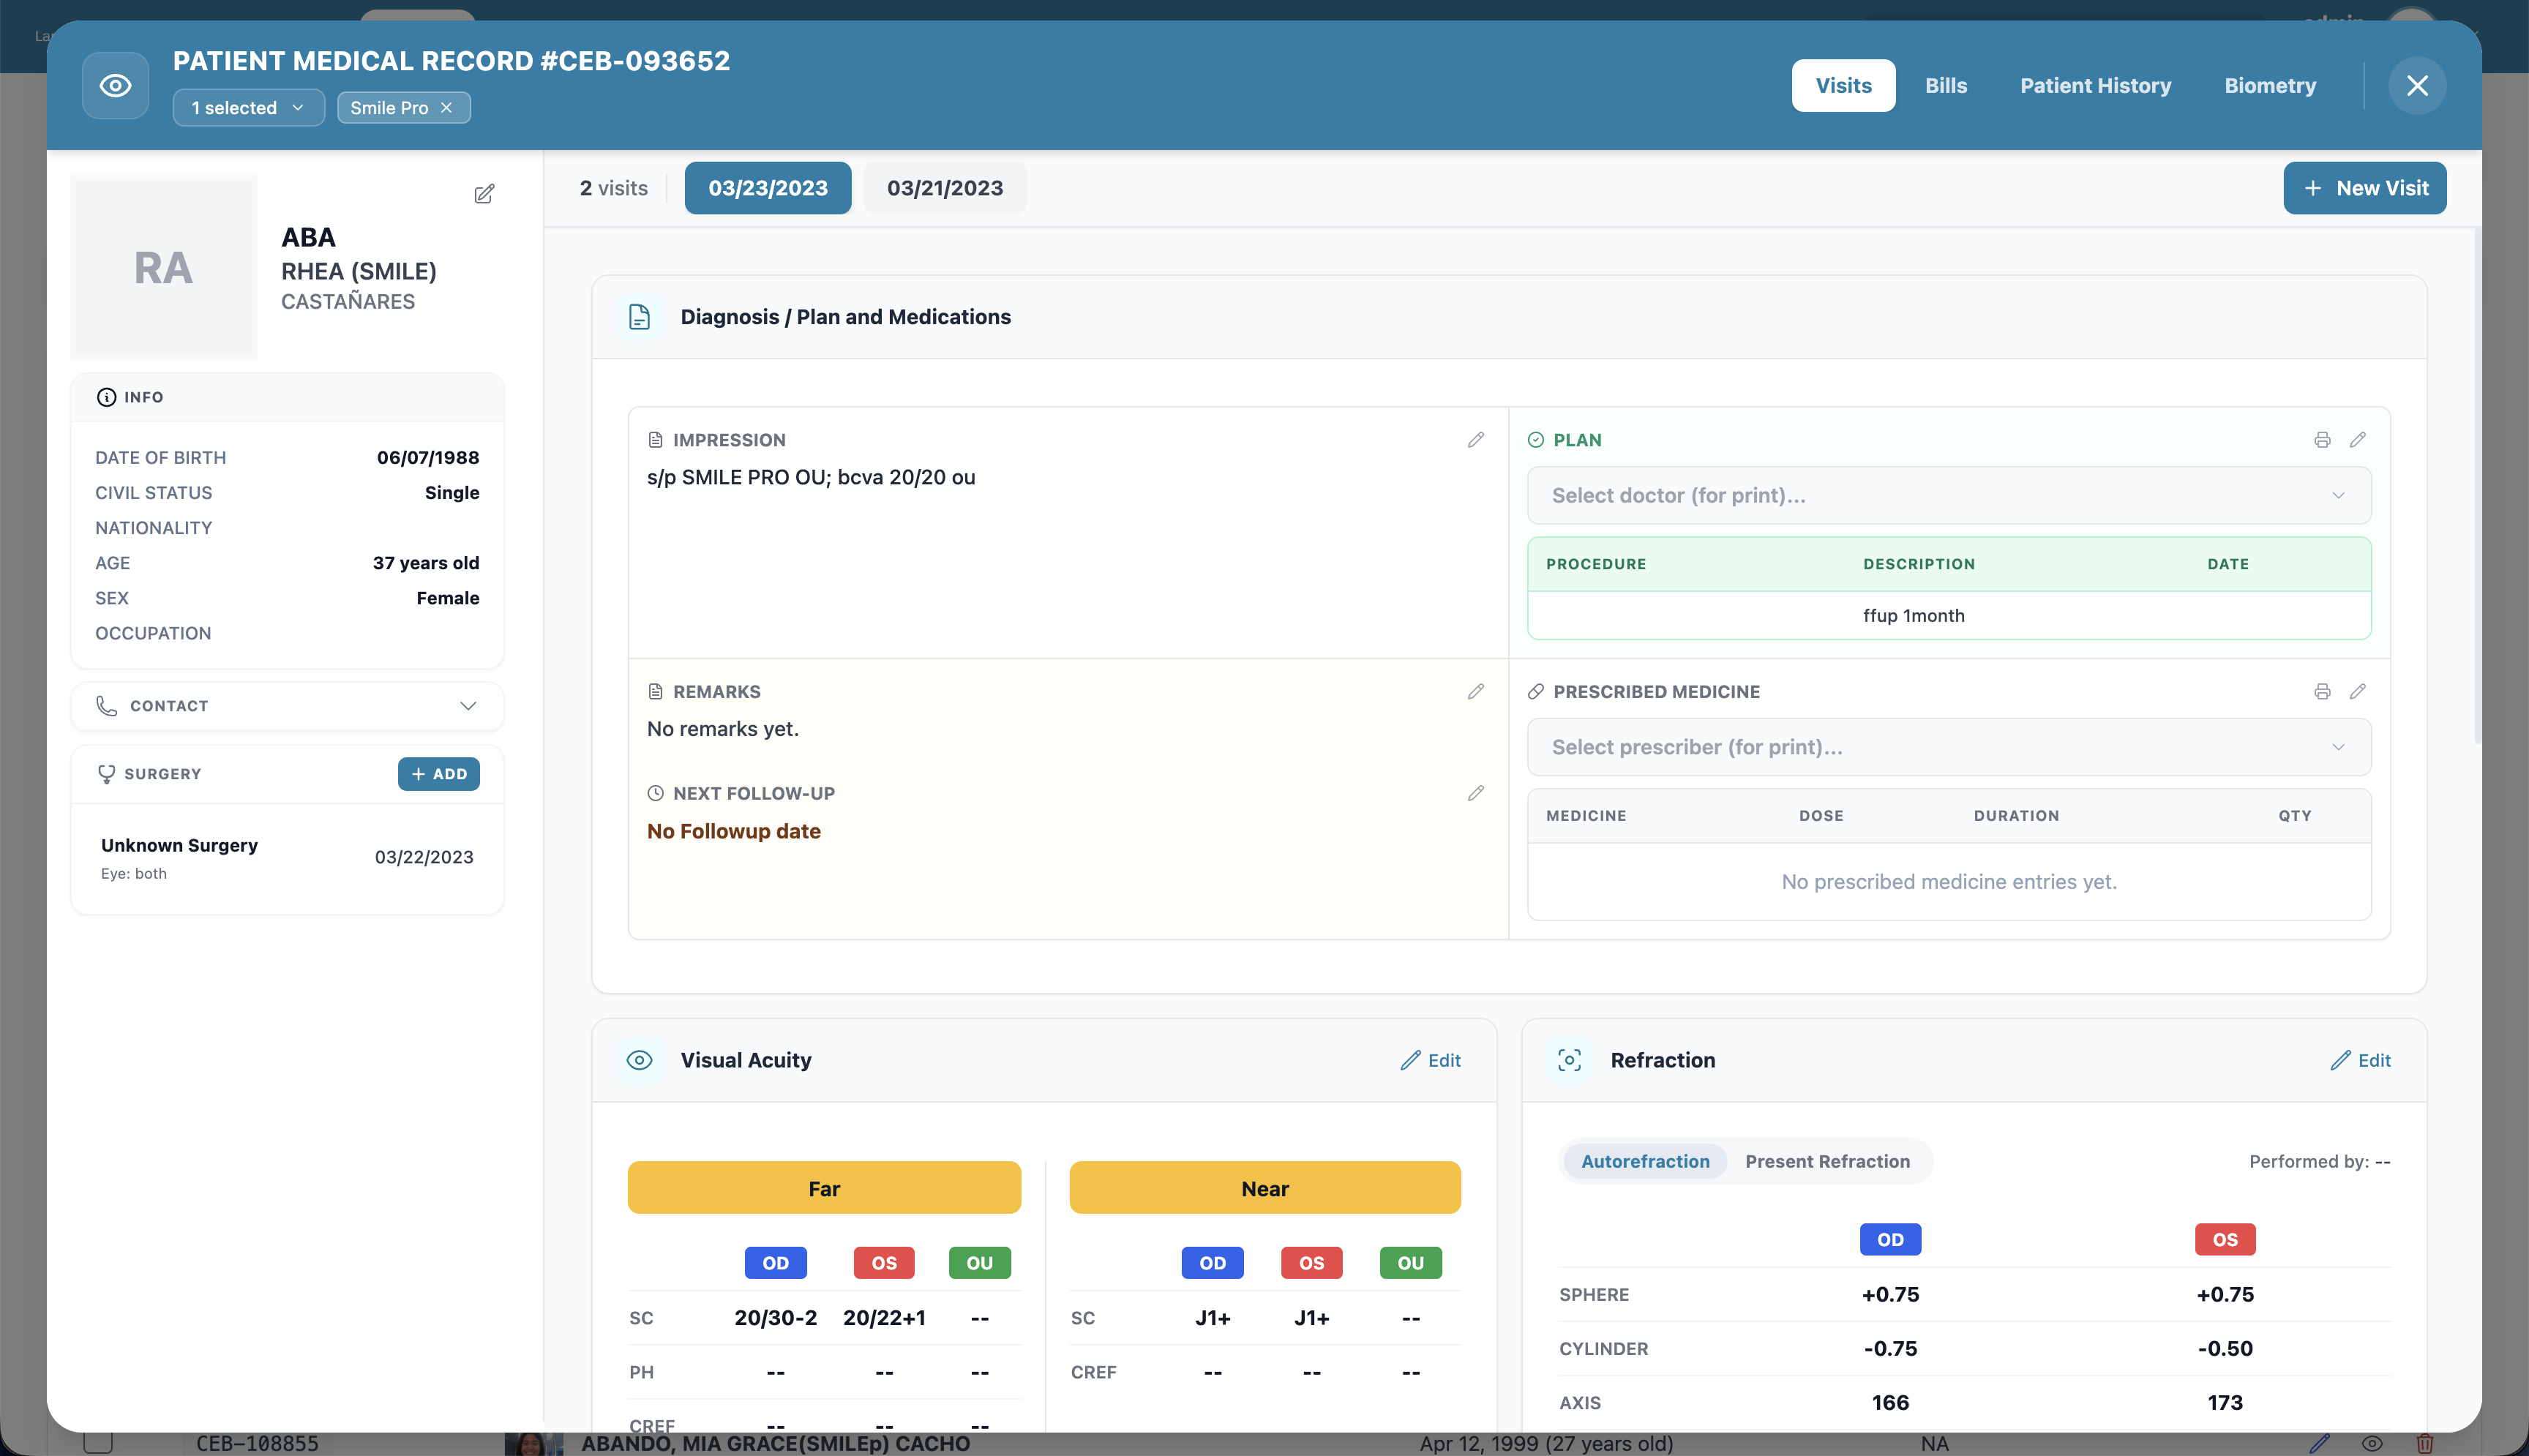
The patient medical record
Click a patient's row or the eye icon to open their full record. It opens over the page with a teal header — click the X (Close) to return to the list. Opening the record requires at least one section-level read permission; what you see inside is gated section by section.
Left side — patient summary
- The patient's photo, name, and PIN.
- Patient information — date of birth, age, civil status, nationality, sex, occupation (read-only here; use Edit Patient to change them).
- Contact — phone, email, address (click the header to expand or collapse).
- Surgery history — a list of the patient's surgeries with the procedure, eye, and date. Click one to open its Surgery Details modal. If you have
surgery-schedules.create, an + Add button on the section header opens the Add Surgery form pre-filled with this patient.
Choosing the patient's categories
In the header, the categories button (showing how many are selected) opens a list of all categories. Tick or untick to add or remove a category for this patient. Selected categories also appear as pills with an X to remove them.
Visits
The medical record is organized around visits — one per date the patient was seen.
- Along the top of the main area is a row of visit dates. Click a date to view that visit. Use the arrows on the sides if there are many.
- Click New Visit, pick the Visit Date (today by default), and click Create Visit to start a new one. (Hidden if you don't have
visits.create.)
For the selected visit you'll see a list of expandable cards for the different examinations and findings. The first card, Diagnosis / Plan and Medications, splits into four sub-sections:
- Impression — short impression text.
- Plan — pick the doctor for print, then add procedures as rows (Procedure / Description / Date).
- Remarks and Next Follow-up — extra text and a follow-up date for the visit.
- Prescribed Medicine — pick the prescriber, then add medicine rows (Medicine / Dose / Duration / Qty).
The remaining cards are for eye exams — by default examination cards are collapsed, click a card to expand:
Complaint / Symptoms, Visual Acuity (Far / Near × OD / OS), Refraction (OD / OS), Tonometry, Gonioscopy, Corneal Topography, Slit Lamp, Funduscopy / Indirect Ophthalmoscopy, Amsler Grid, EOM / Prisms, Hertel's Exophthalmometry, Lacrimal Irrigation, Gross Examination, and Radiology.
Each card has an edit (or add) button — click it to fill in or update that section. Section edit controls are gated on visits.update. If the patient has no visits yet, the area says "No Visits Yet"; if you haven't picked one, it says "No Visit Selected".
Other tabs in the record
The header shows four tabs across the top right: Visits, Bills, Patient History, Biometry.
- Bills — the patient's billing history. Click + Add New Bill to record a new line. The Billing Records table has columns Date, Item, Doctor, Paid By, Bill, Payment, Actions, with Total and Balance Due rows underneath. The Doctor column shows whichever doctor the bill was tagged to.
- Patient History — a structured form for the patient's long-running medical conditions:
- A row per condition (Diabetes, Hypertension, Heart Disease, Sinus / Allergy, Cancer) with three fields: Duration, Physician, and a condition-specific field (Last FBS, Highest BP, Last Attack, X-ray / Allergy To, Organ).
- An Other row for any condition not in the list above (label, duration, physician).
- Two free-text boxes at the bottom: Remarks and Other Medical History.
- Biometry — eye measurements used for lens calculations. The IOL Measurements table has an OD (blue) and OS (red) column, with rows for Axial Length, T-Power, AK, IOL Brand, and IOL Power. Click Save to commit changes.
Tip: Most of the day's billing for a patient happens on the Queue page, not here. The Bills tab is for reviewing what's already recorded (and for adding off-queue charges).