Pharmacy
The Pharmacy tab manages the clinic's medicines and supplies — what you stock, who supplies it, what you've ordered and received, stock adjustments, and sales to patients. The sub-tabs are grouped into three sections:
Branch Operations (this branch only)
- Transactions — sales / dispensing to patients
- Inventory — current stock levels for this branch
- Stock Movement — adjustments, transfers, and other stock changes
Purchasing (this branch only)
- Purchase Orders — orders placed with suppliers
- Deliveries — receiving ordered items
Master Data (shared across all branches — marked with an All branches chip)
- Items — the catalog of products
- Item Categories — the categories items can belong to
- Suppliers — supplier contact details
You only see the tabs your account is allowed to open; on a small screen the whole submenu collapses into a single dropdown.
All lists have a search box, status/category filters where relevant, and pagination. Edit and delete use the pencil and trash icons; deletes ask for confirmation.
Transactions
Records what was dispensed and paid for. The header shows the number of transactions and the total amount.
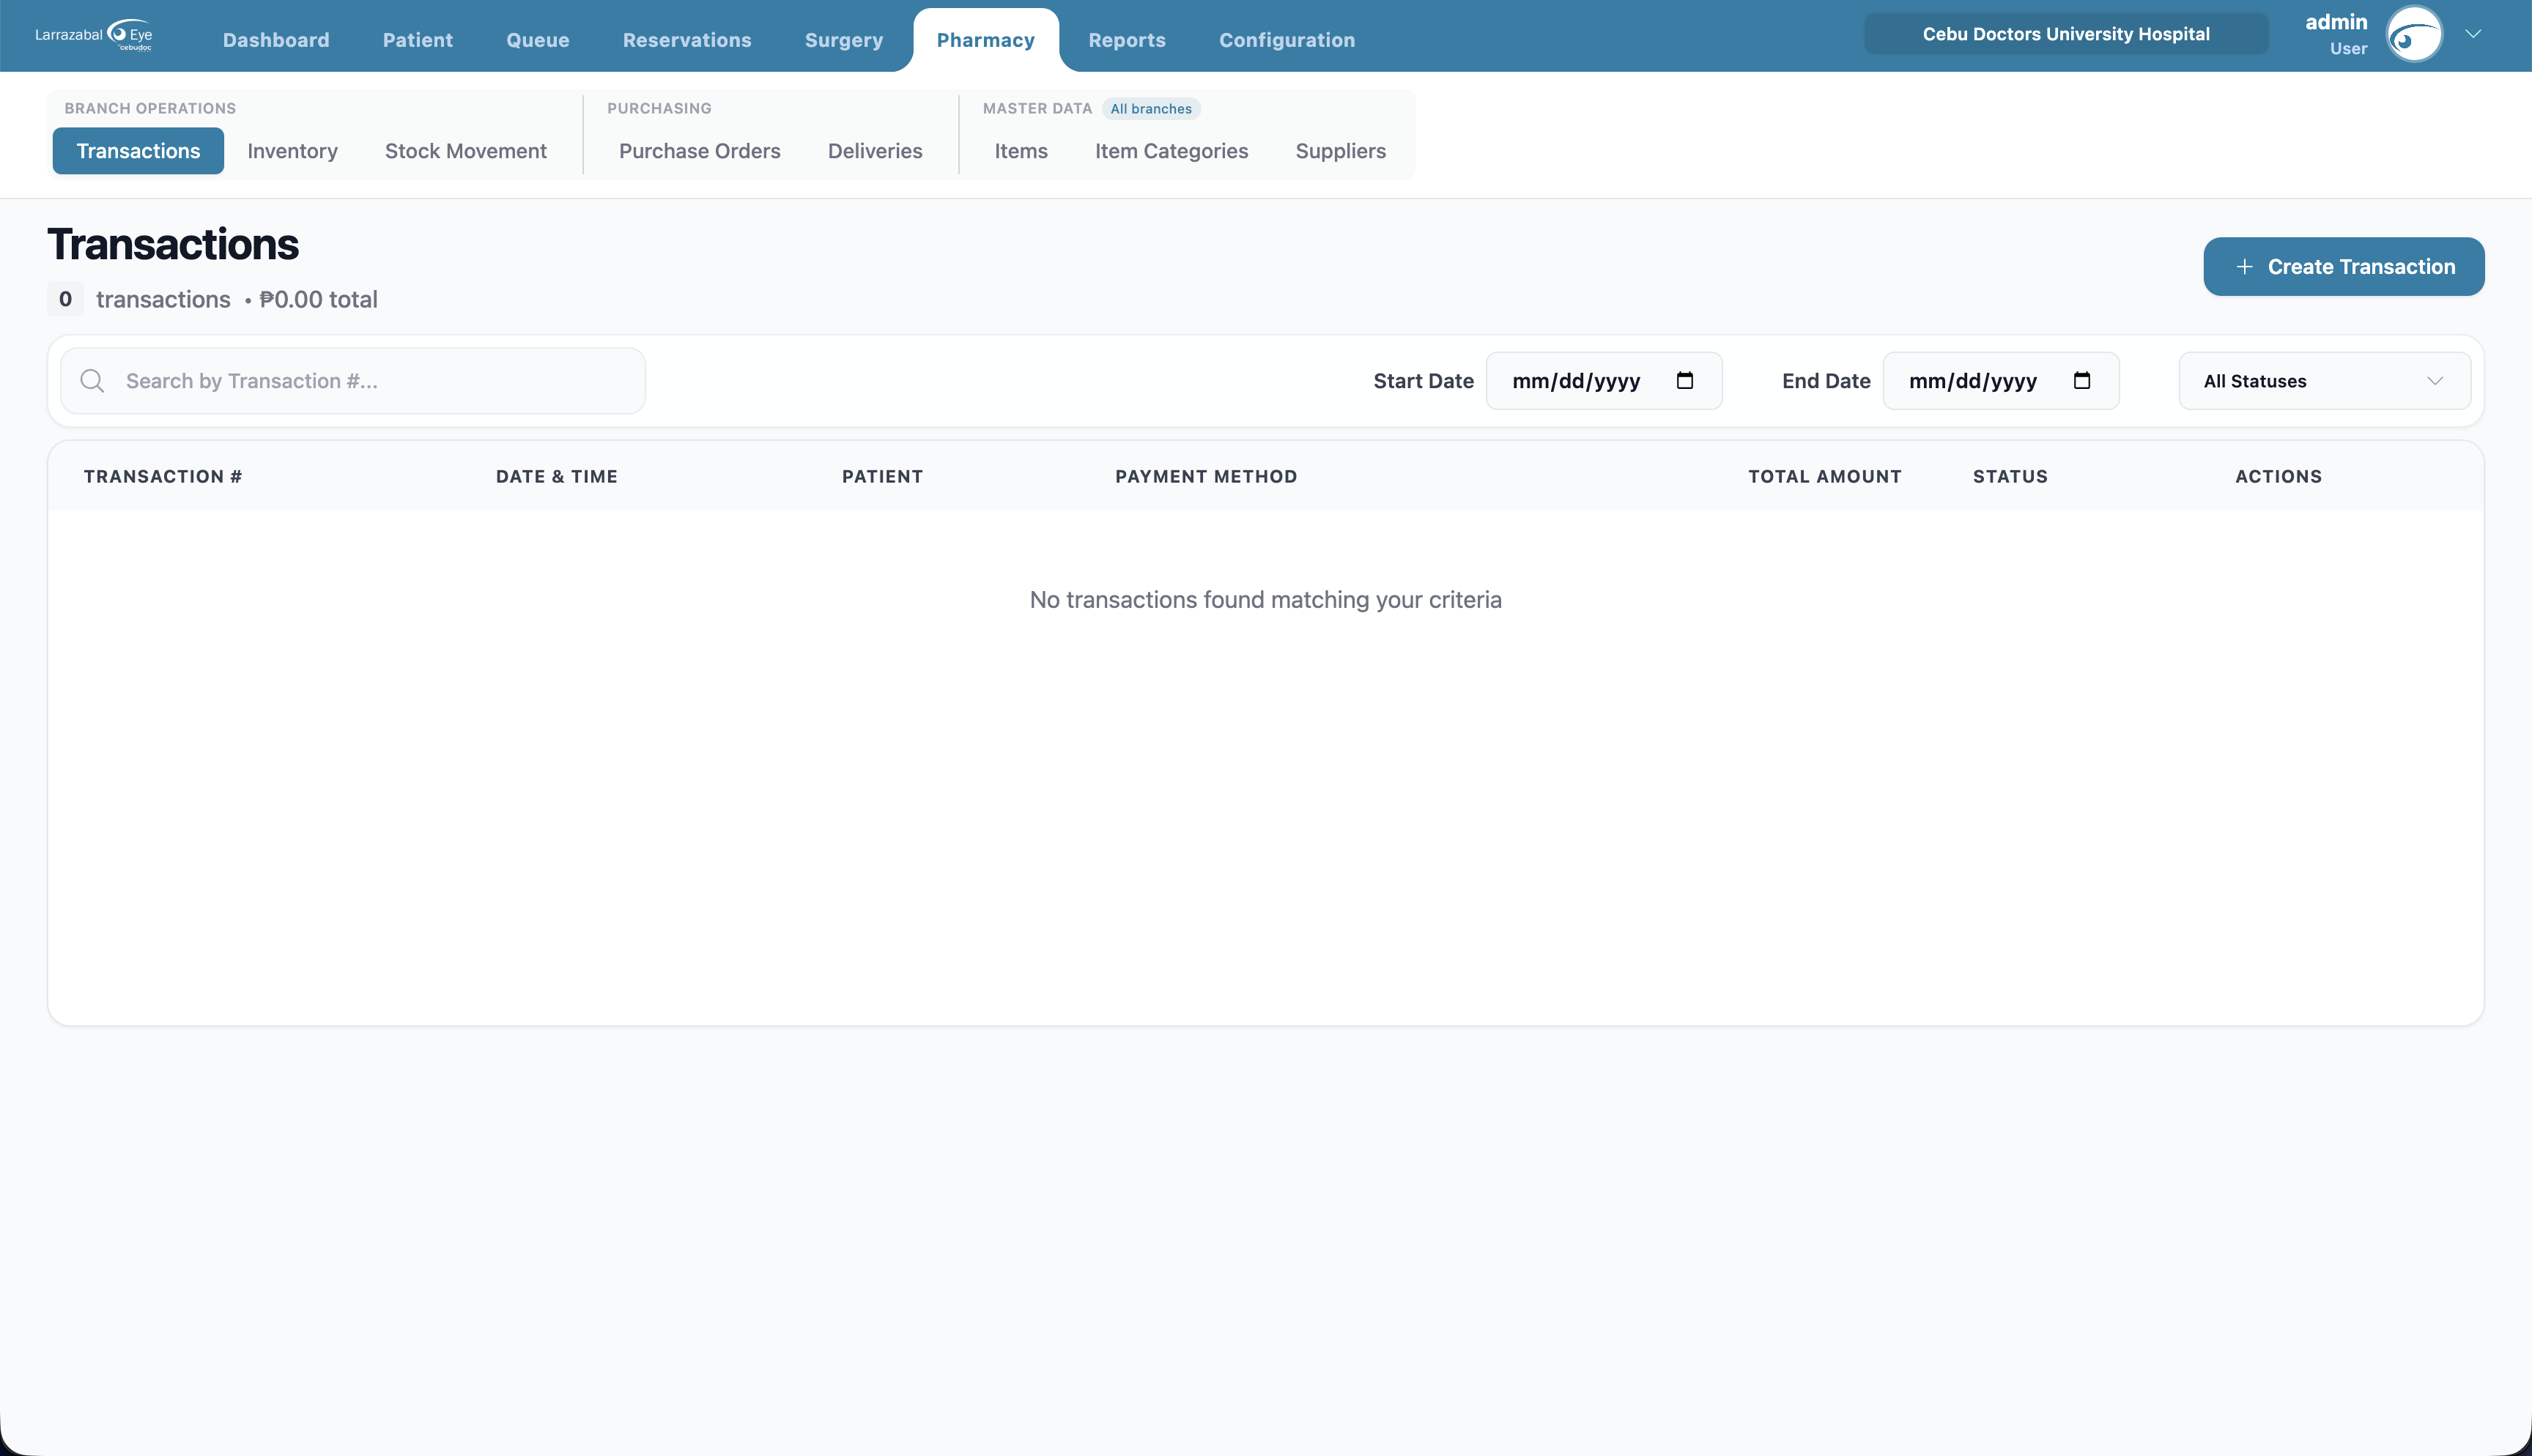
Columns: Transaction #, Date & Time, Patient, Payment Method, Total Amount, Status (Completed / Pending / Cancelled), and a view action.
Filters: search by transaction number, patient, or payment method; Start Date / End Date; status.
Recording a transaction

- Click Create Transaction.
- Fill in Patient, Date, Time, Payment Method (Cash, Credit Card, Debit Card, PhilHealth, HMO, GCash, Maya), and Status.
- Add items: pick an Item (the Unit Price fills in for you), enter the Qty, and click Add Item. The Subtotal is calculated. Repeat for each item.
- Check the Total Amount shown at the bottom, then click Create Transaction. Inventory is reduced automatically.
Click the eye icon on a row to open a receipt-style view of the transaction — branch and patient info at the top, line items below, payment method and totals at the bottom. Use the print option in the modal to print or save it as PDF.
Inventory
Shows what's in stock now. The header shows the number of items and offers Print Summary and Add Stock. Yellow and red banners warn when items are low on stock or out of stock.
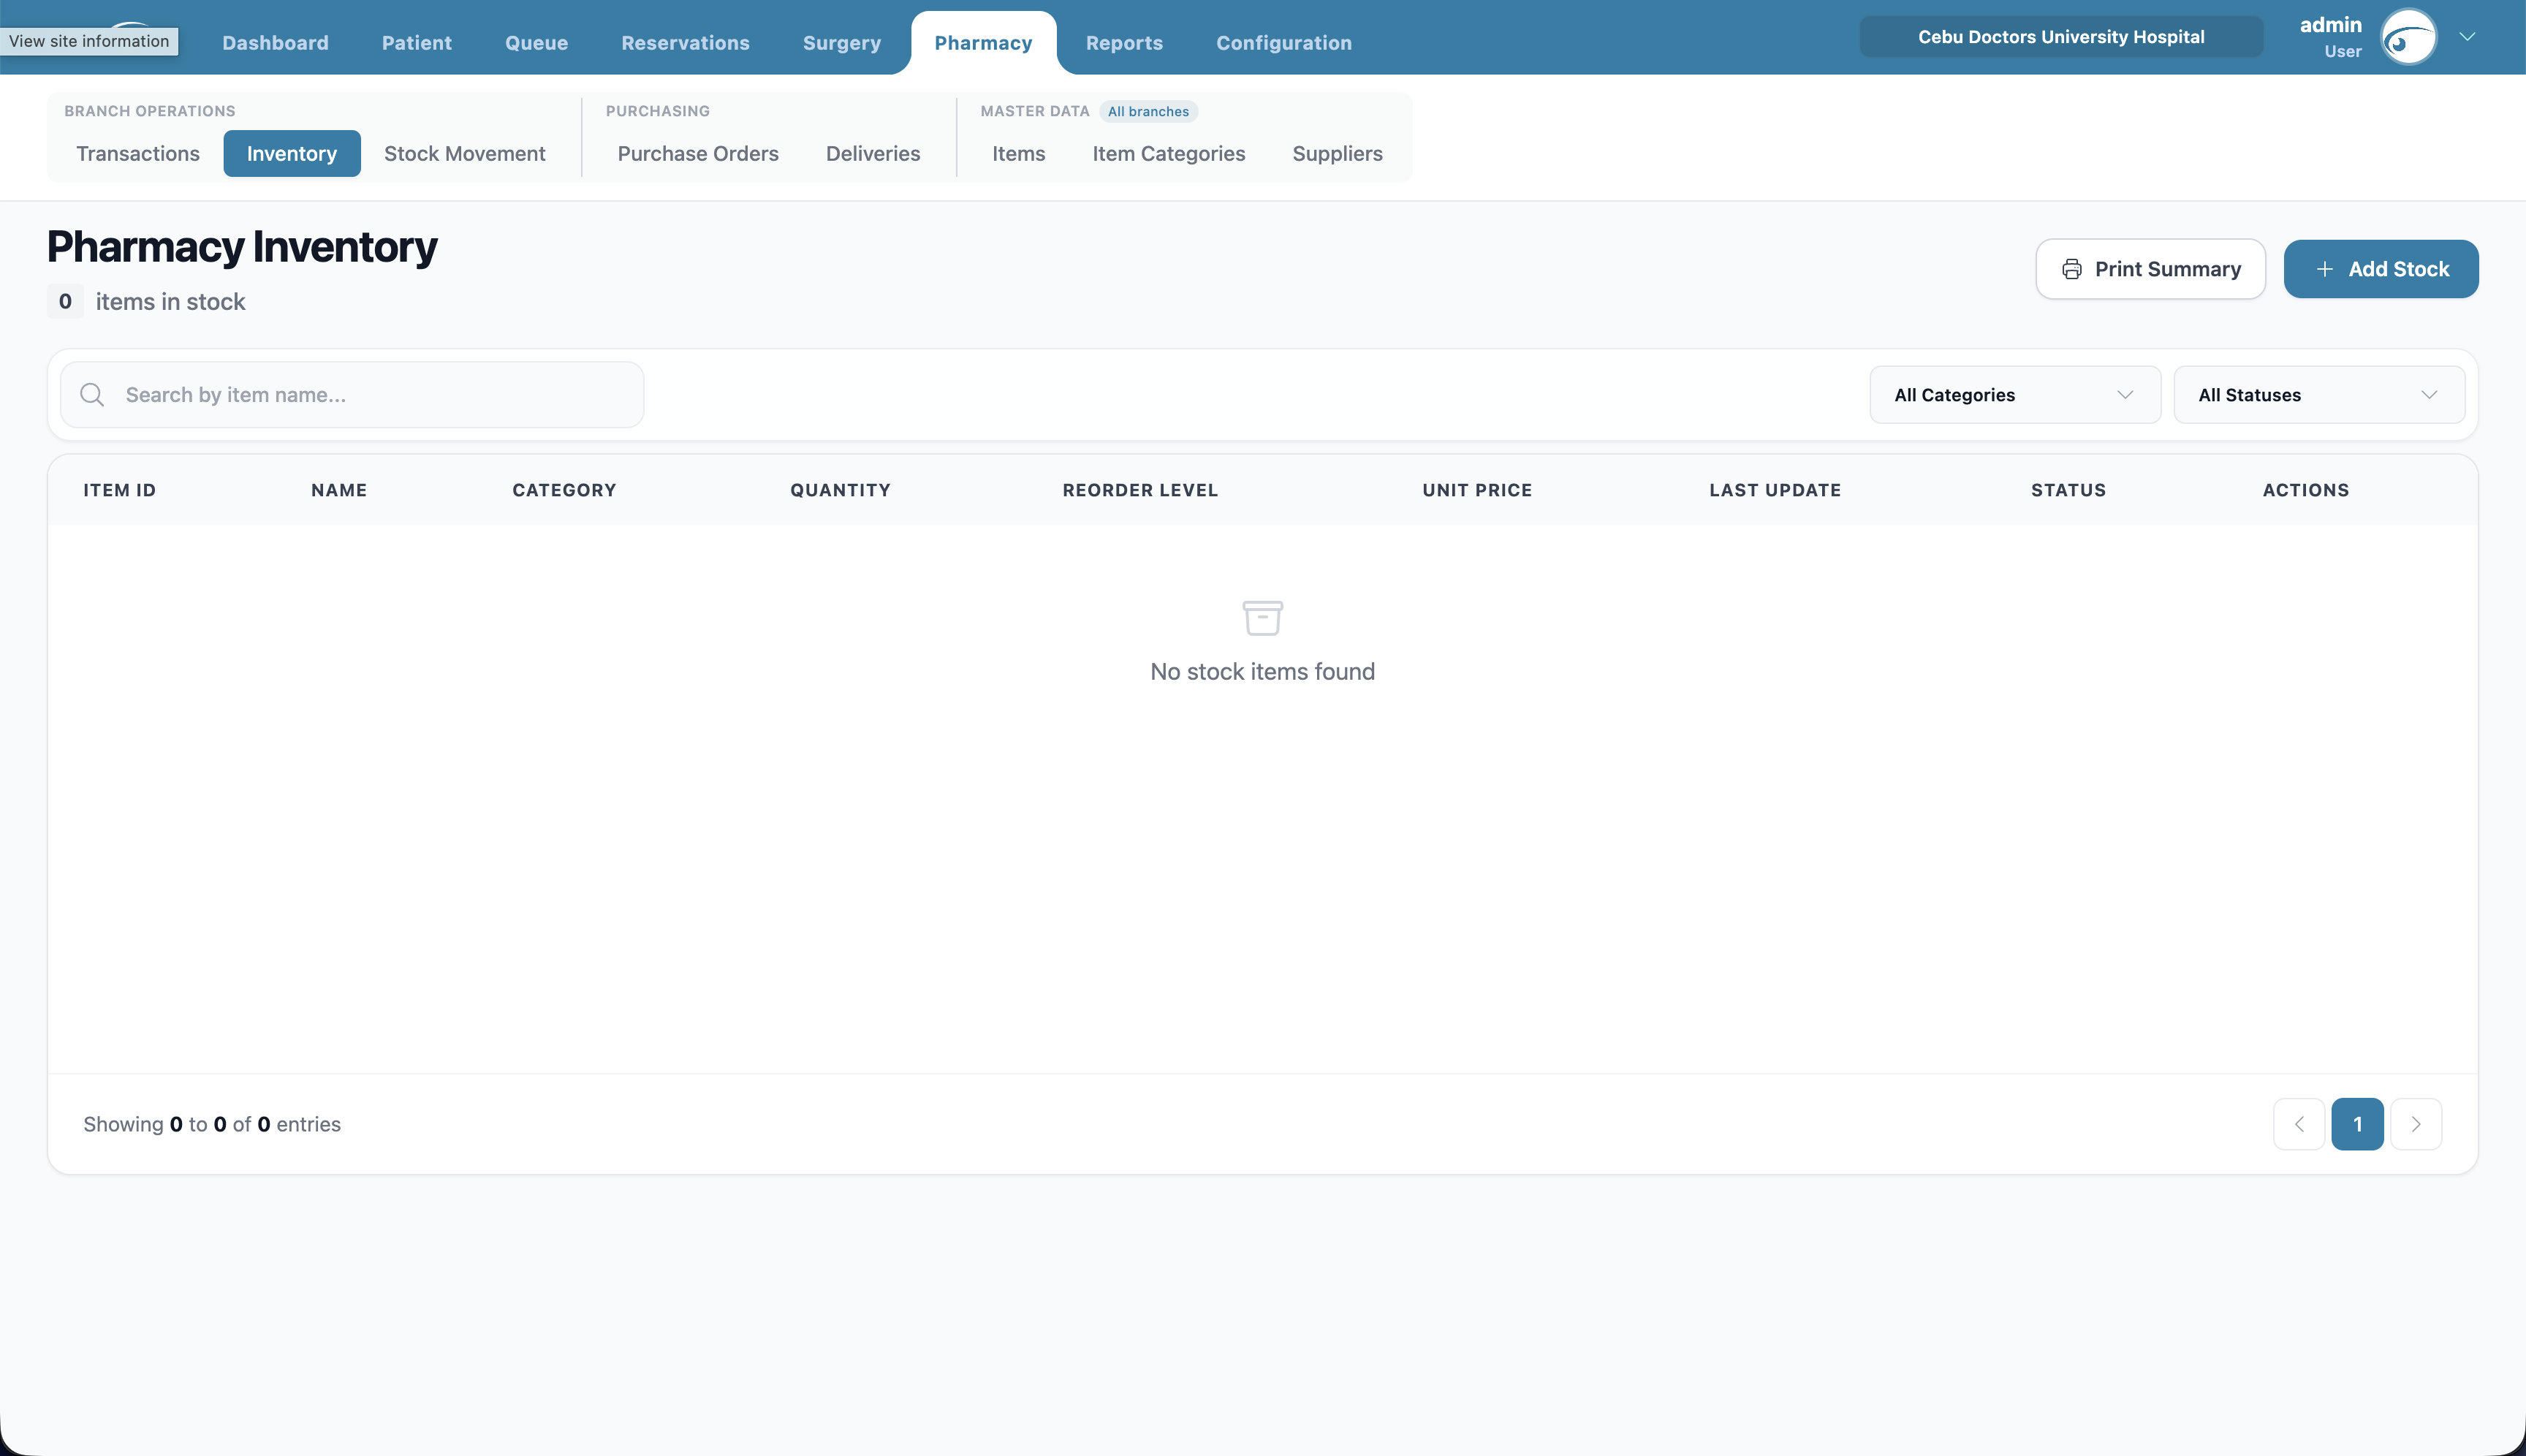
Columns: Item ID, Name, Category, Quantity, Reorder Level, Unit Price, Last Update, Status (In Stock / Low Stock / Out of Stock), Actions.
Filters: search by name/category/ID; category; status.
Adjusting an item's stock settings
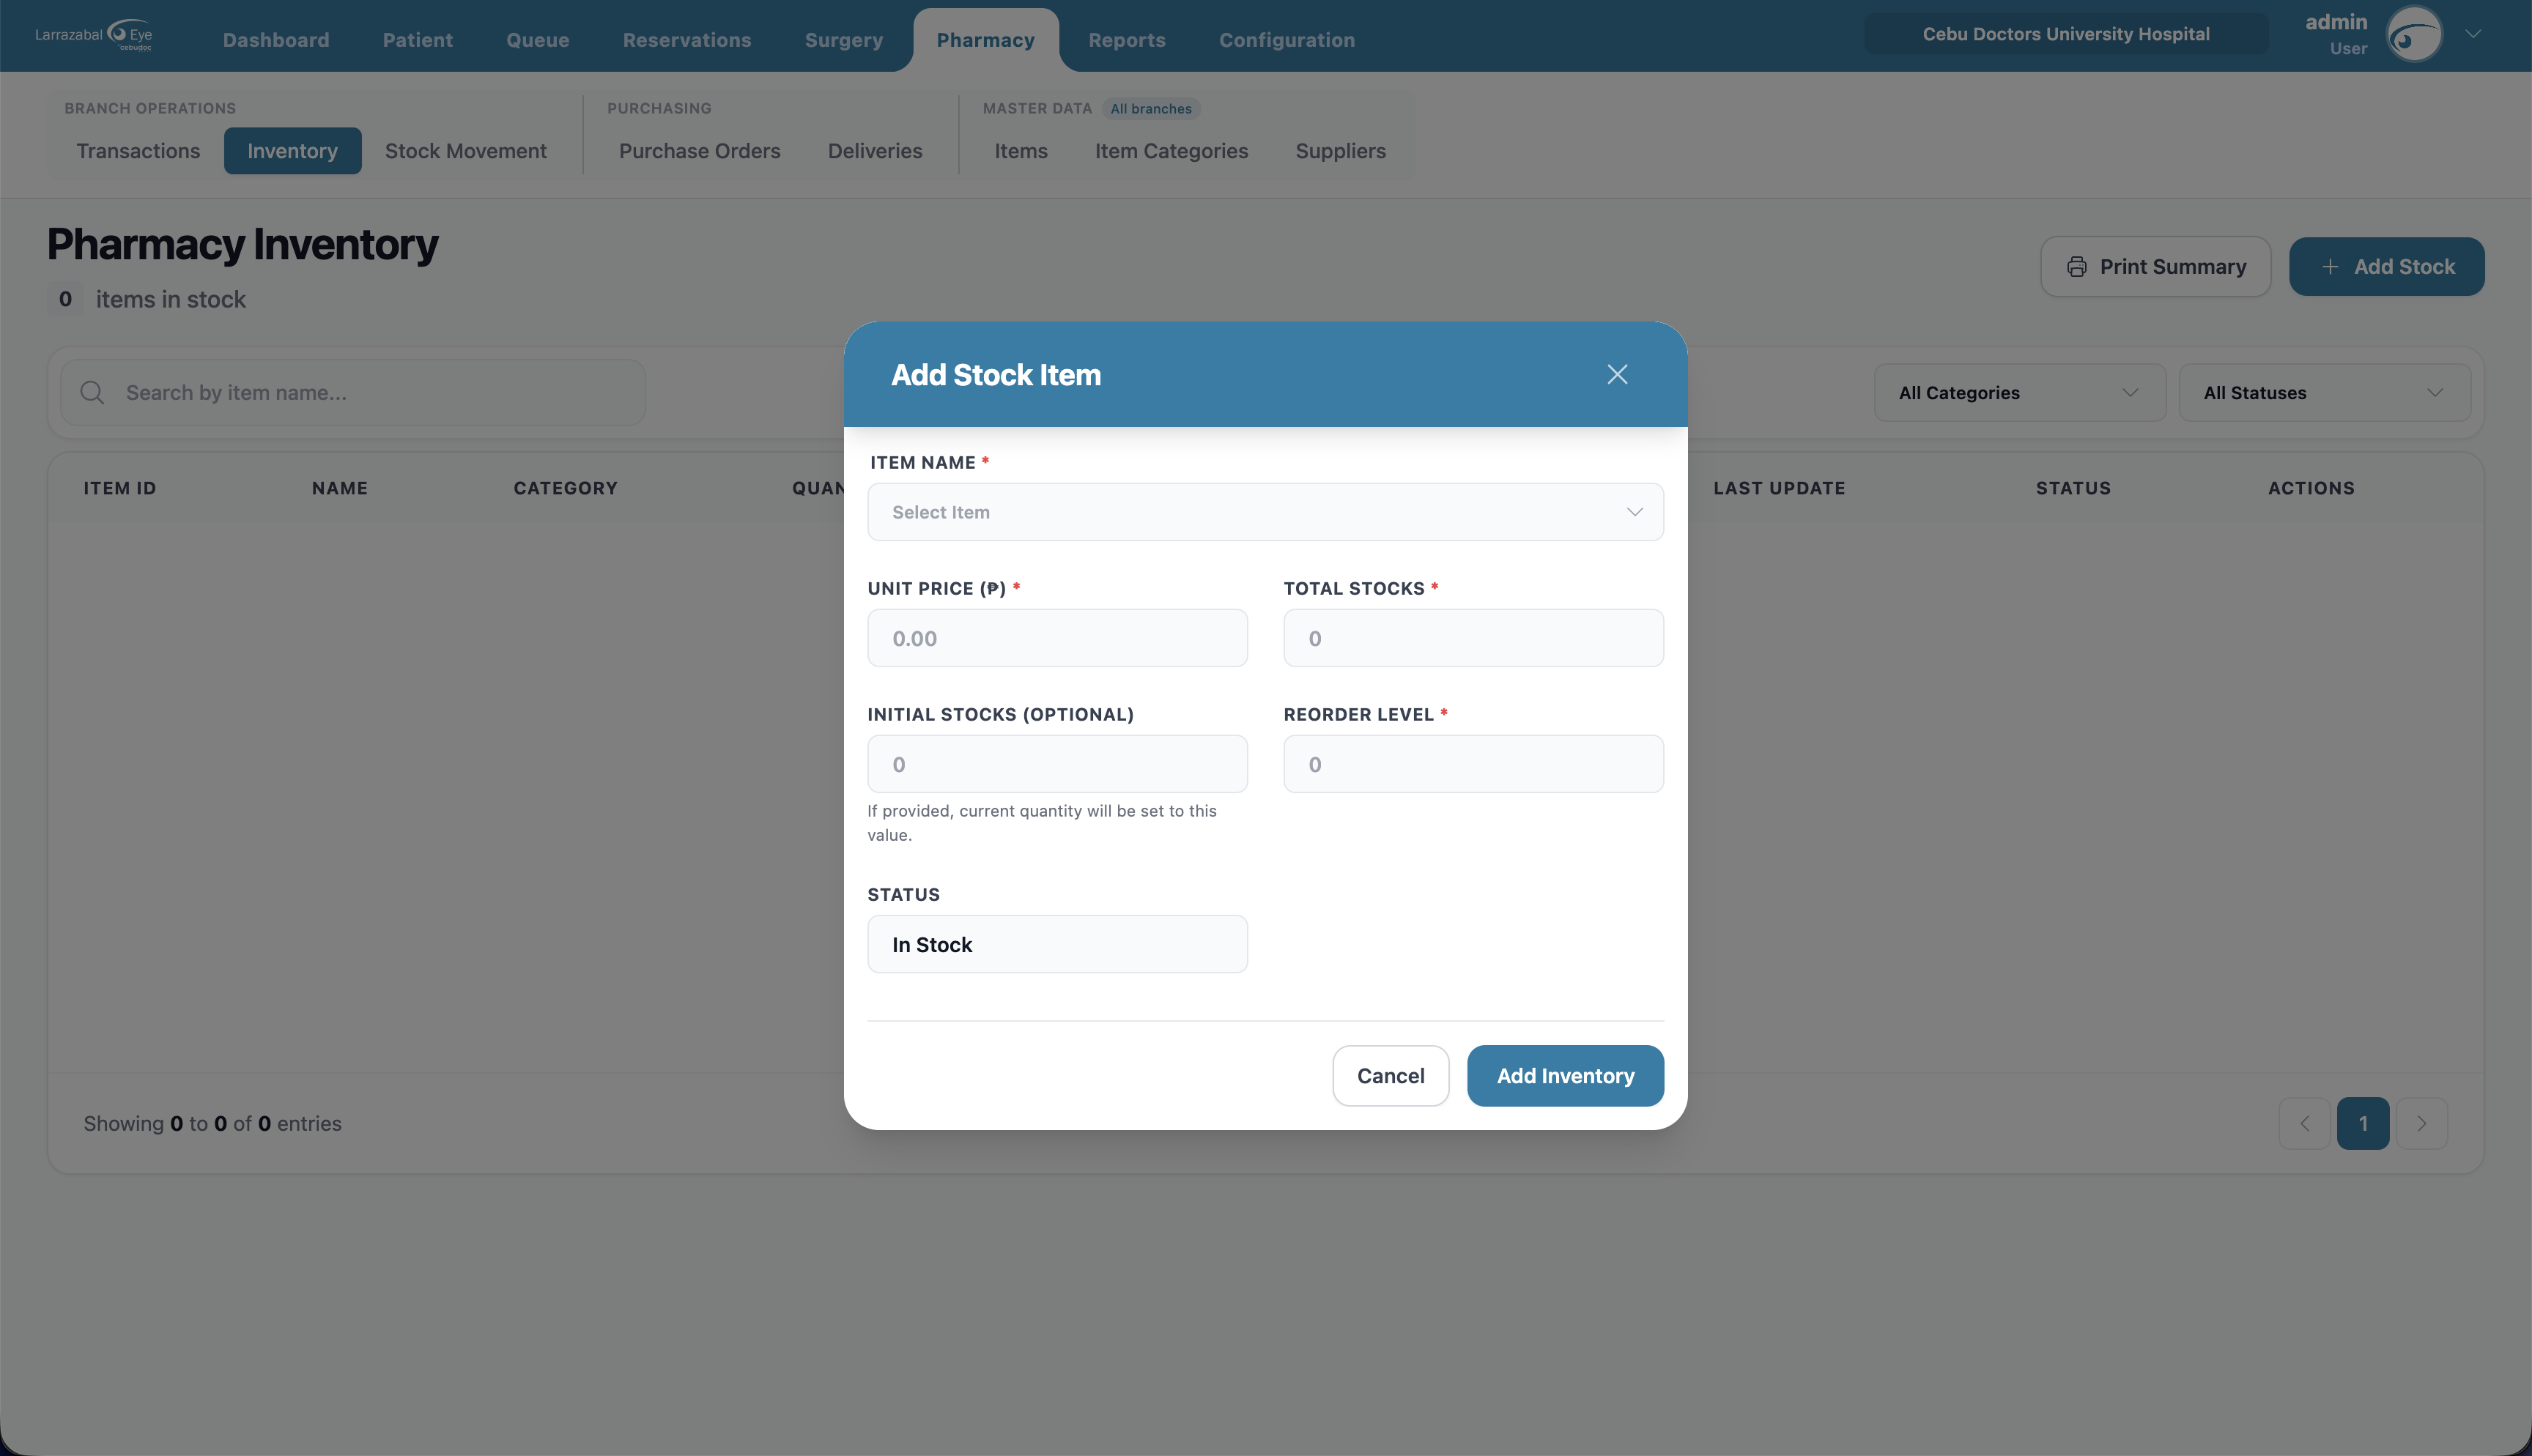
- Click Add Stock (or the pencil icon on an existing item).
- Choose the Item Name — its Unit Price and Total Stocks fill in for you (read-only).
- Optionally set Initial Stocks to reset the on-hand quantity to a specific number ("If provided, current quantity will be set to this value").
- Set the Reorder Level — the quantity at which the item is flagged as low.
- Pick a Status (defaults to In Stock).
- Click Add Inventory / Update Inventory. The status updates itself based on quantity vs. reorder level.
Print Summary
Click Print Summary to open a printable inventory report — totals at the top (item count, stock value, low‑stock and out‑of‑stock counts), items grouped by category with subtotals and a grand total, the date and your name, and signature lines for "Prepared by" and "Verified by". Use your browser's print dialog to print or save as PDF.
Stock Movement
A log of stock changes that aren't sales or deliveries — adjustments, consumption, damaged items, transfers. The header shows the record count and an Add Stock Movement button.
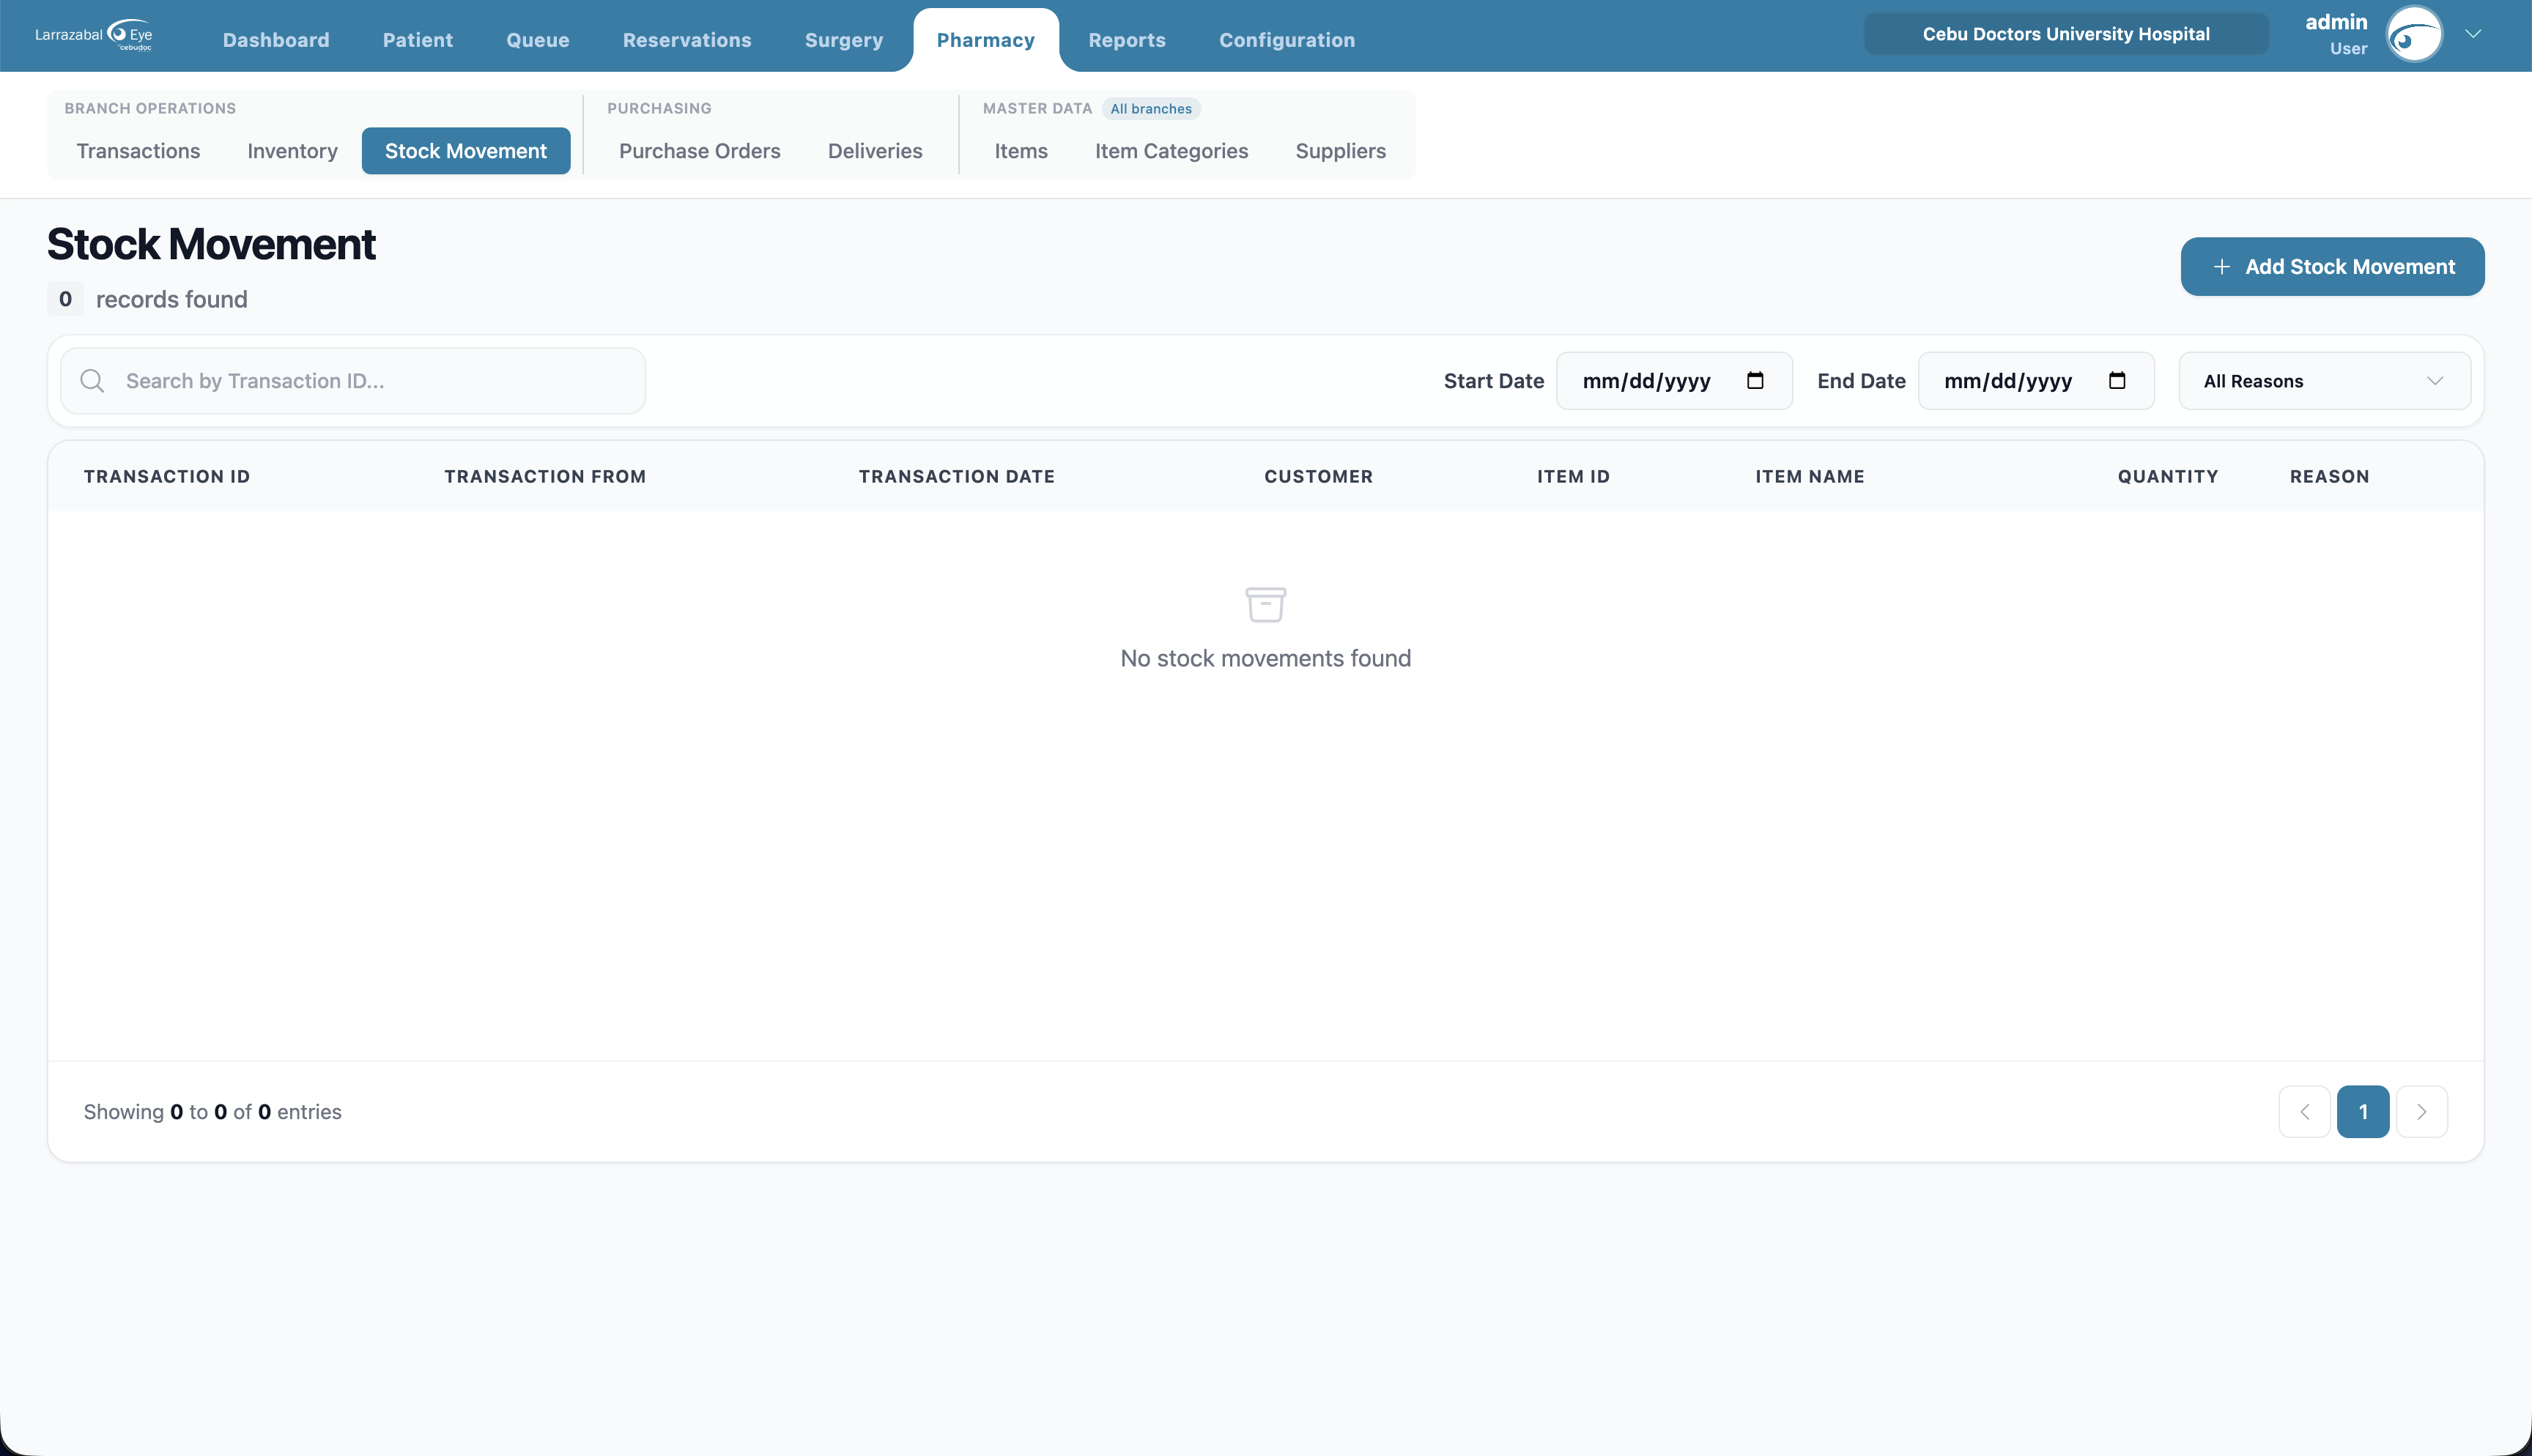
Columns: Transaction ID, Transaction From, Transaction Date, Customer, Item ID, Item Name, Quantity, Reason.
Filters: search by transaction number; Start Date / End Date; reason.
Recording a stock movement
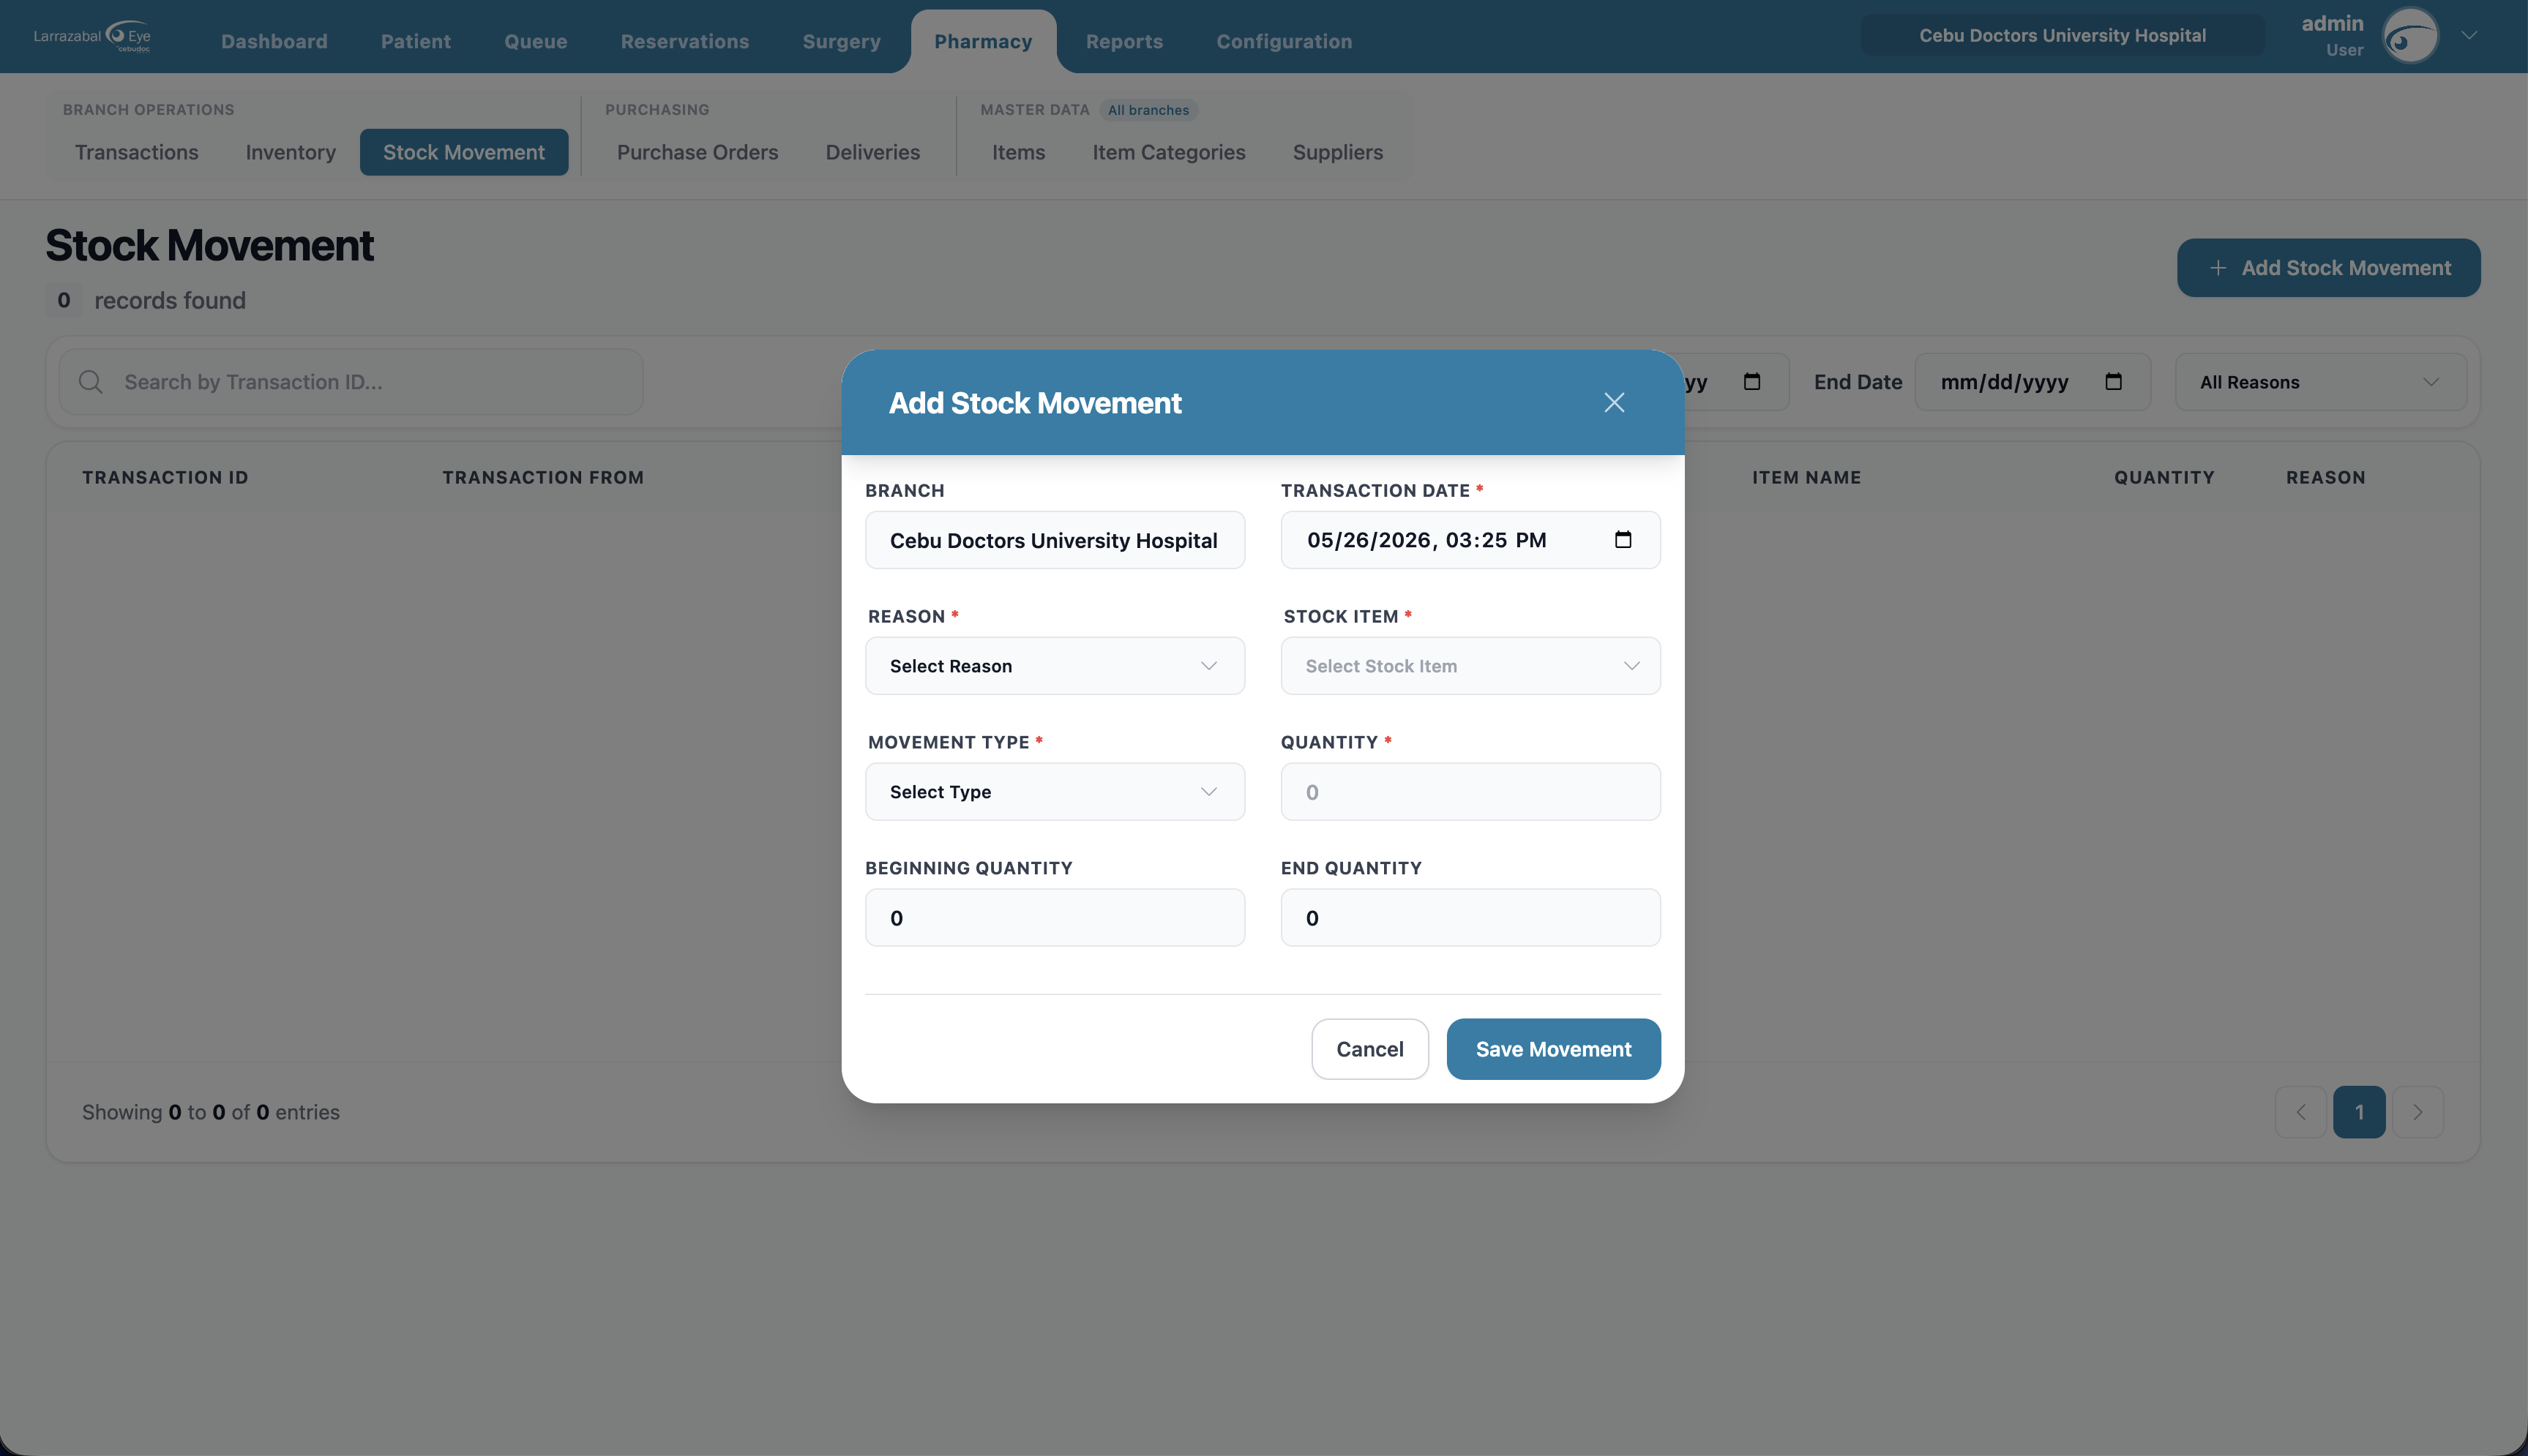
- Click Add Stock Movement.
- Branch is filled in from your current branch.
- Set the Transaction Date (date and time).
- Pick a Reason and the Stock Item.
- Choose a Movement Type and enter the Quantity.
- Confirm the Beginning Quantity and End Quantity (calculated for you).
- Click Save Movement. Inventory updates accordingly.
Items
The product catalog — every medicine or supply the pharmacy handles. The header shows the item count and an Add Item button.
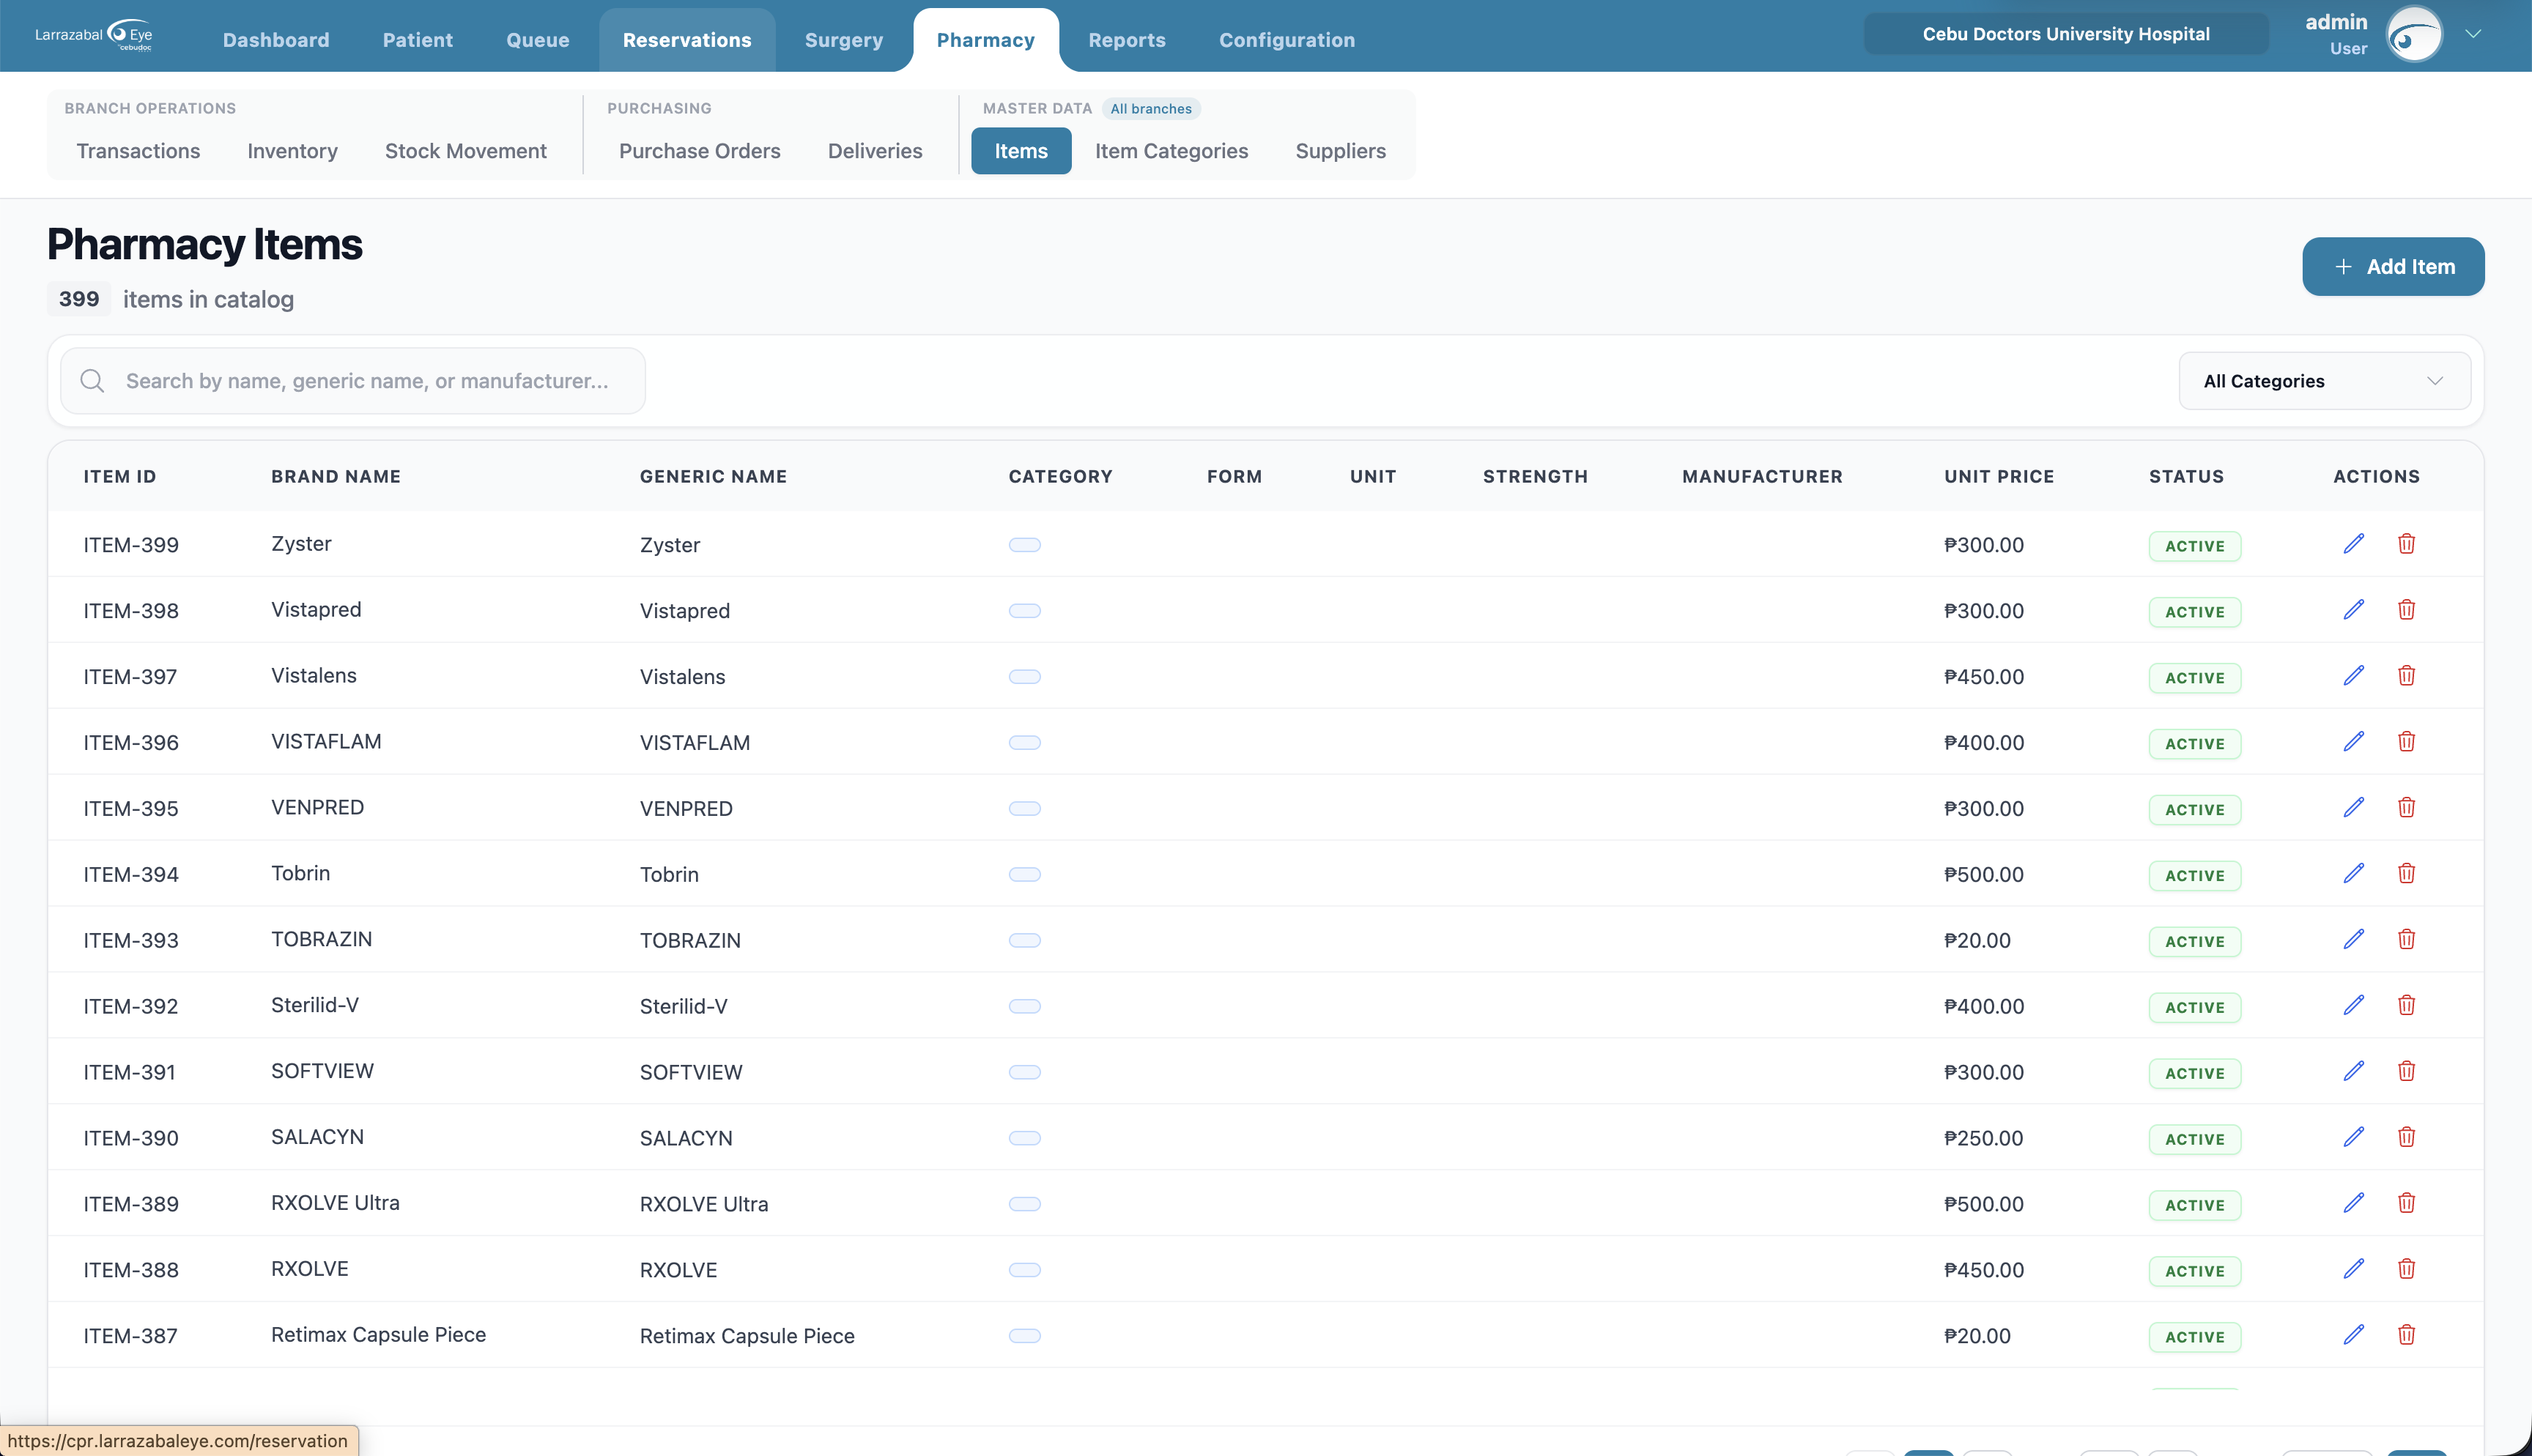
Columns: Item ID, Brand Name, Generic Name, Category, Form, Strength, Unit, Manufacturer, Unit Price, Status (Active / Inactive), Actions.
Filter: search by item, brand, or generic name; filter by category.
Adding a catalog item
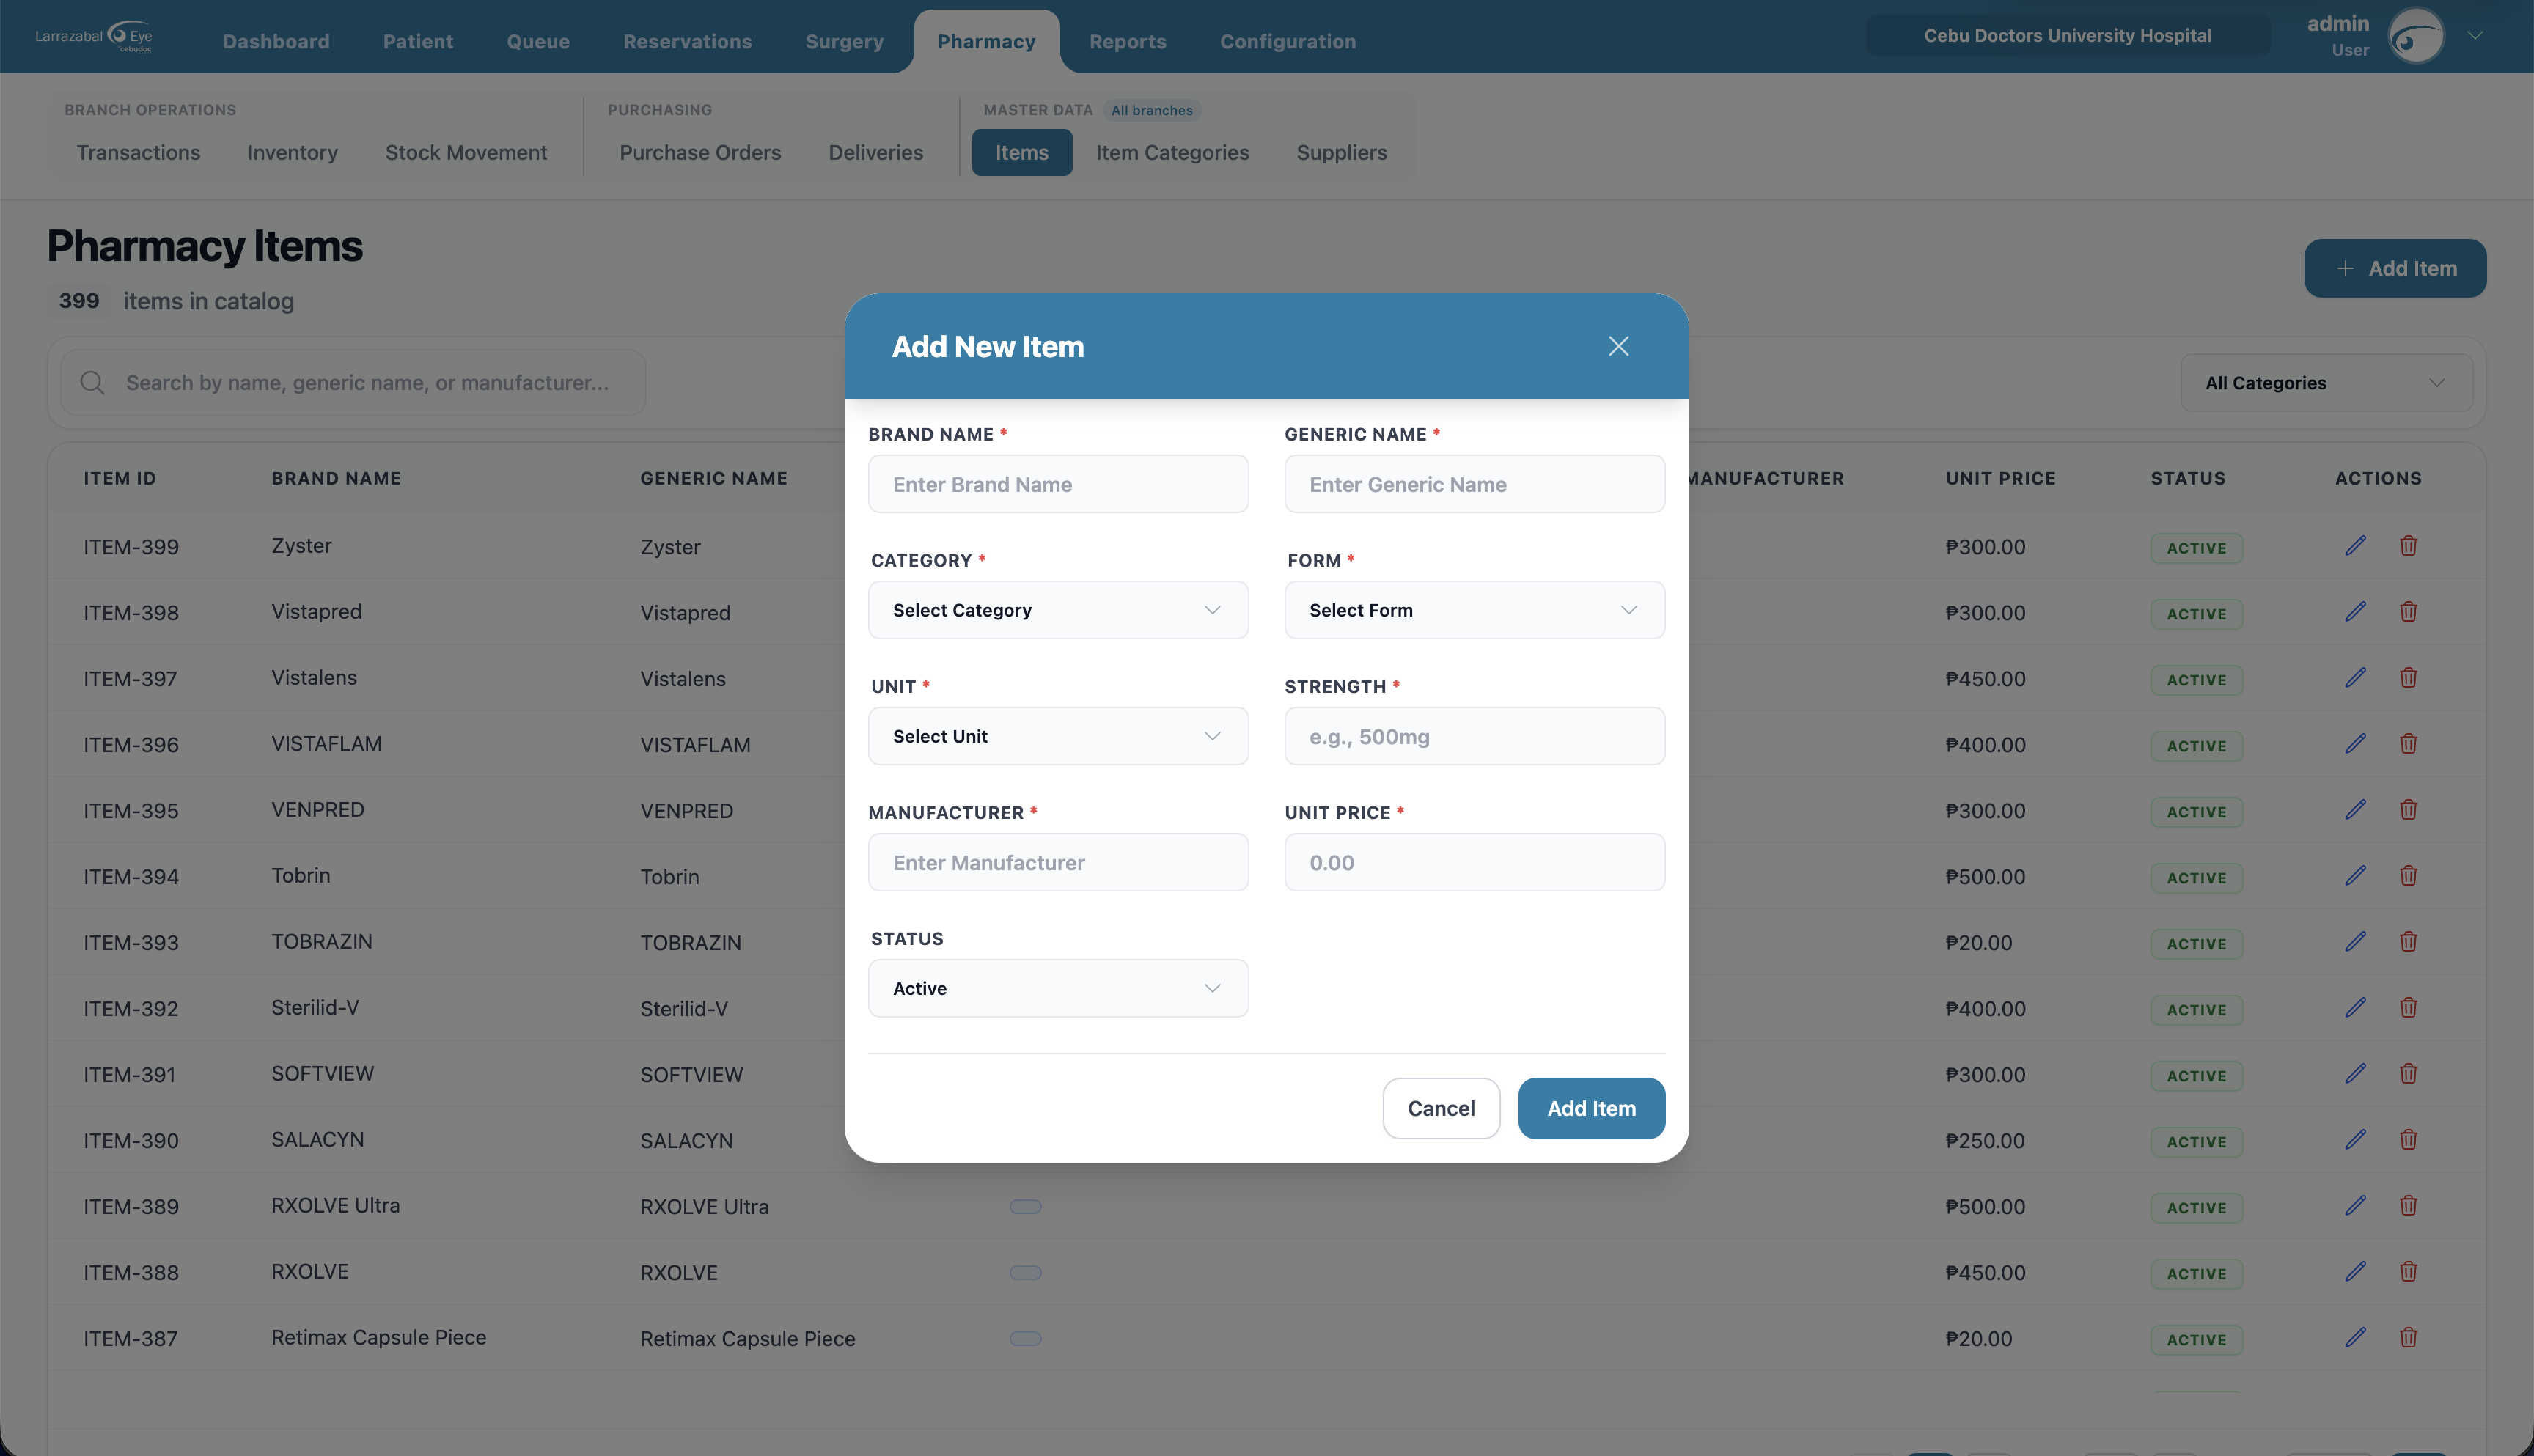
Click Add Item and fill in Brand Name, Generic Name, Category, Form (Tablet, Capsule, Solution, Drops, …), Unit (tablet, ml, bottle, …), Strength (e.g. "500mg"), Manufacturer, Unit Price, and Status. Click Add Item. Use the pencil icon to update an item later ("Update Item").
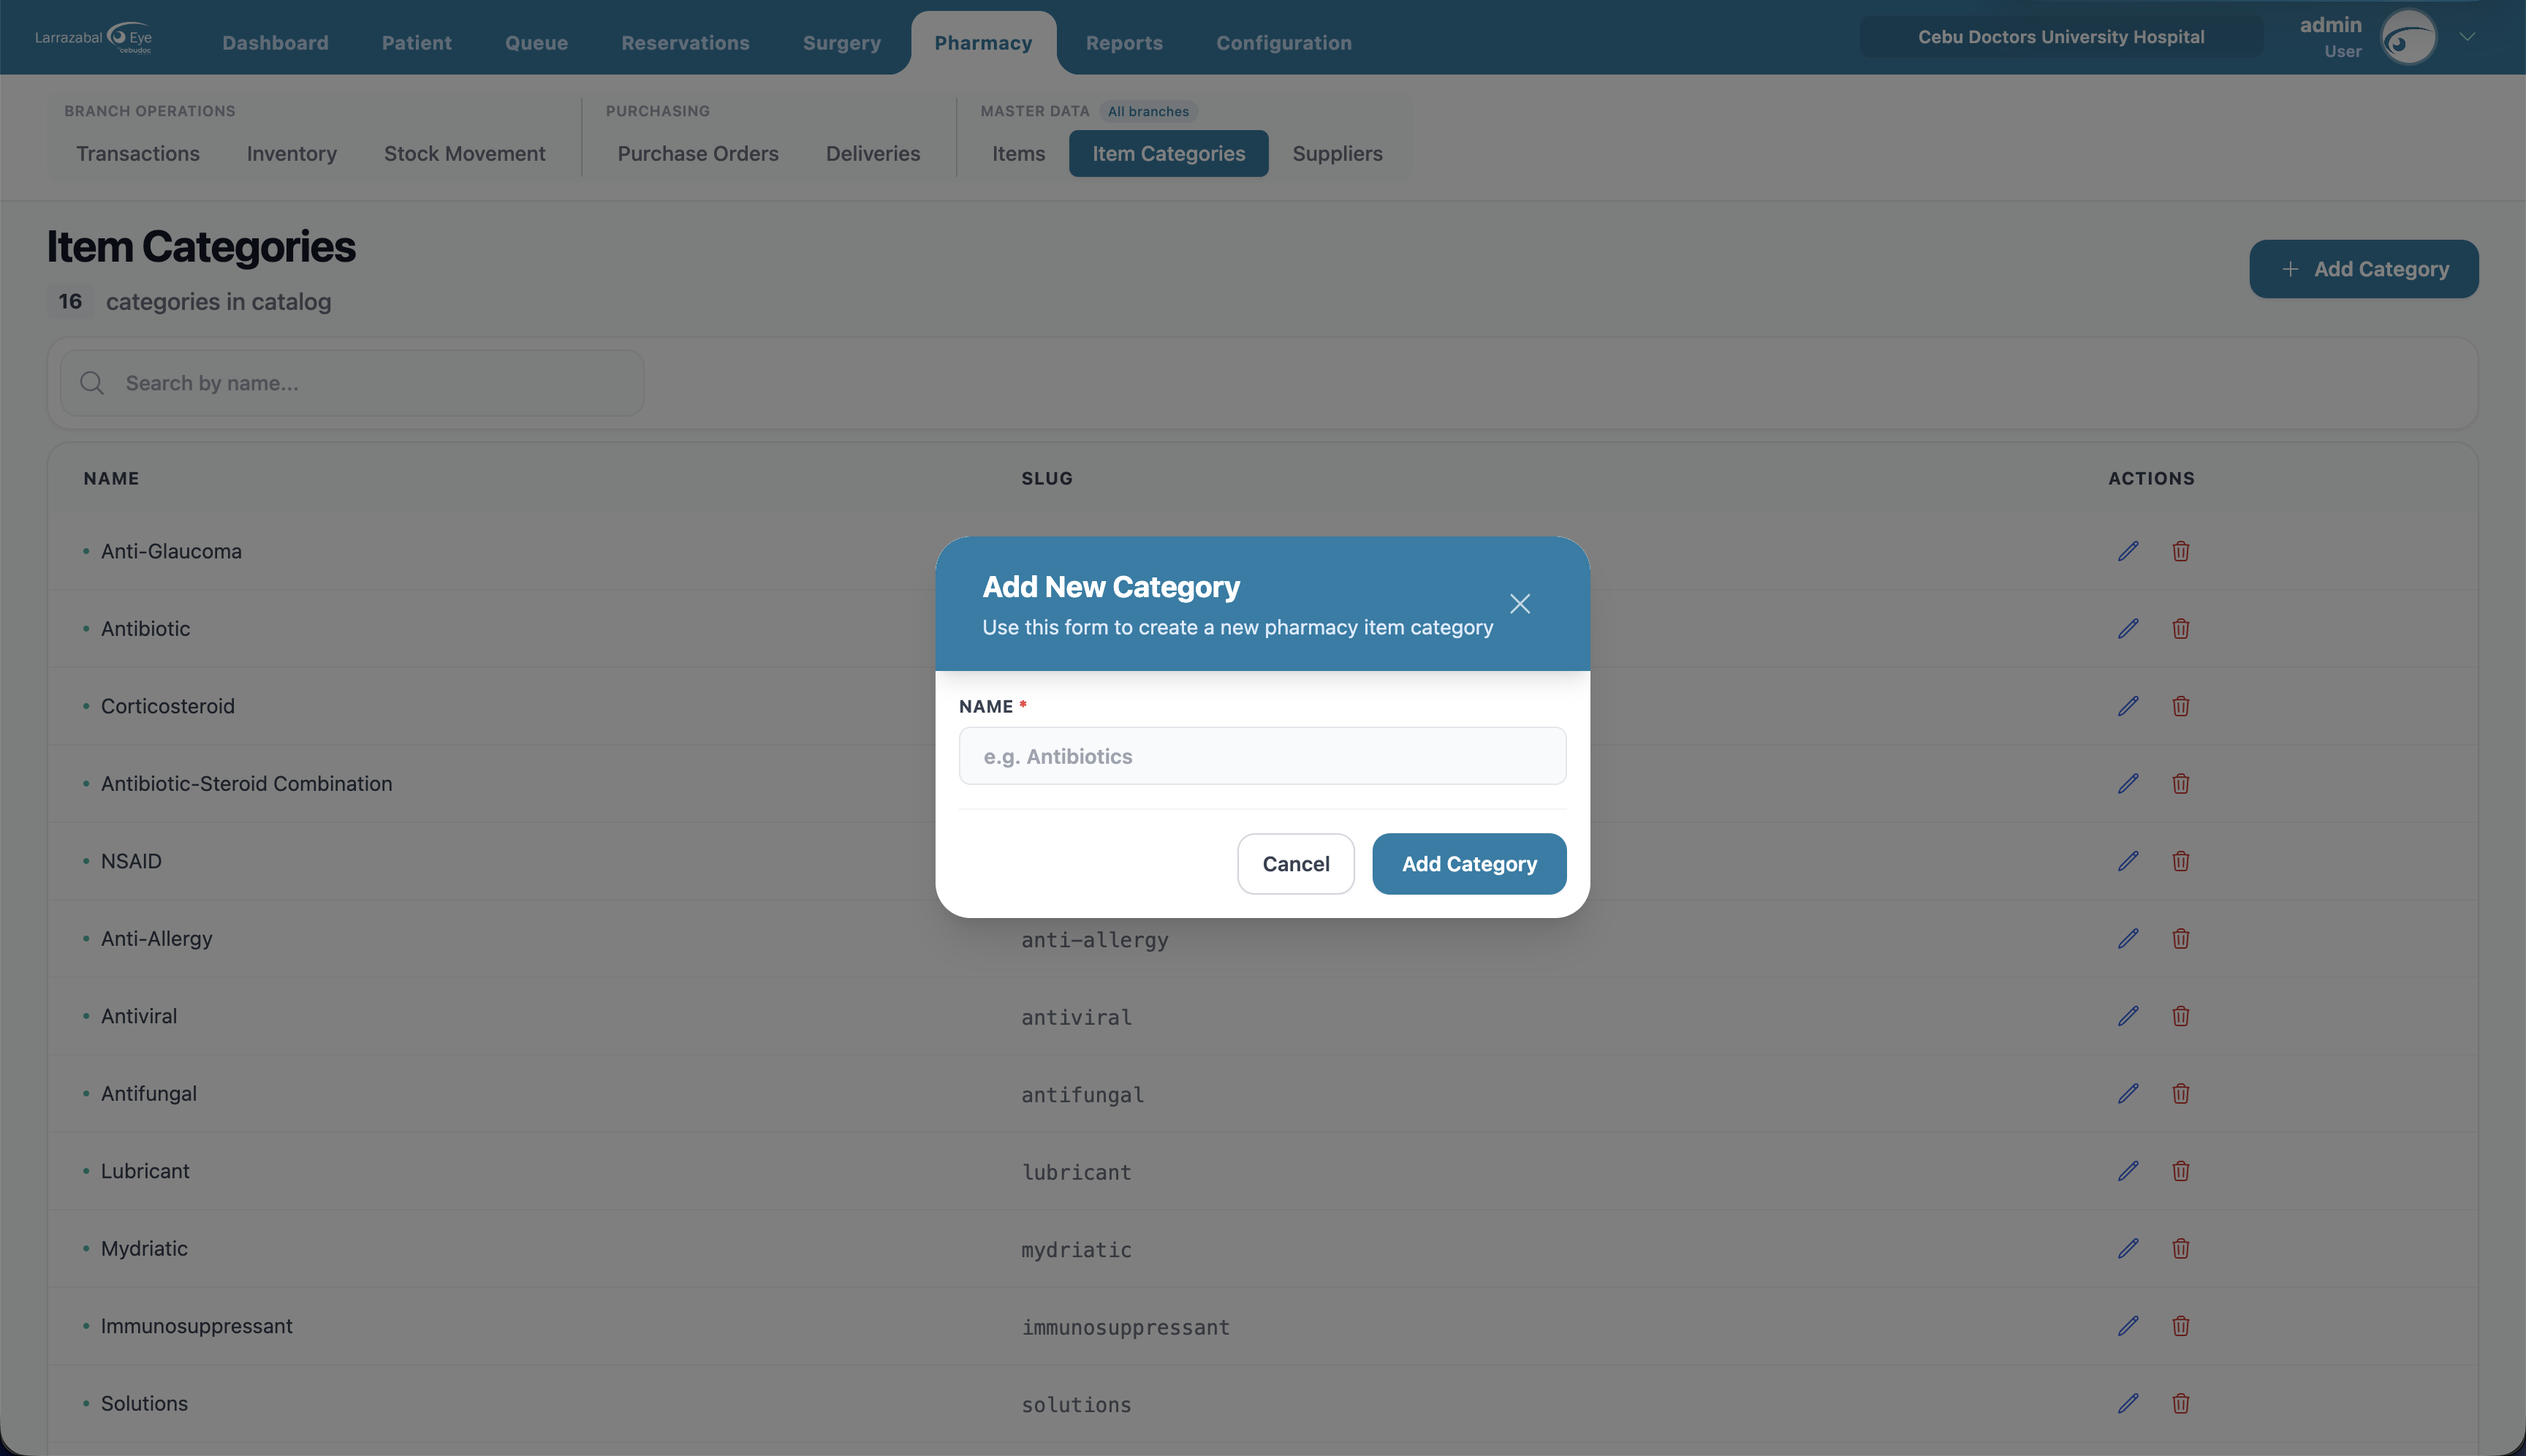
Item Categories
The master list of categories used to group pharmacy items. The header shows the category count and an Add Category button. This list is shared across branches.
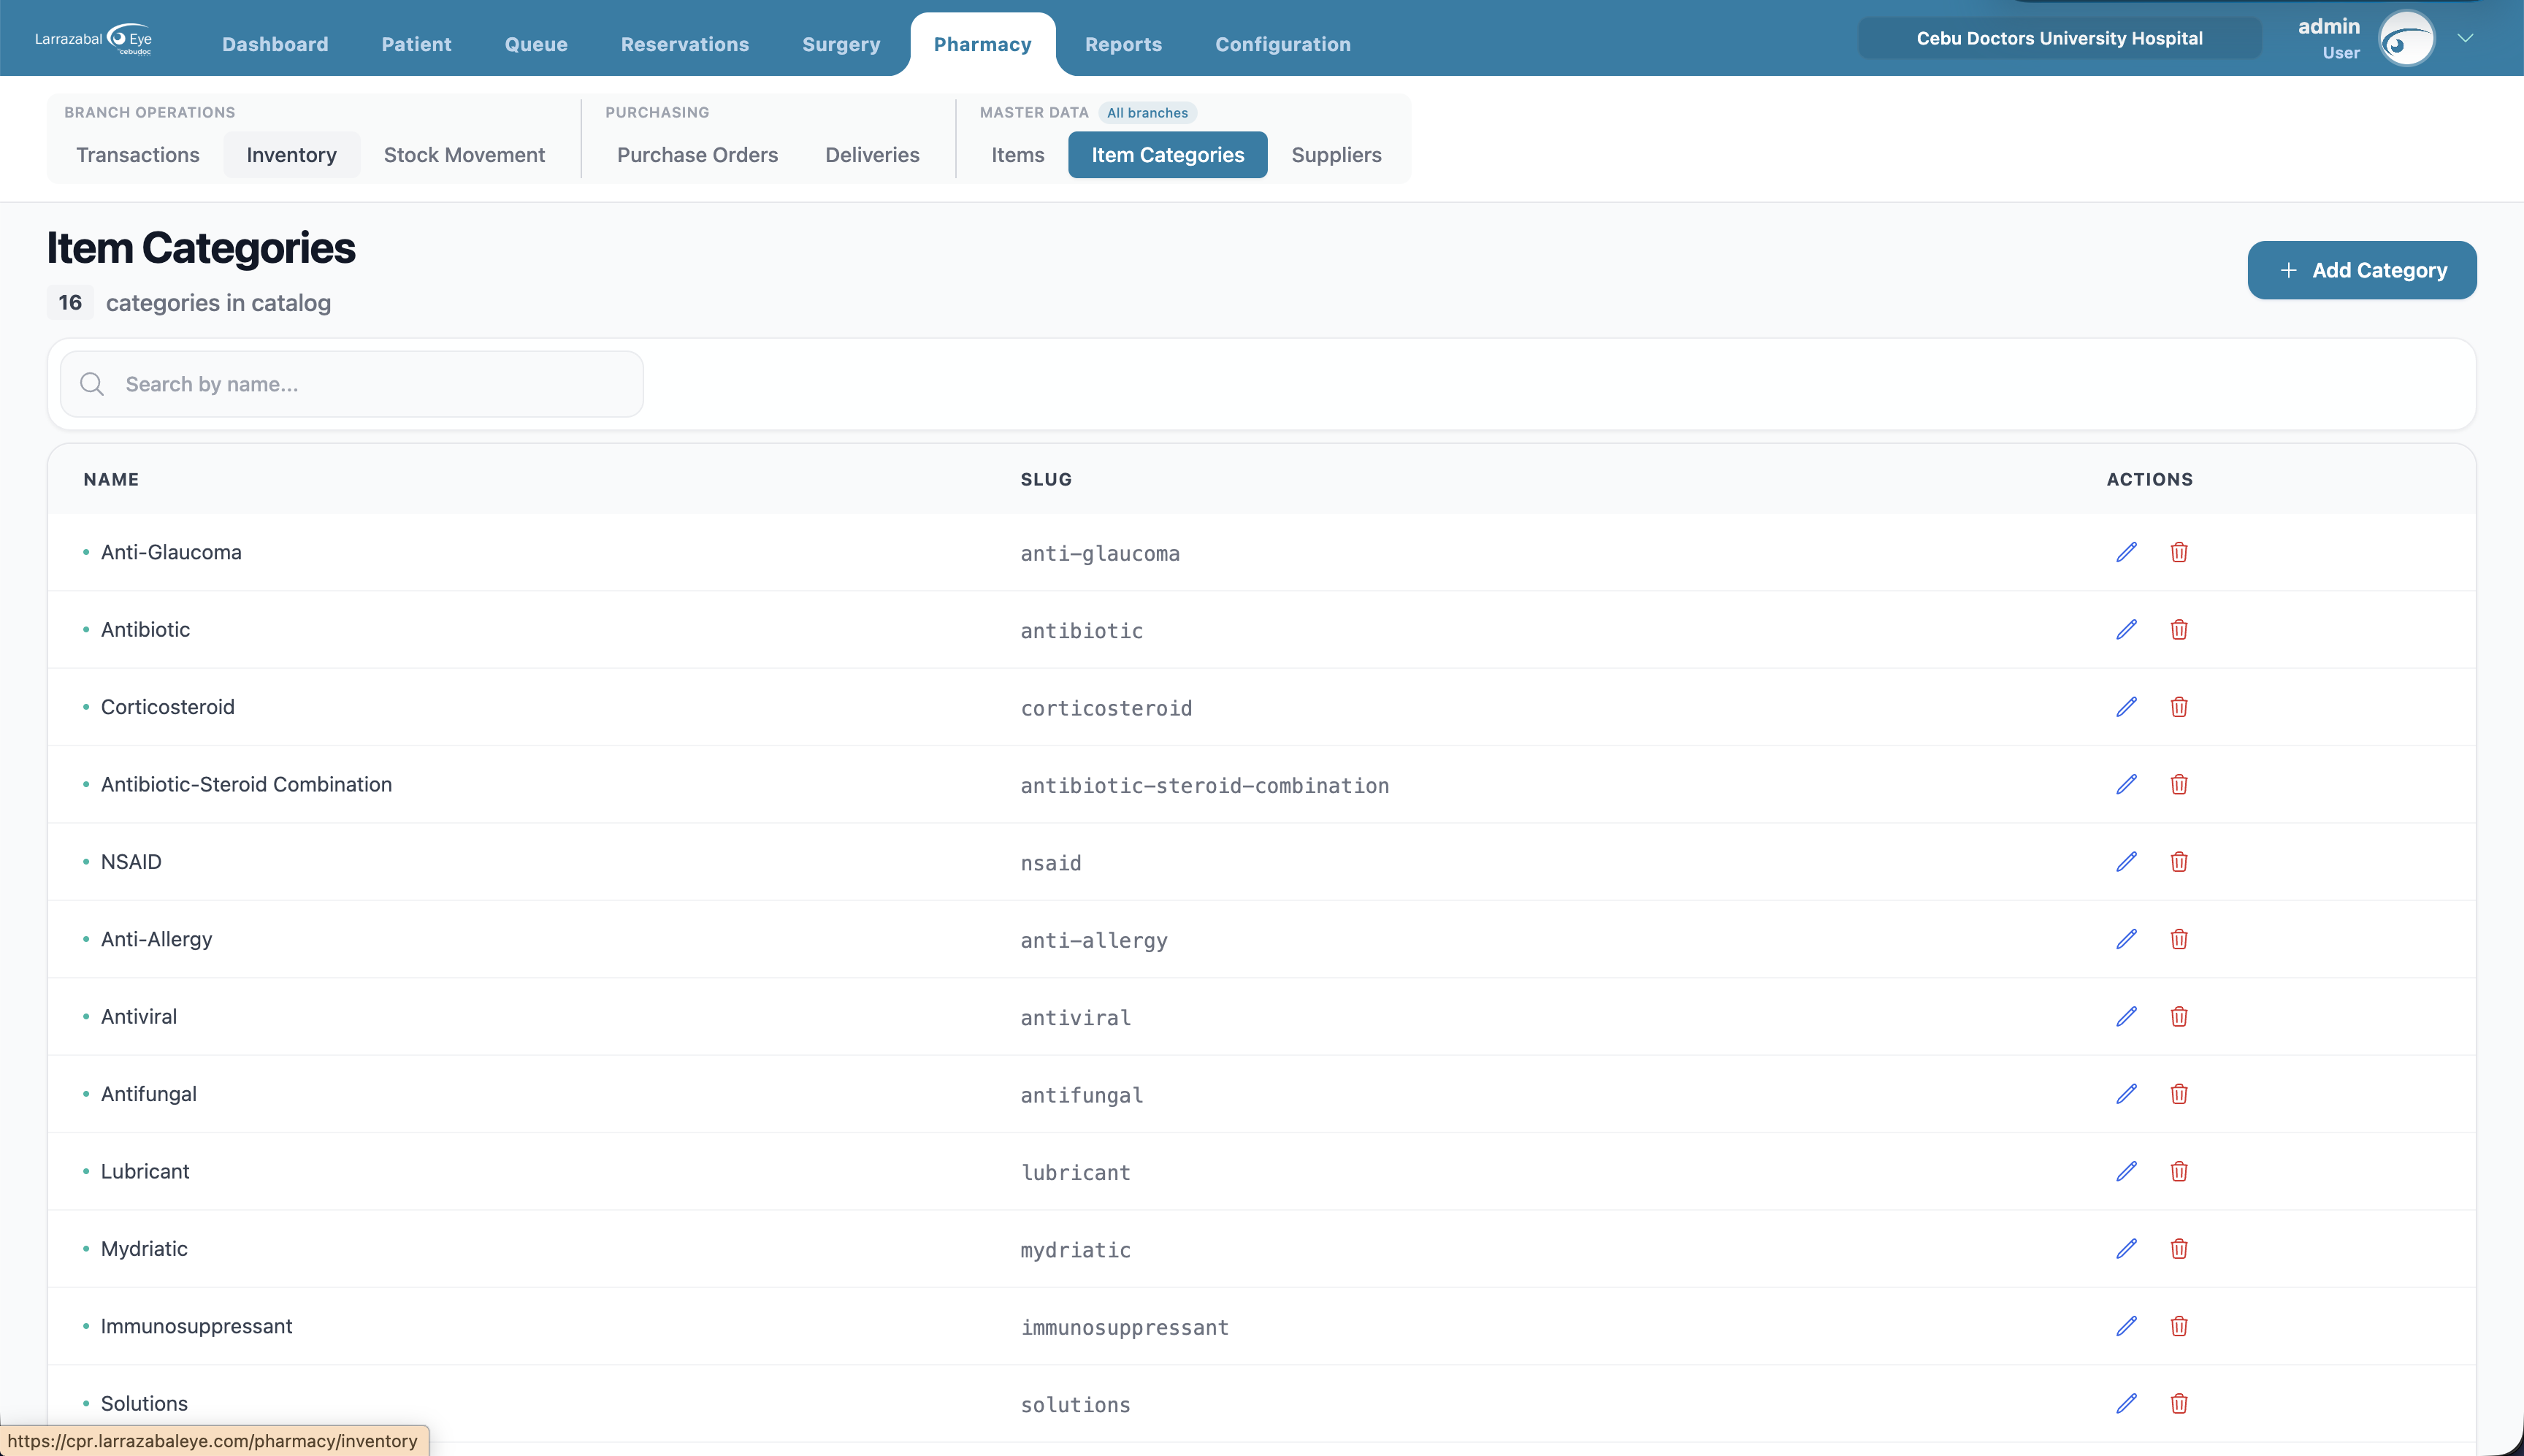
Columns: Name, Slug, Actions. (The slug is auto-generated from the name and is shown read-only for reference — it's how the category is referenced under the hood.)
Search: by name.
Add Category: just a Name (e.g. "Antibiotics"). Click Add Category. Use the pencil icon to rename or the trash icon to delete (confirmation required; you can't delete a category that's still in use).
Purchase Orders
Orders placed with suppliers. The header shows the order count and a Create Order button. Colored banners show how many orders are pending approval, approved, and received.
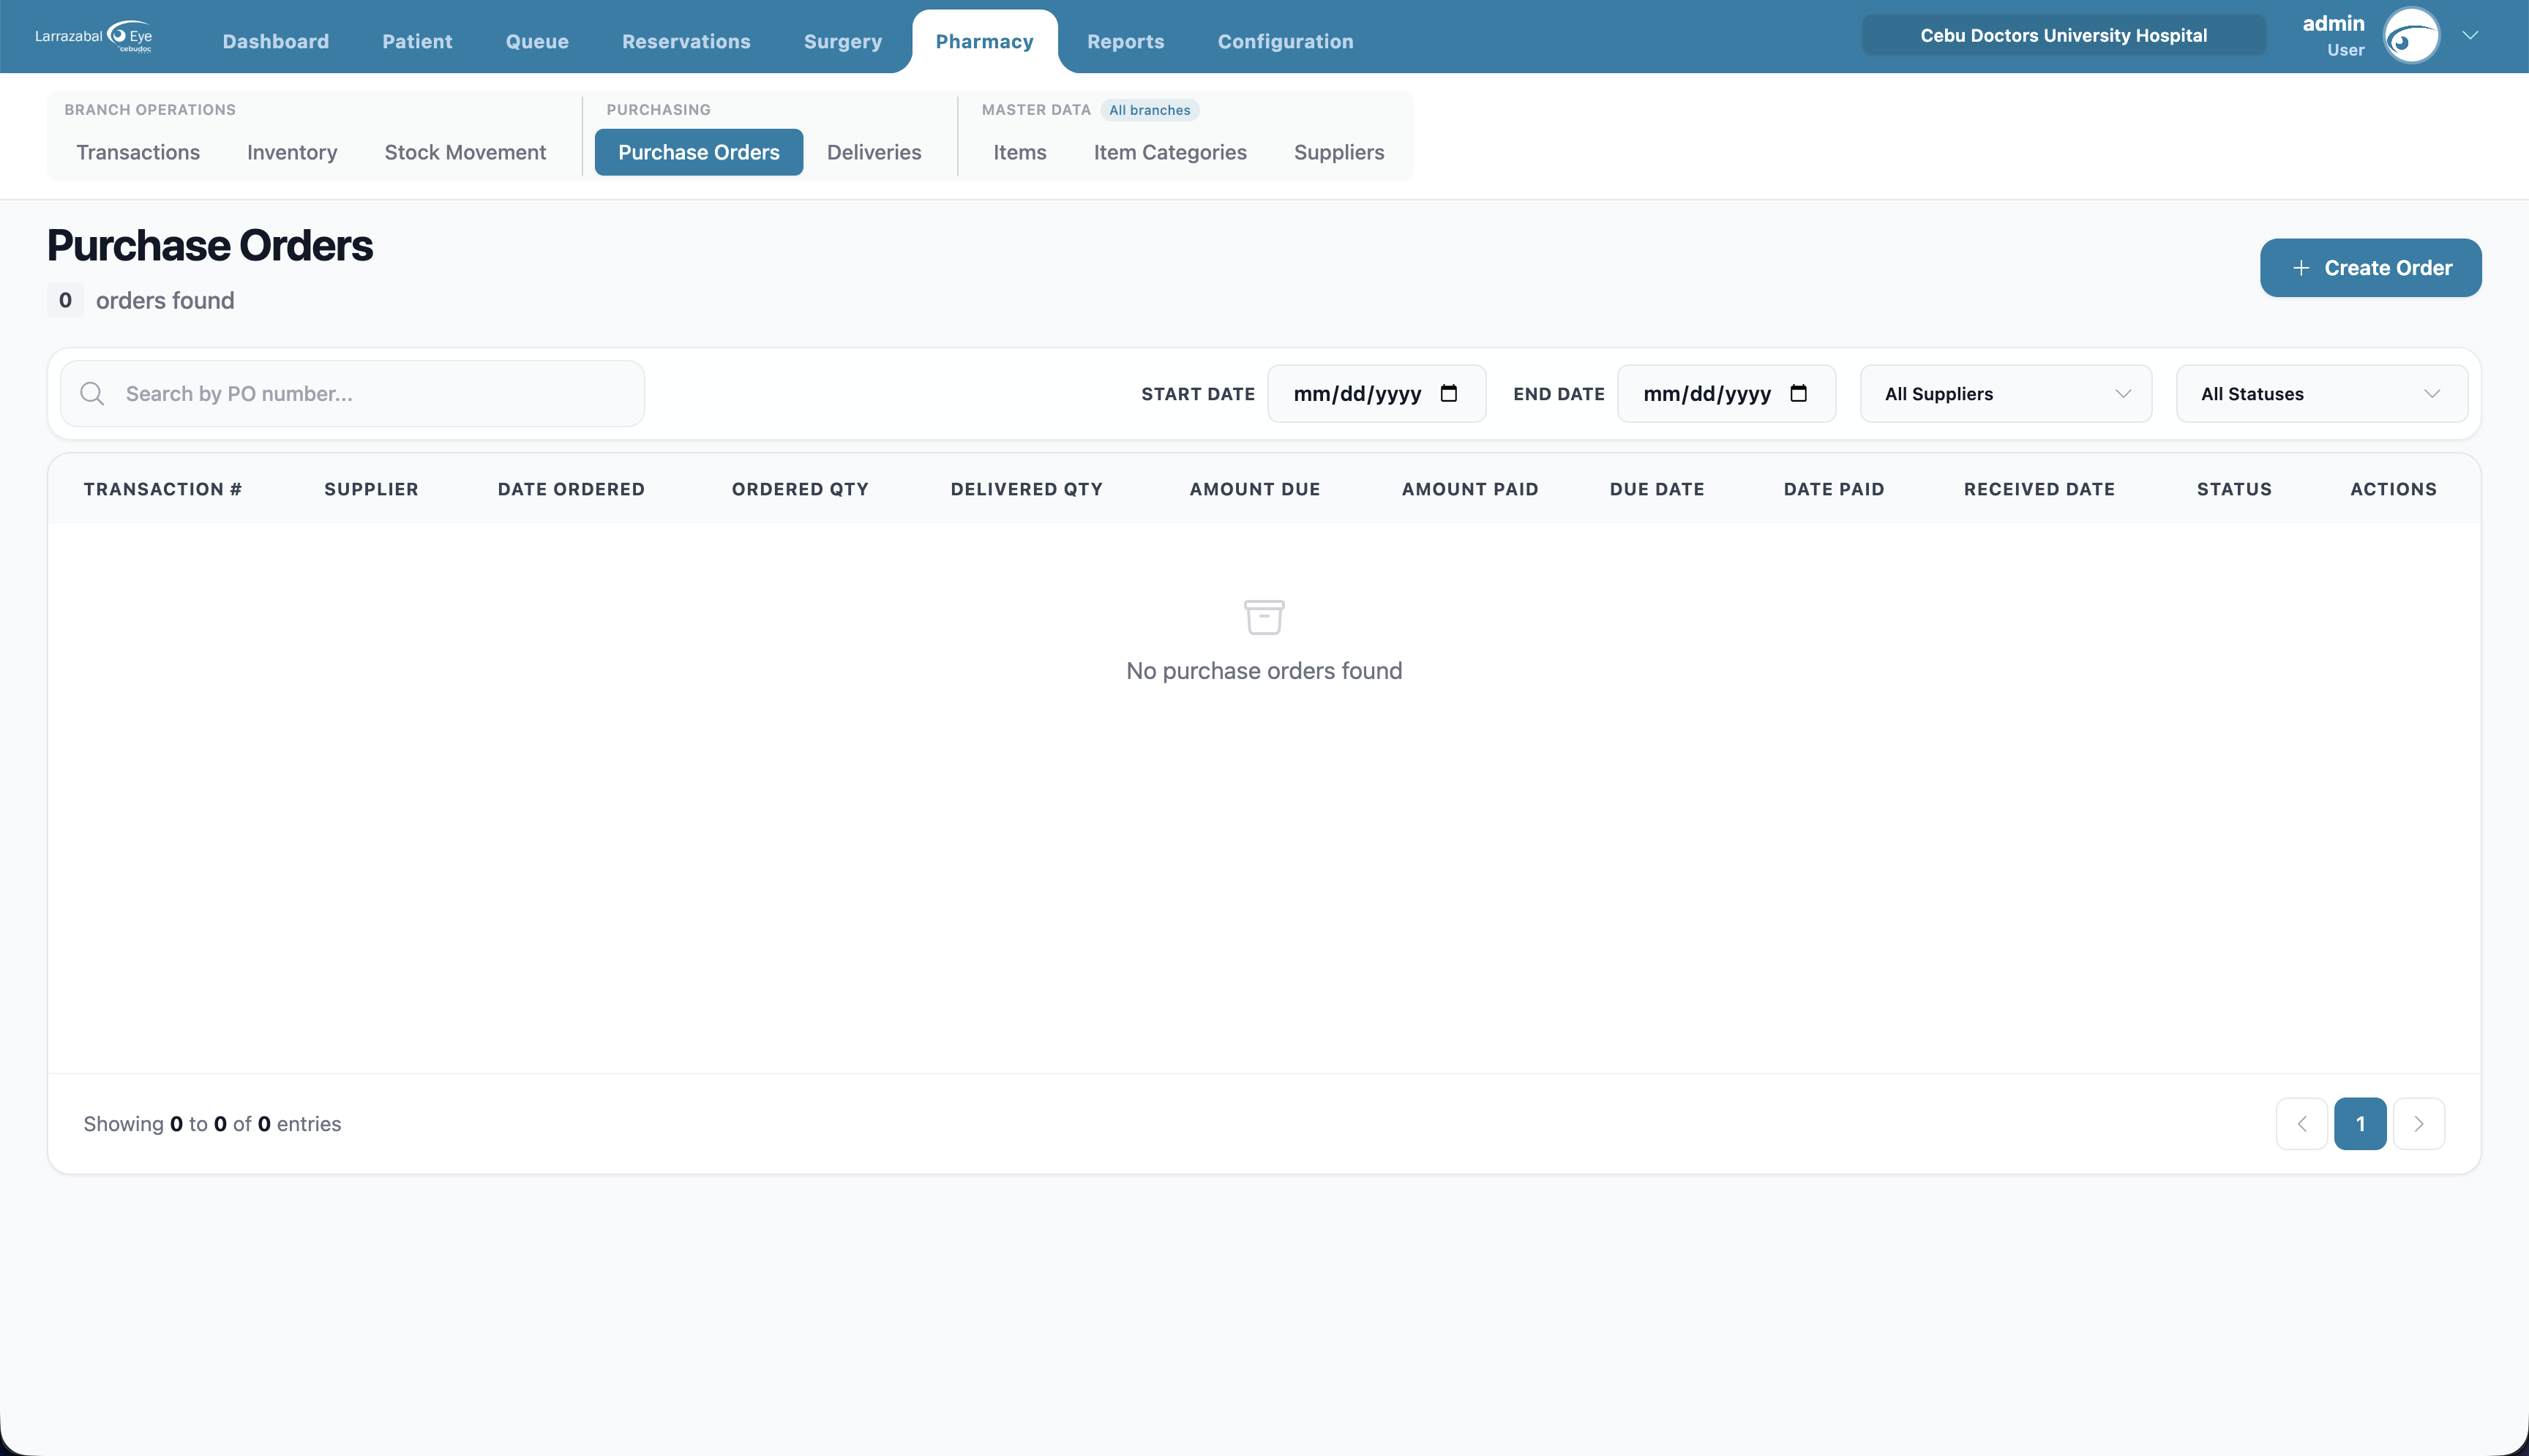
Columns: Transaction # (PO‑#####), Supplier, Date Ordered, Ordered Qty, Delivered Qty, Amount Due, Amount Paid, Due Date, Date Paid, Received Date, Status (Pending / Approved / Received / Cancelled), Actions (view, pay).
Filters: search by PO number/supplier/notes; supplier; Start Date / End Date; status.
Creating a purchase order
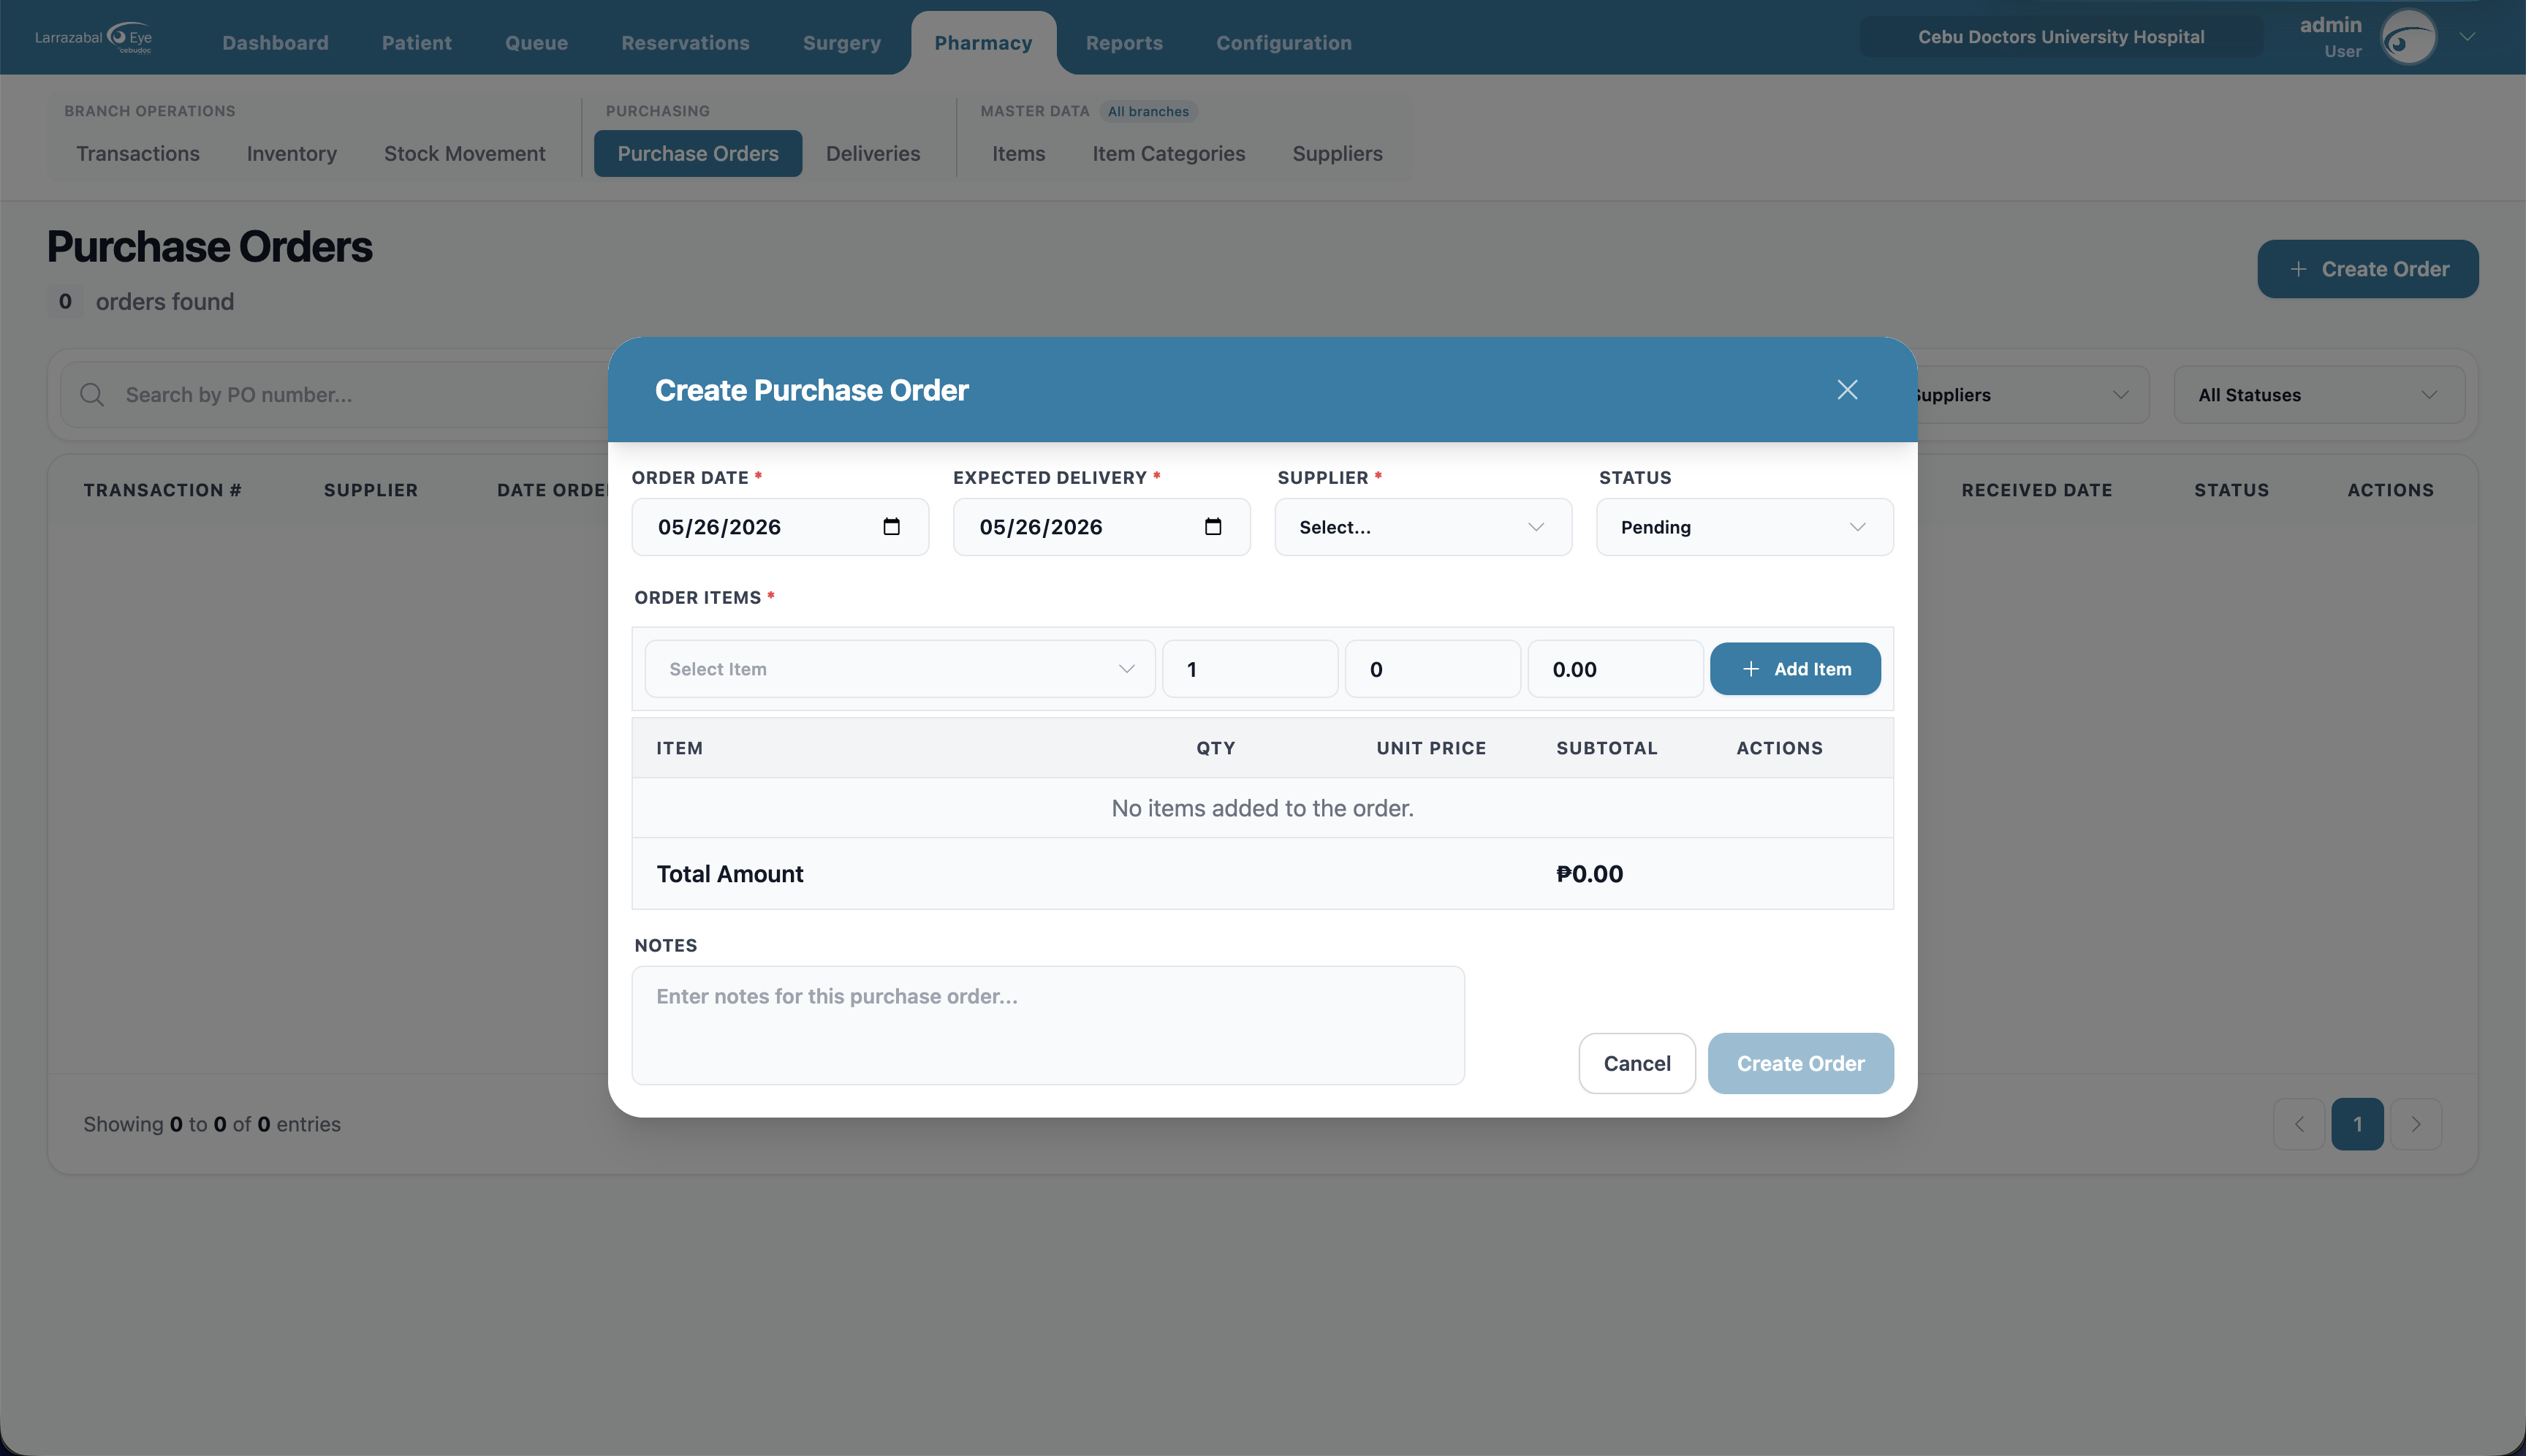
- Click Create Order.
- Fill in Order Date, Expected Delivery, Supplier, and Status (Pending by default).
- Add items: pick an Item (the search covers the full pharmacy item catalog, not just what's currently in stock), enter Qty and Unit Price (you can override the suggested price), and click Add Item. Repeat. Remove a line with its trash icon.
- Check the order total, then click Create Order.
A new order is Pending until someone approves it (status becomes Approved). Only approved orders can be received as deliveries.
Viewing and paying a PO
Click the view icon to see the PO's supplier, dates, line items, total, and payment status. Click the Pay action to record a payment — enter Amount to Pay, Payment Method, Payment Date, an optional Reference Number, and Notes, then click Record Payment.
Deliveries
Receiving items against a purchase order. The header shows the record count and a Receive Order button.
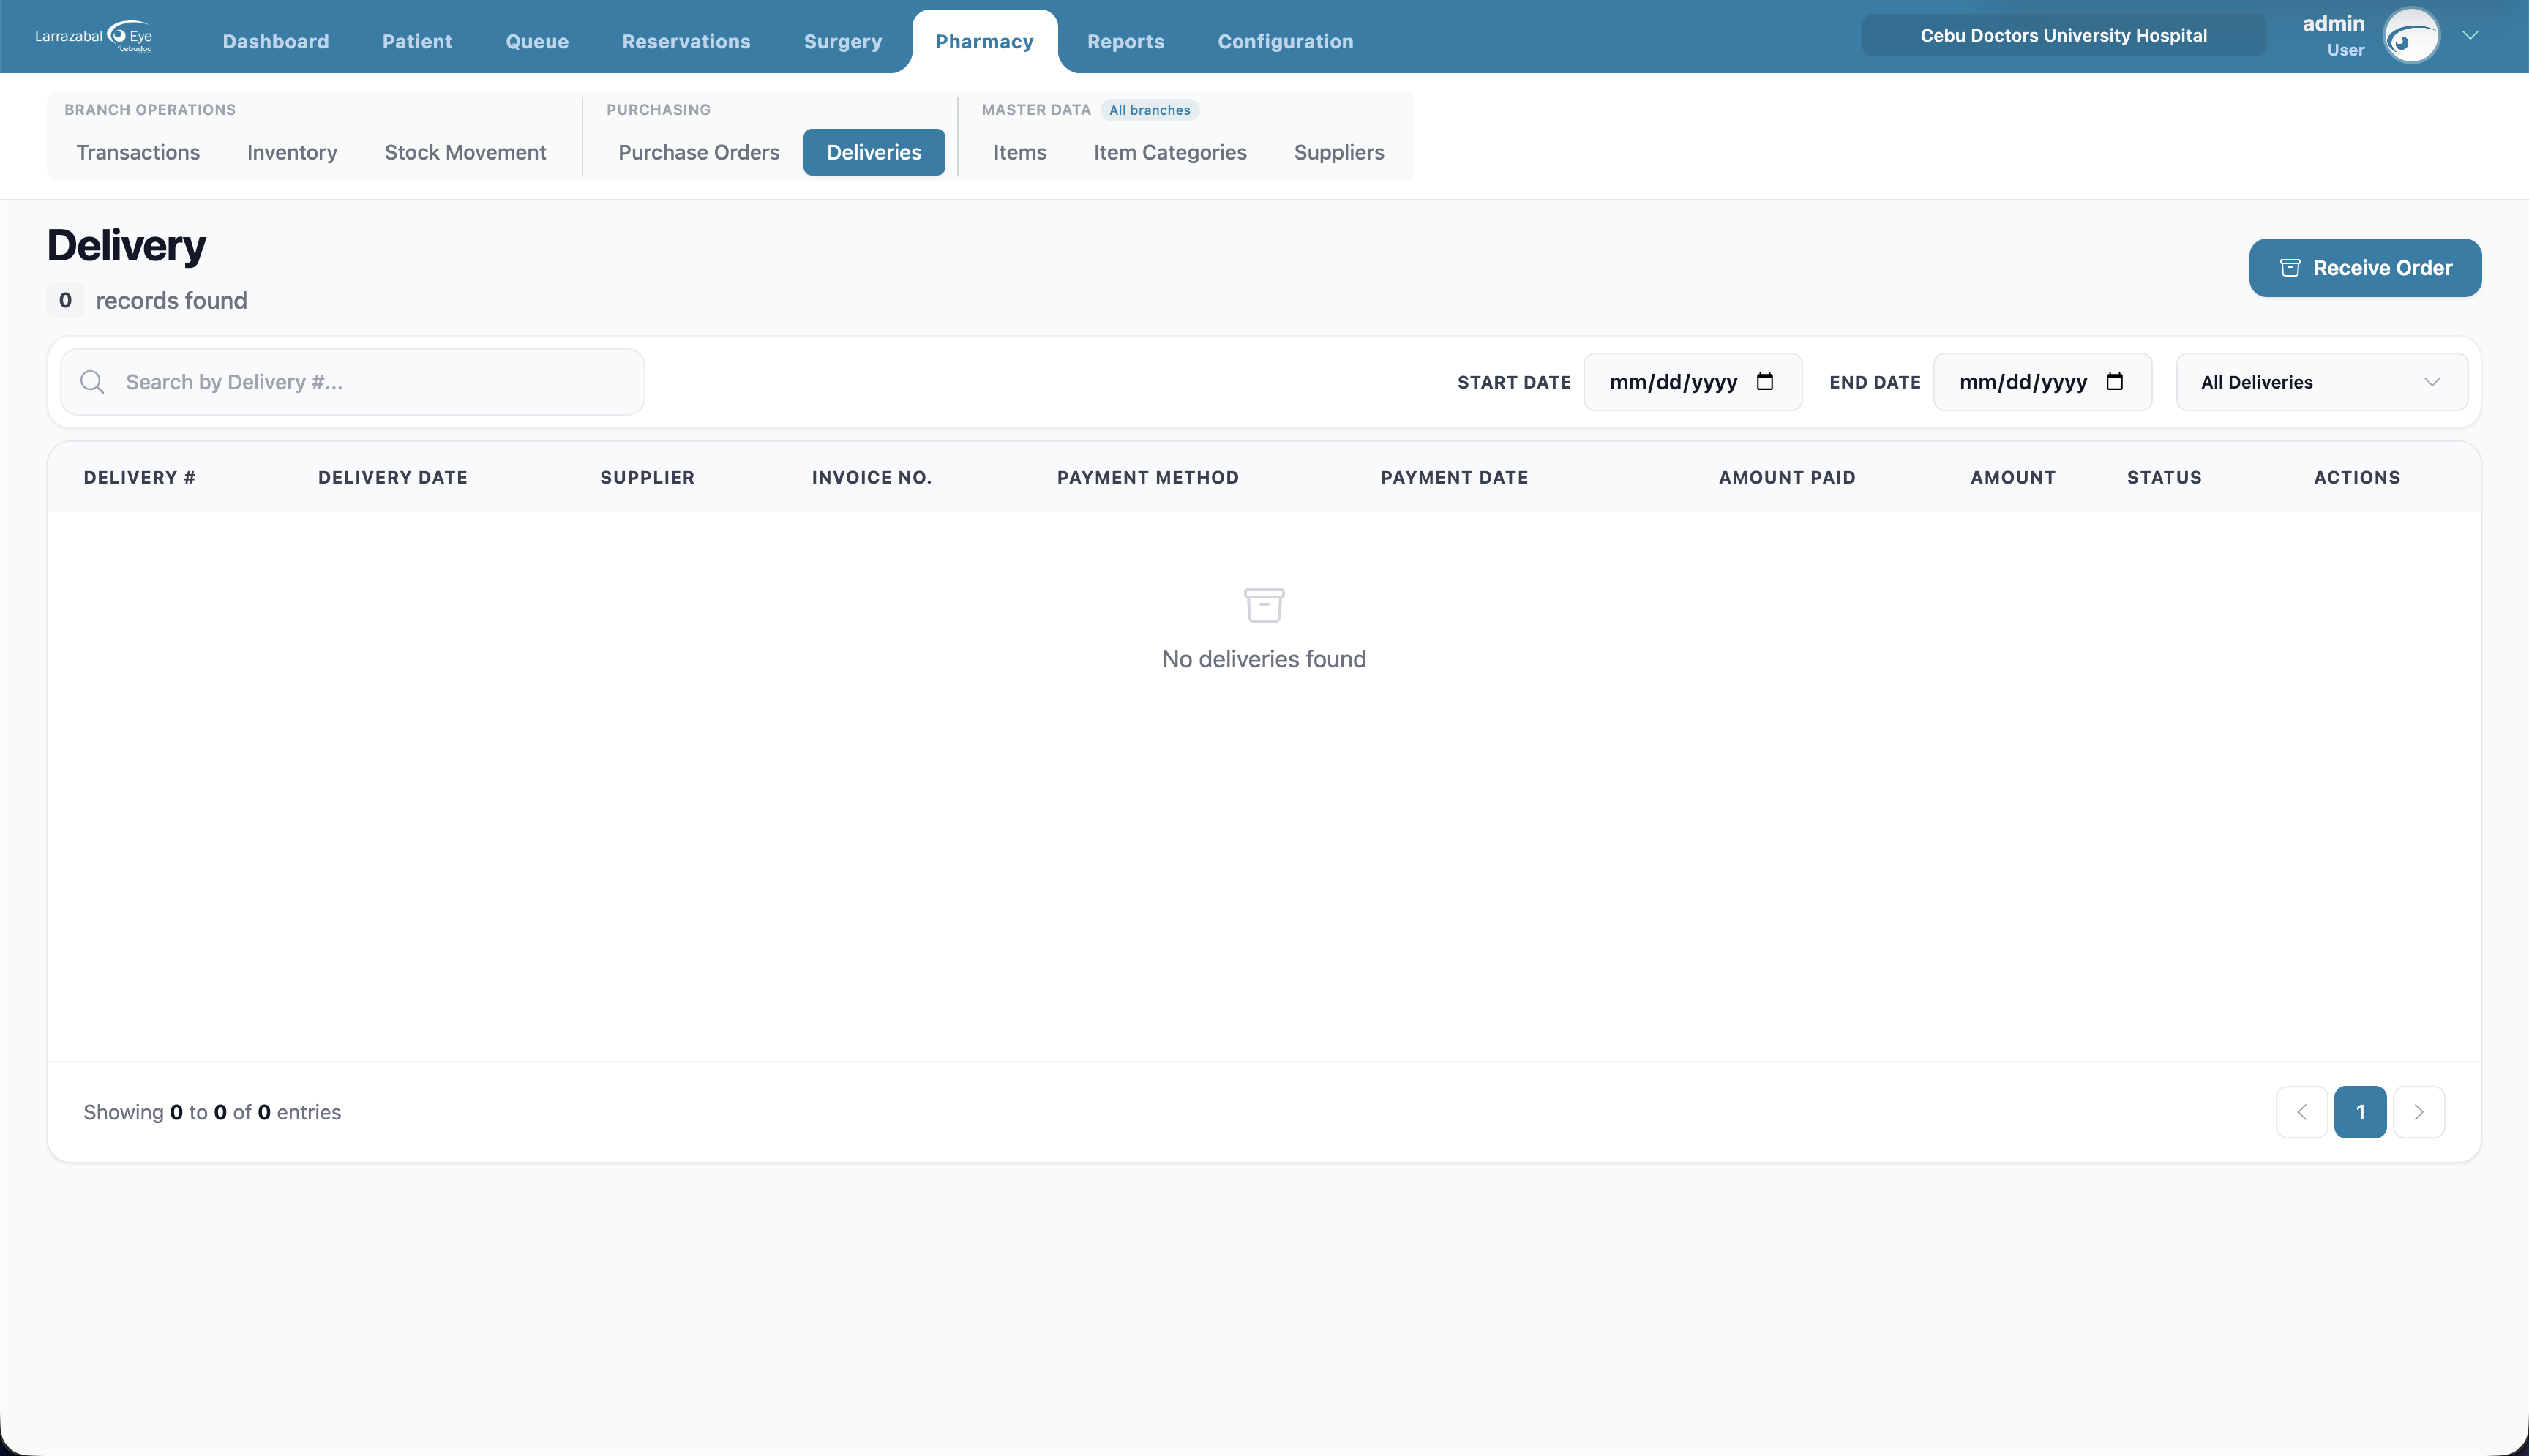
Columns: Delivery # (DEL‑#####), Delivery Date, Supplier, Invoice No., Payment Method, Payment Date, Amount Paid, Amount, Status, Actions (view).
Filters: search by delivery number/invoice/supplier; Start Date / End Date; status.
Receiving a delivery
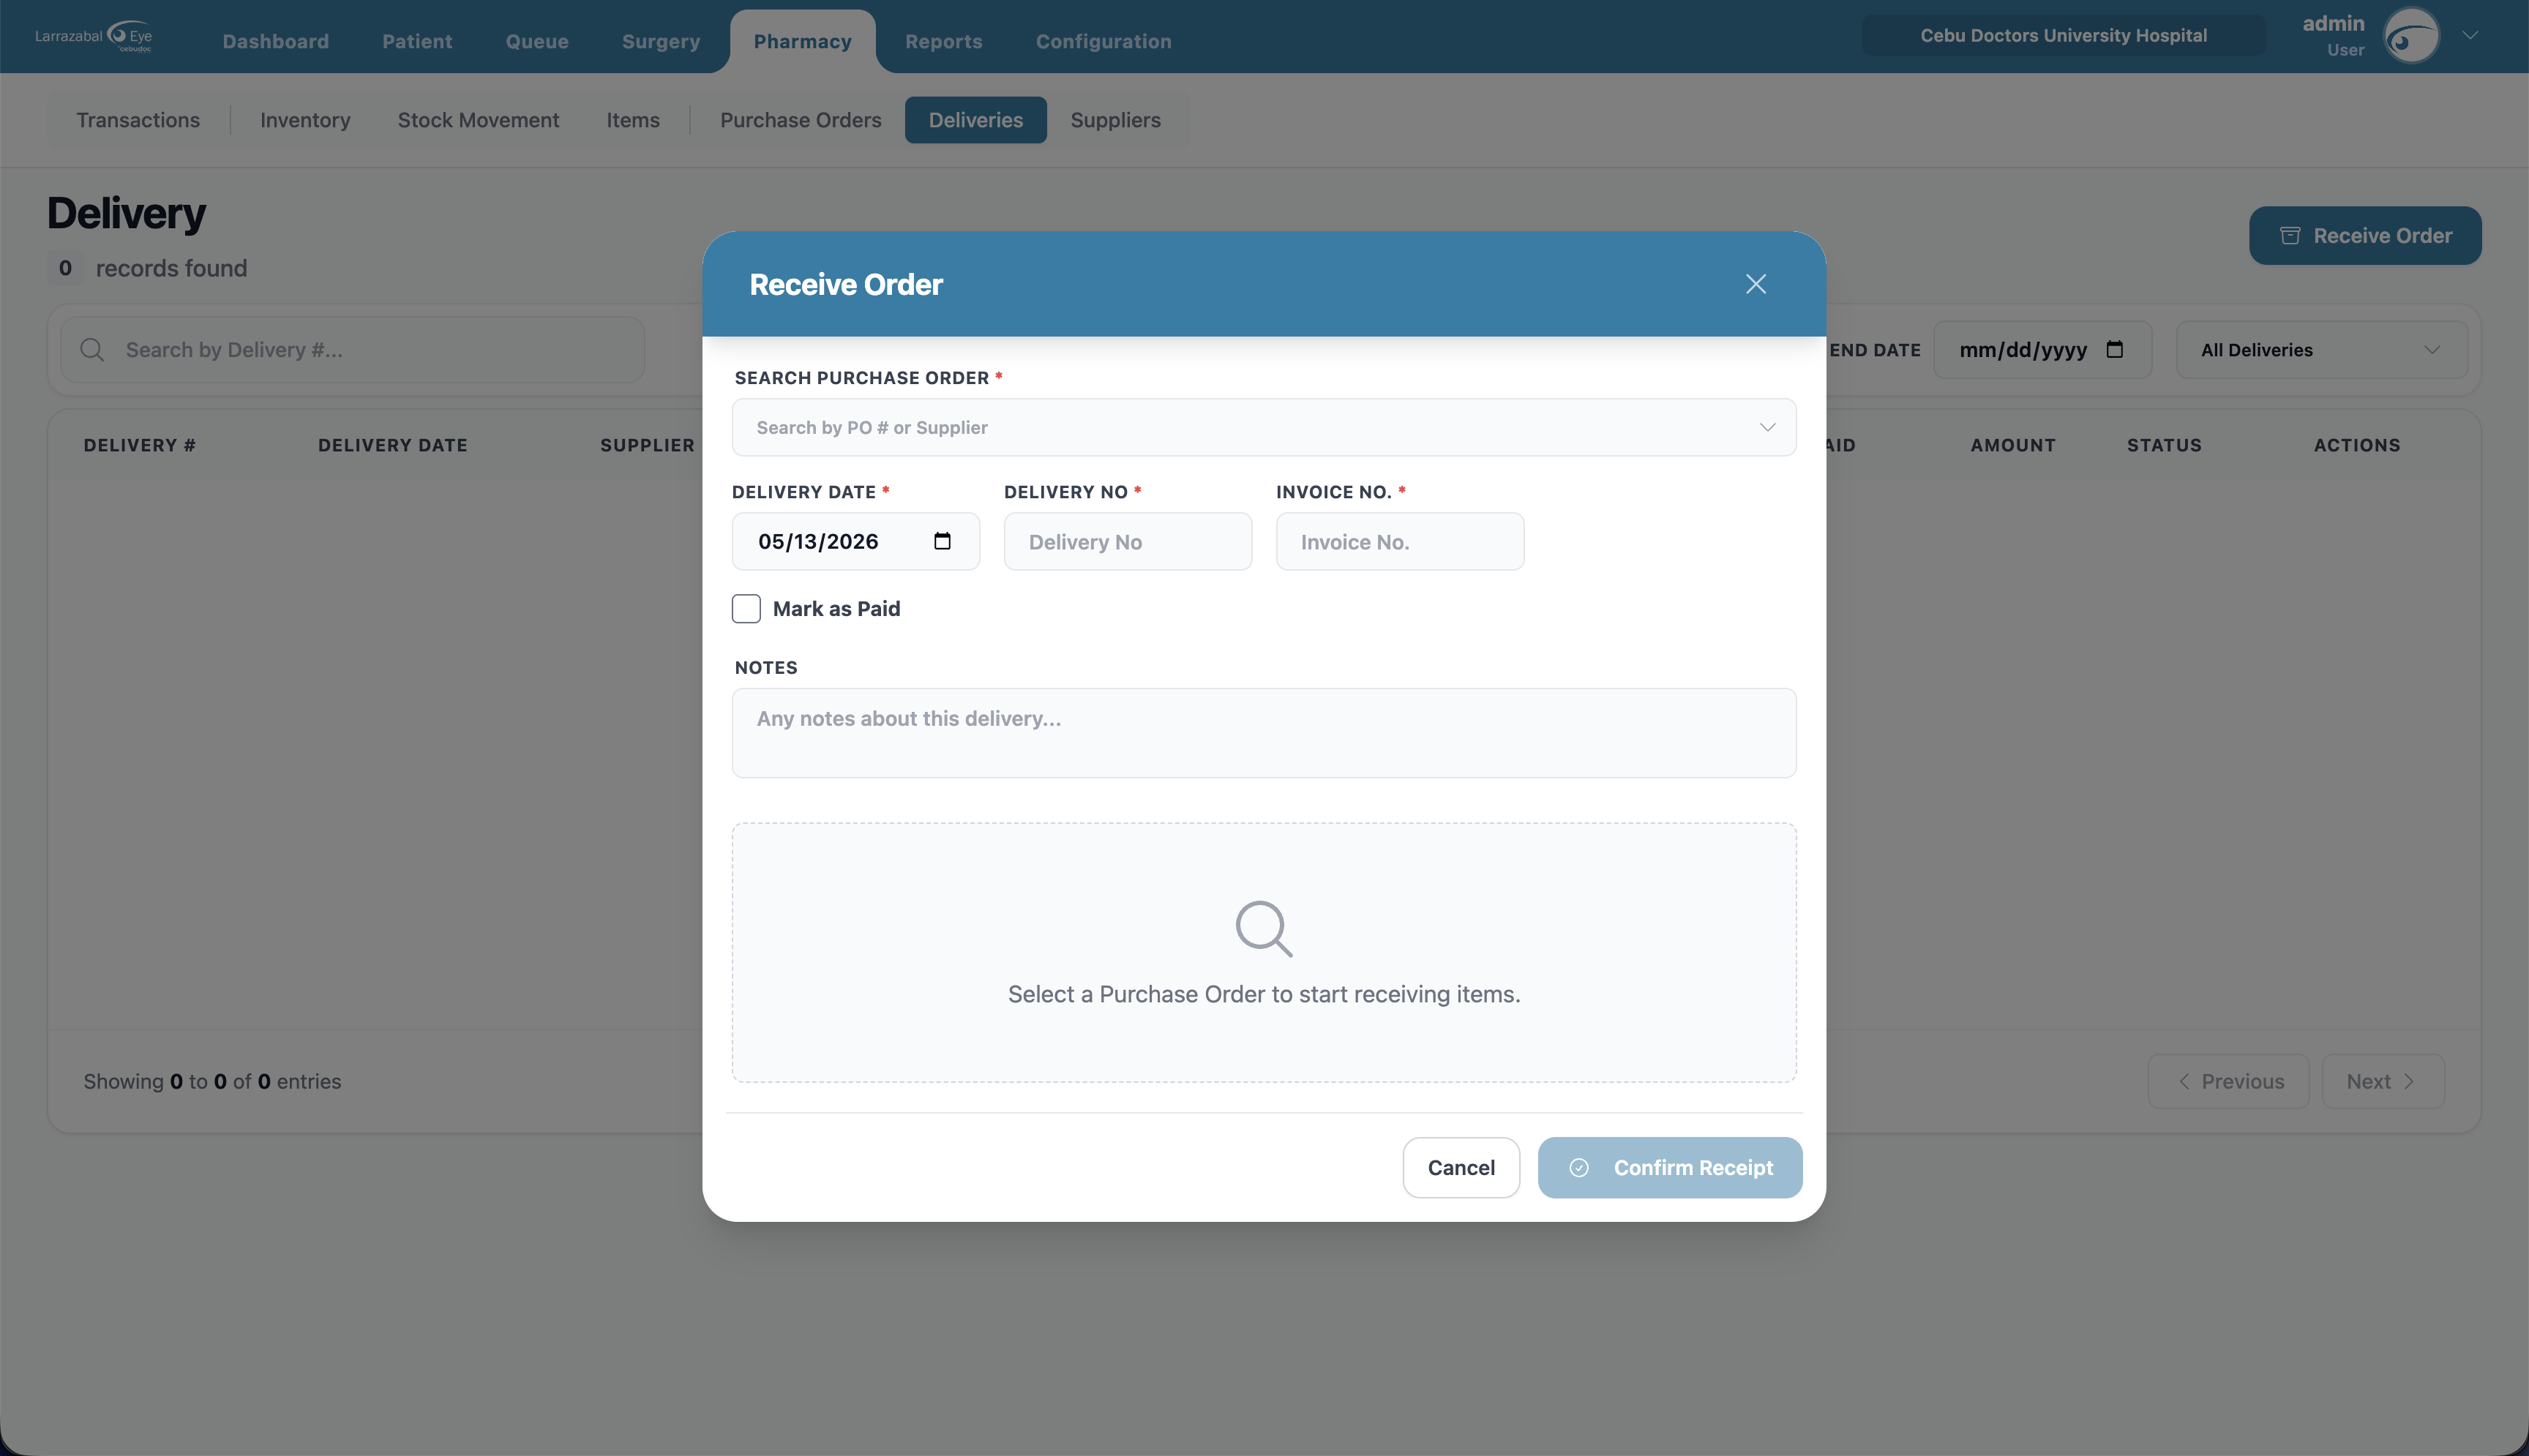
- Click Receive Order.
- Purchase Order — search for and select one if the delivery is against a PO. (If the PO is still Pending, you'll see a warning — it must be approved first.) Leave it blank if the goods arrived without a PO; the supplier field unlocks and you can record the delivery directly.
- Fill in Delivery Date, Delivery No, Invoice No., and Supplier (auto-filled from the PO if there is one). The PO's due date is shown for reference where applicable.
- If you're paying on delivery, tick Mark as Paid and fill in Payment Method, Payment Date, an optional Reference Number, and Amount Paid.
- In the items table:
- For a PO-backed delivery, enter the Received Qty for each line (you can record a partial delivery) and adjust the Unit Price if it differs from the PO.
- For a delivery without a PO, click Add Item to search the full pharmacy item catalog, then enter quantity and unit price for each line.
- Click Record Delivery. Inventory is increased by what you received.
Click the view icon on a row to see a delivery's full details. Inside the view, a Mark as Paid toggle records payment for the delivery itself — handy when you receive the goods first and pay the supplier later. The deliveries table shows the delivery's own payment fields (method, date, amount paid), independent of the originating PO.
Suppliers
Supplier contact records. The header shows the supplier count and an Add Supplier button.
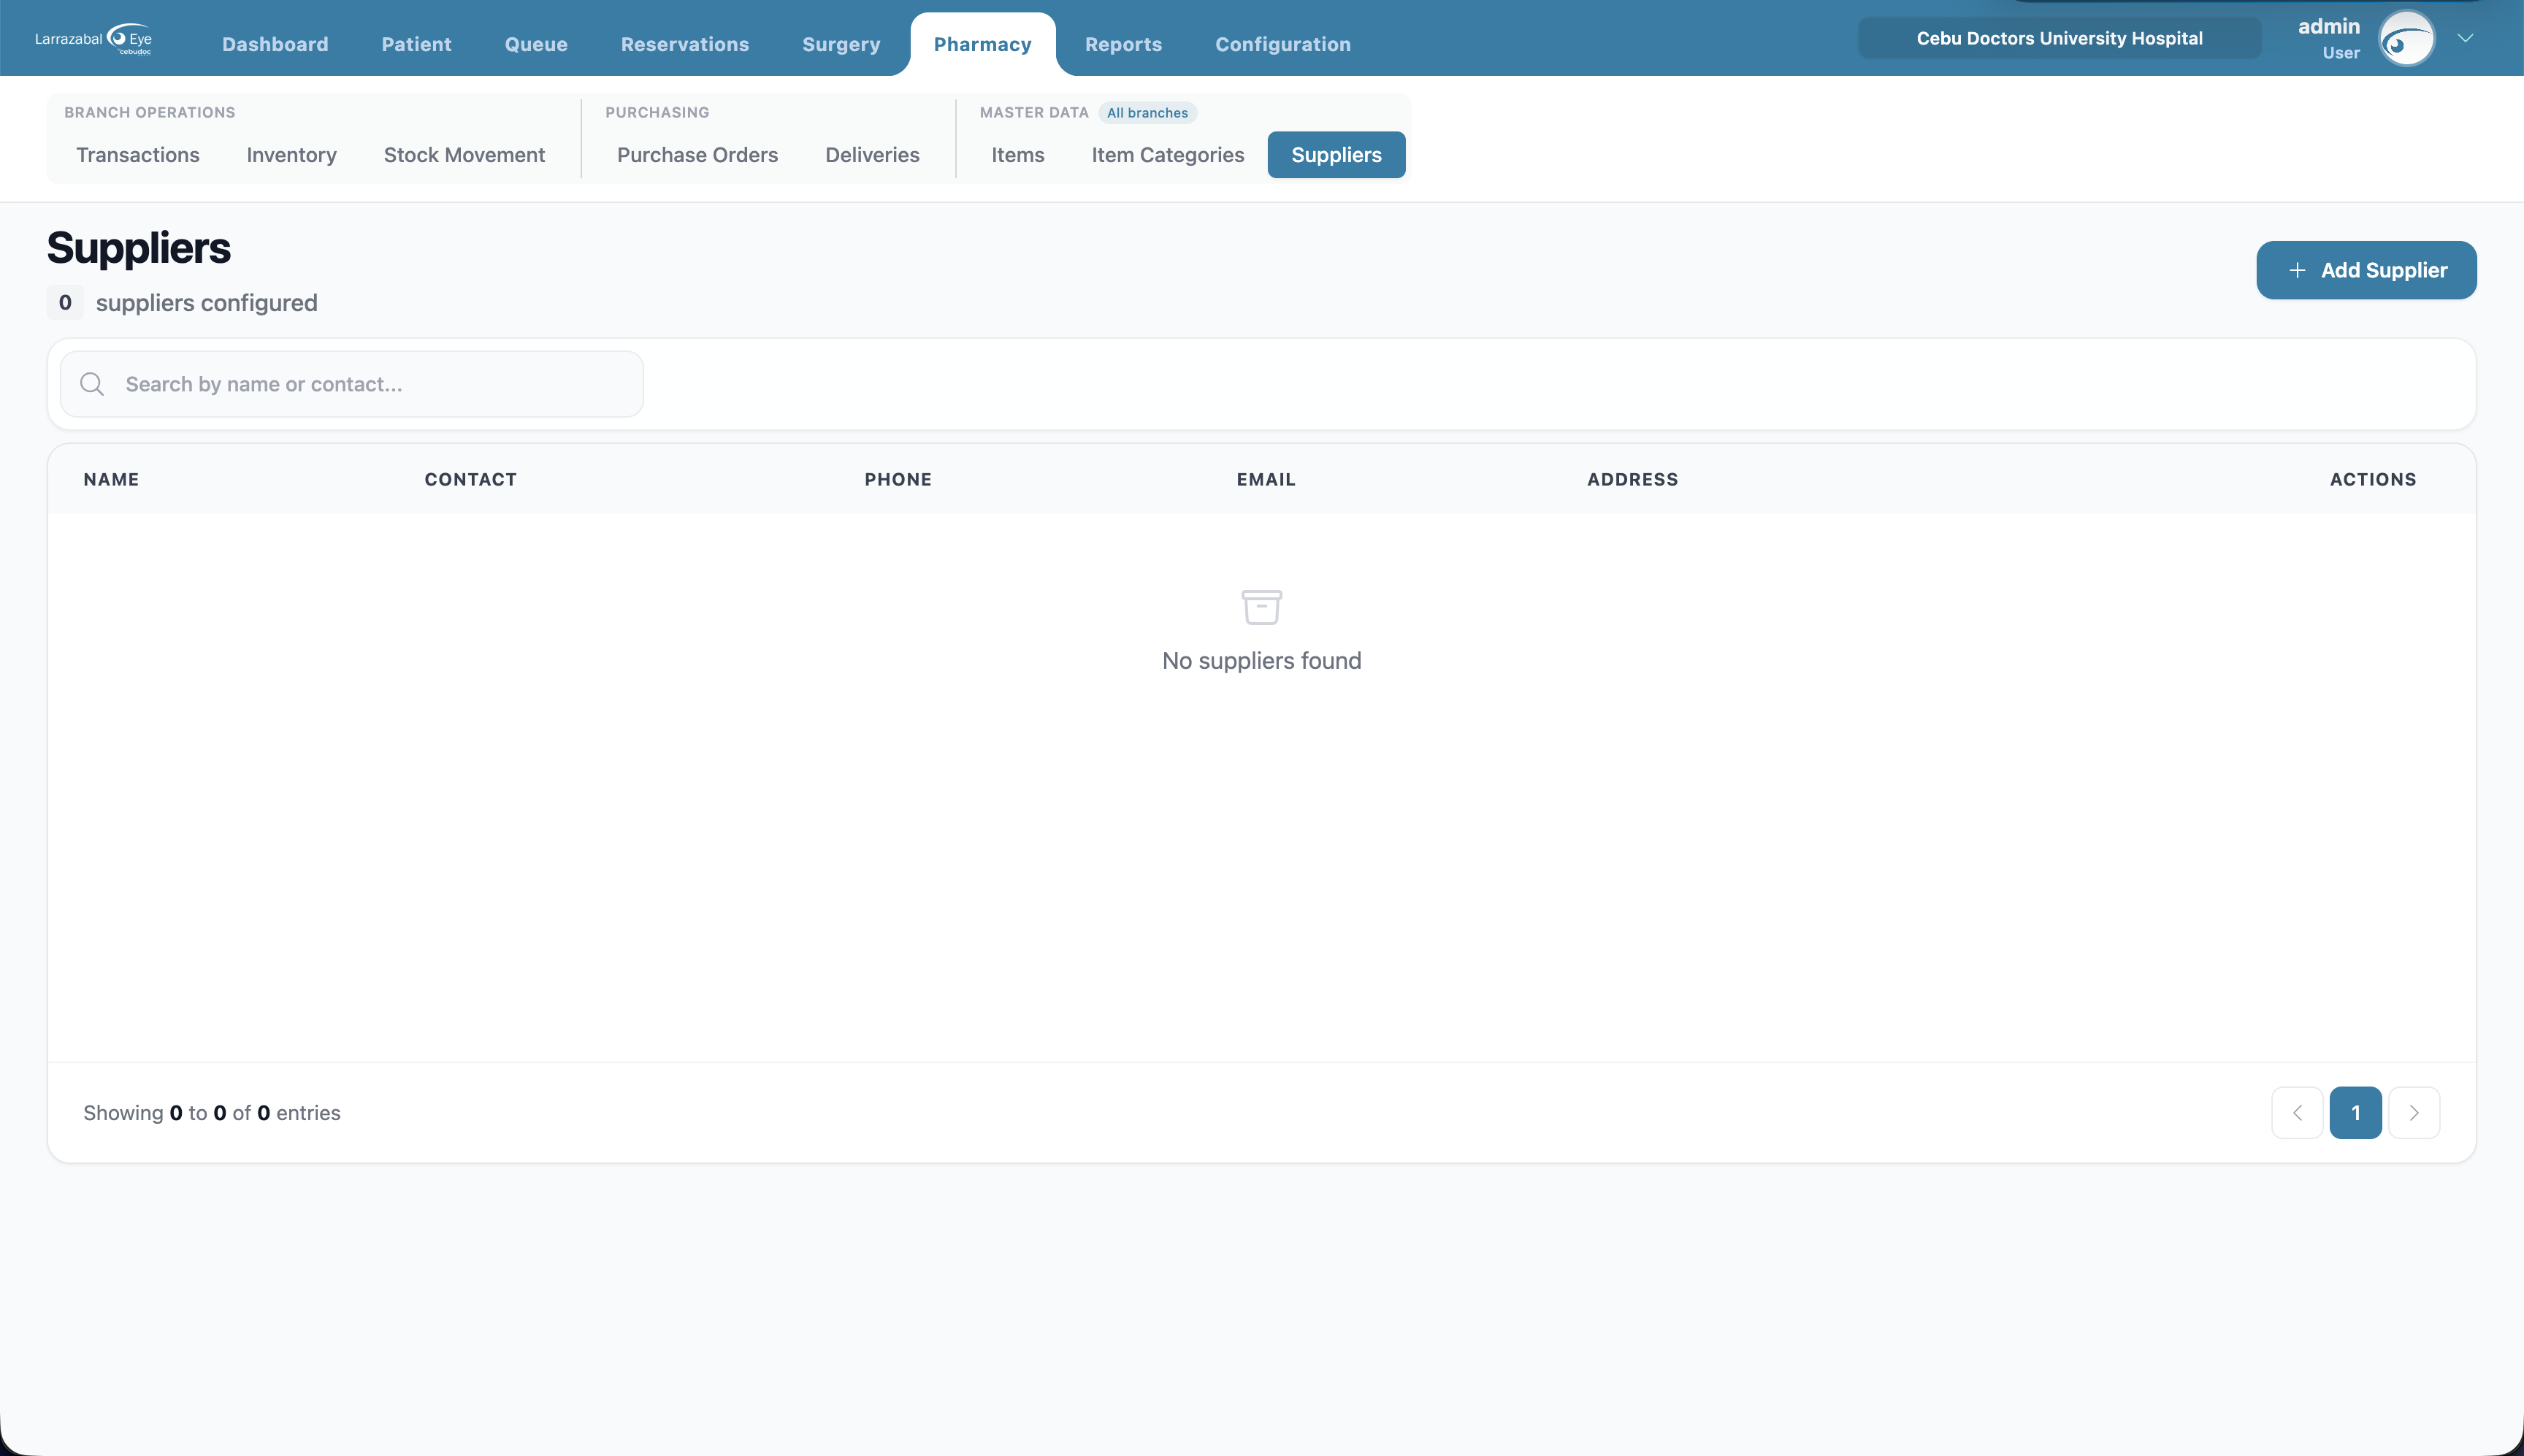
Columns: Supplier Name, Contact Person, Phone, Email, Address, Status (Active / Inactive), Last Updated, Actions.
Filter: search by supplier name, contact, or phone.
Adding a supplier
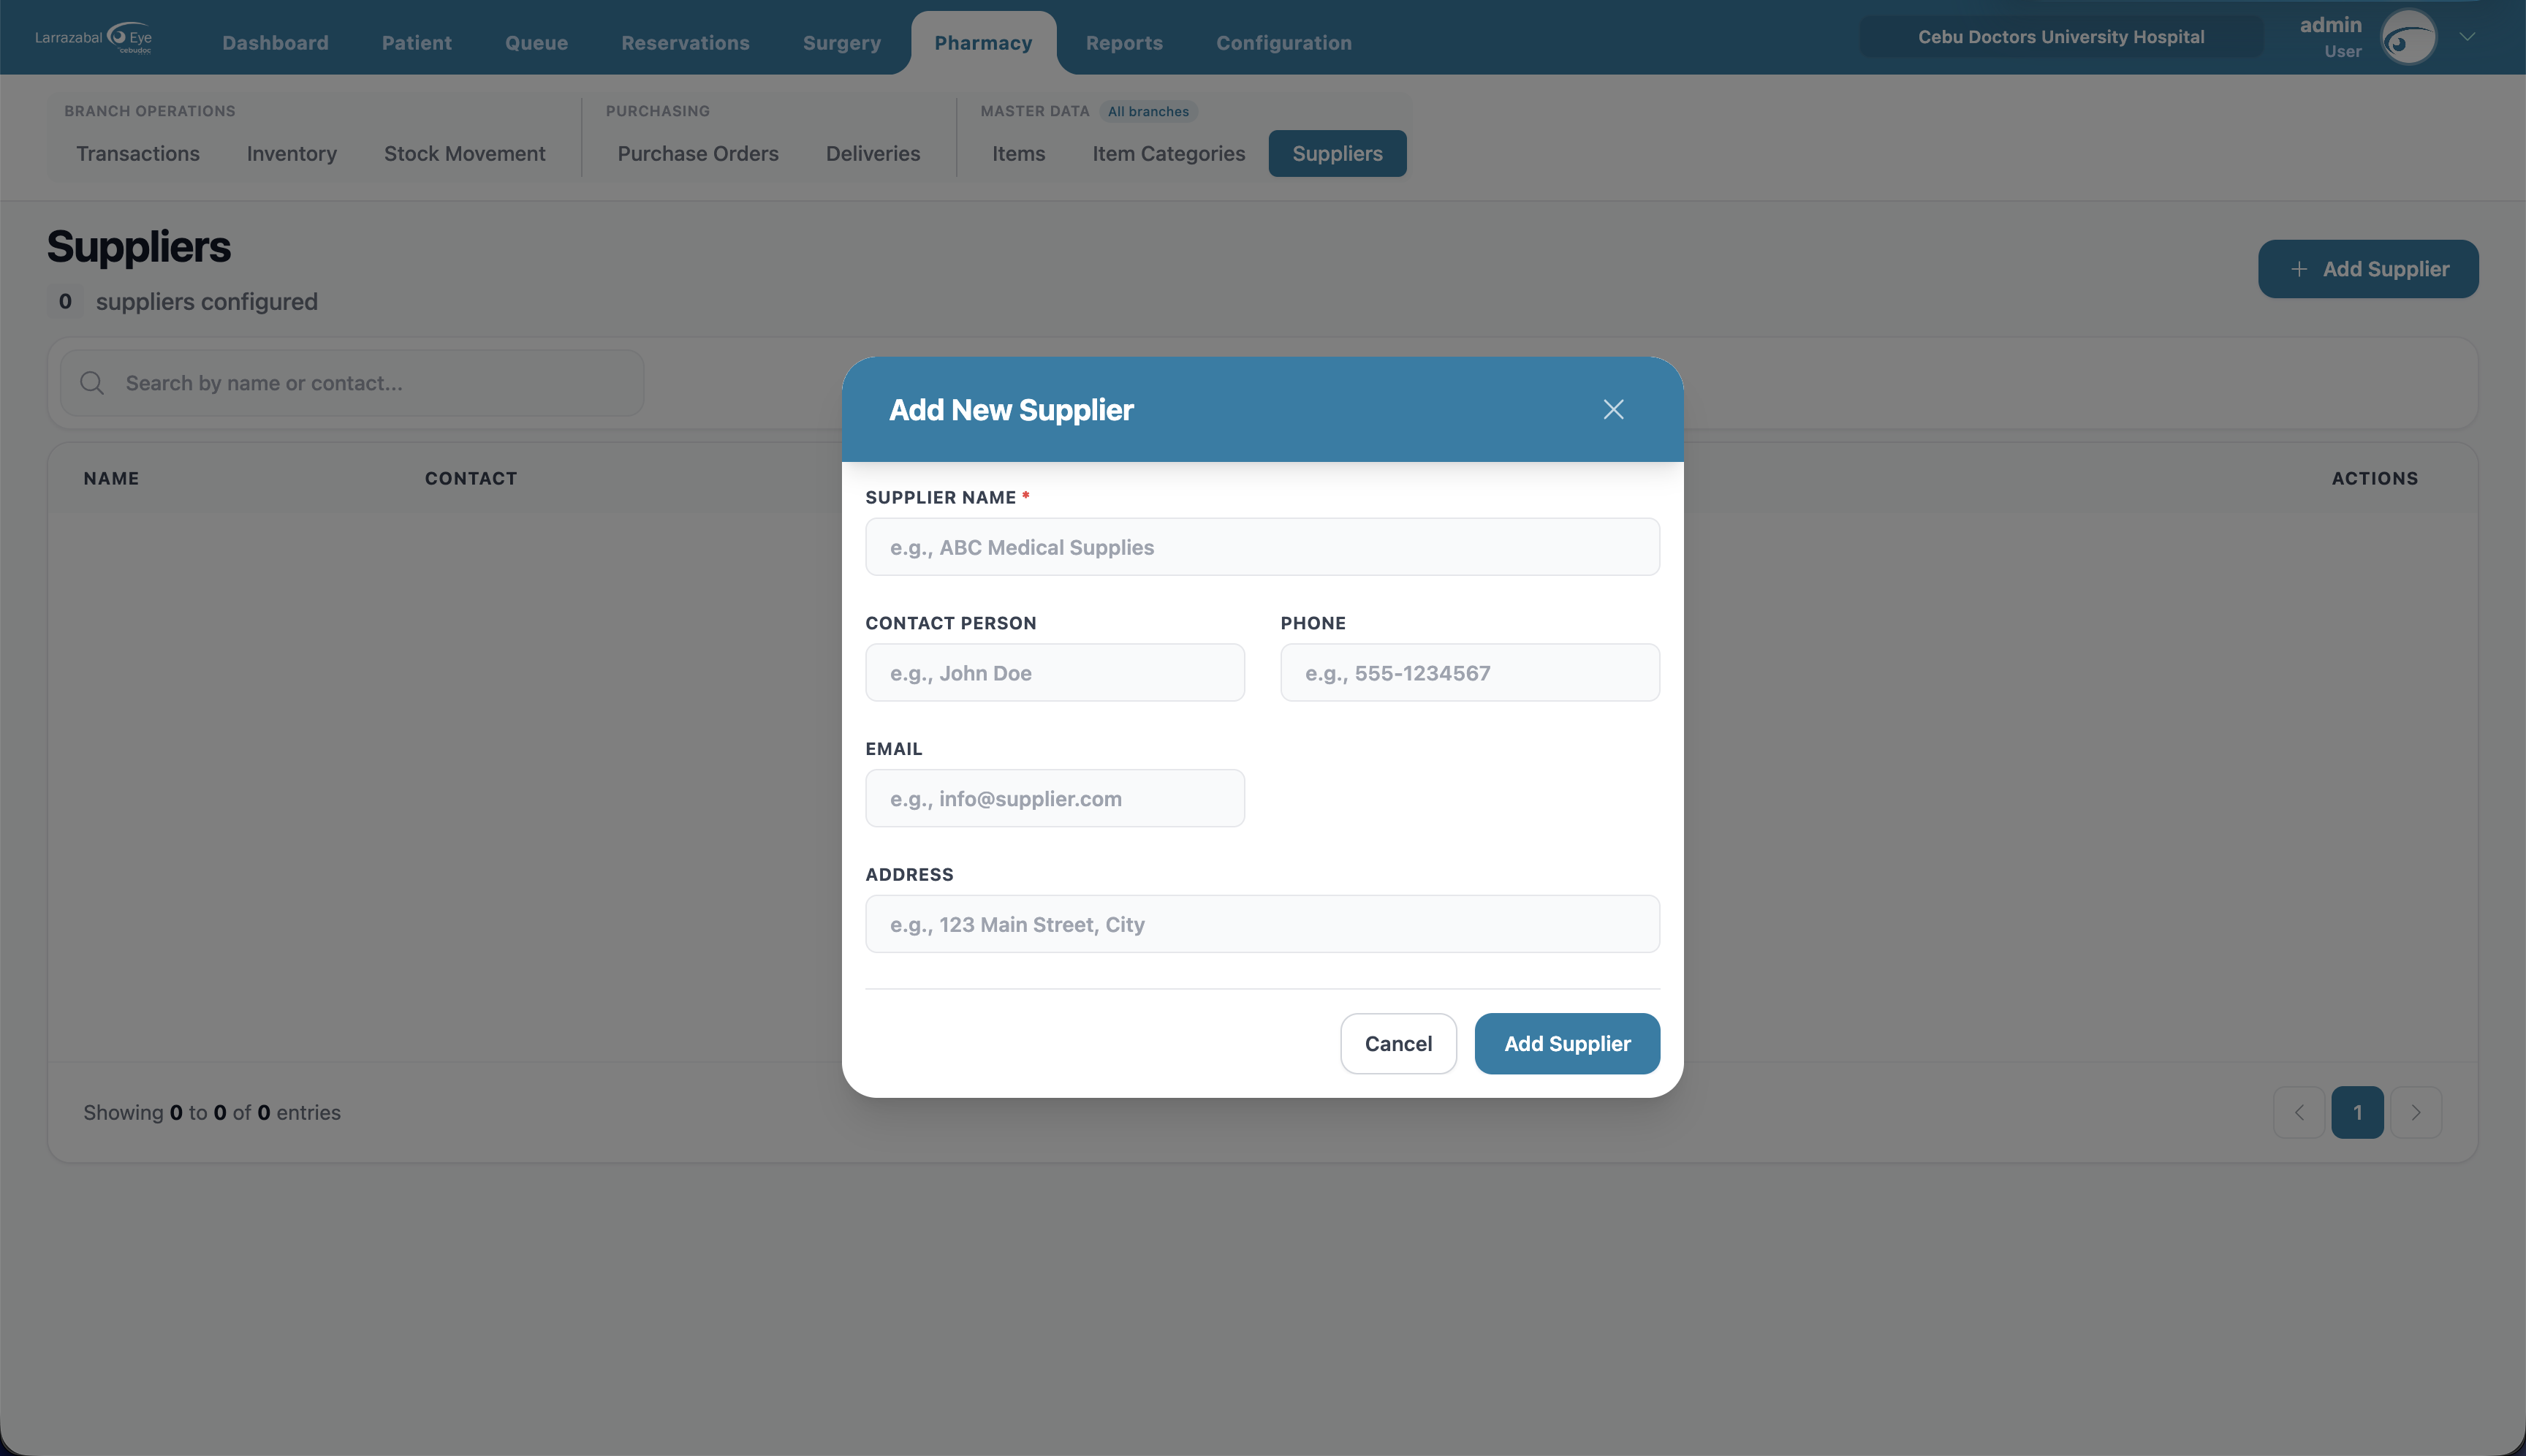
Click Add Supplier and fill in Supplier Name (required) plus optional Contact Person, Phone, Email, and Address. Click Add Supplier. Use the pencil icon to update a supplier later.
Common pharmacy workflows
Restocking an item that's running low
- Pharmacy → Inventory shows a low‑stock banner. Decide whether to order more or adjust on‑hand stock.
- To order: Pharmacy → Purchase Orders → Create Order, add the item(s), and create the order. Have it approved.
- When the goods arrive: Pharmacy → Deliveries → Receive Order, pick the PO, enter the delivery and invoice numbers and the received quantities, and record the delivery. Inventory updates.
Dispensing to a patient (standalone sale)
Pharmacy → Transactions → Create Transaction, choose the patient and payment method, add the items and quantities, check the total, and create the transaction. (For medicines tied to a clinic visit, you can also record them on the Queue page.)
Correcting stock (damage, count adjustment, consumption)
Pharmacy → Stock Movement → Add Stock Movement, choose the item, movement type and reason, enter the quantity and date, and save.