Surgery Schedule
The Surgery tab lists scheduled surgeries and lets you book new ones, edit them, and record IOL (lens) details for each eye.
The schedule
The page shows a count of scheduled surgeries and a table:
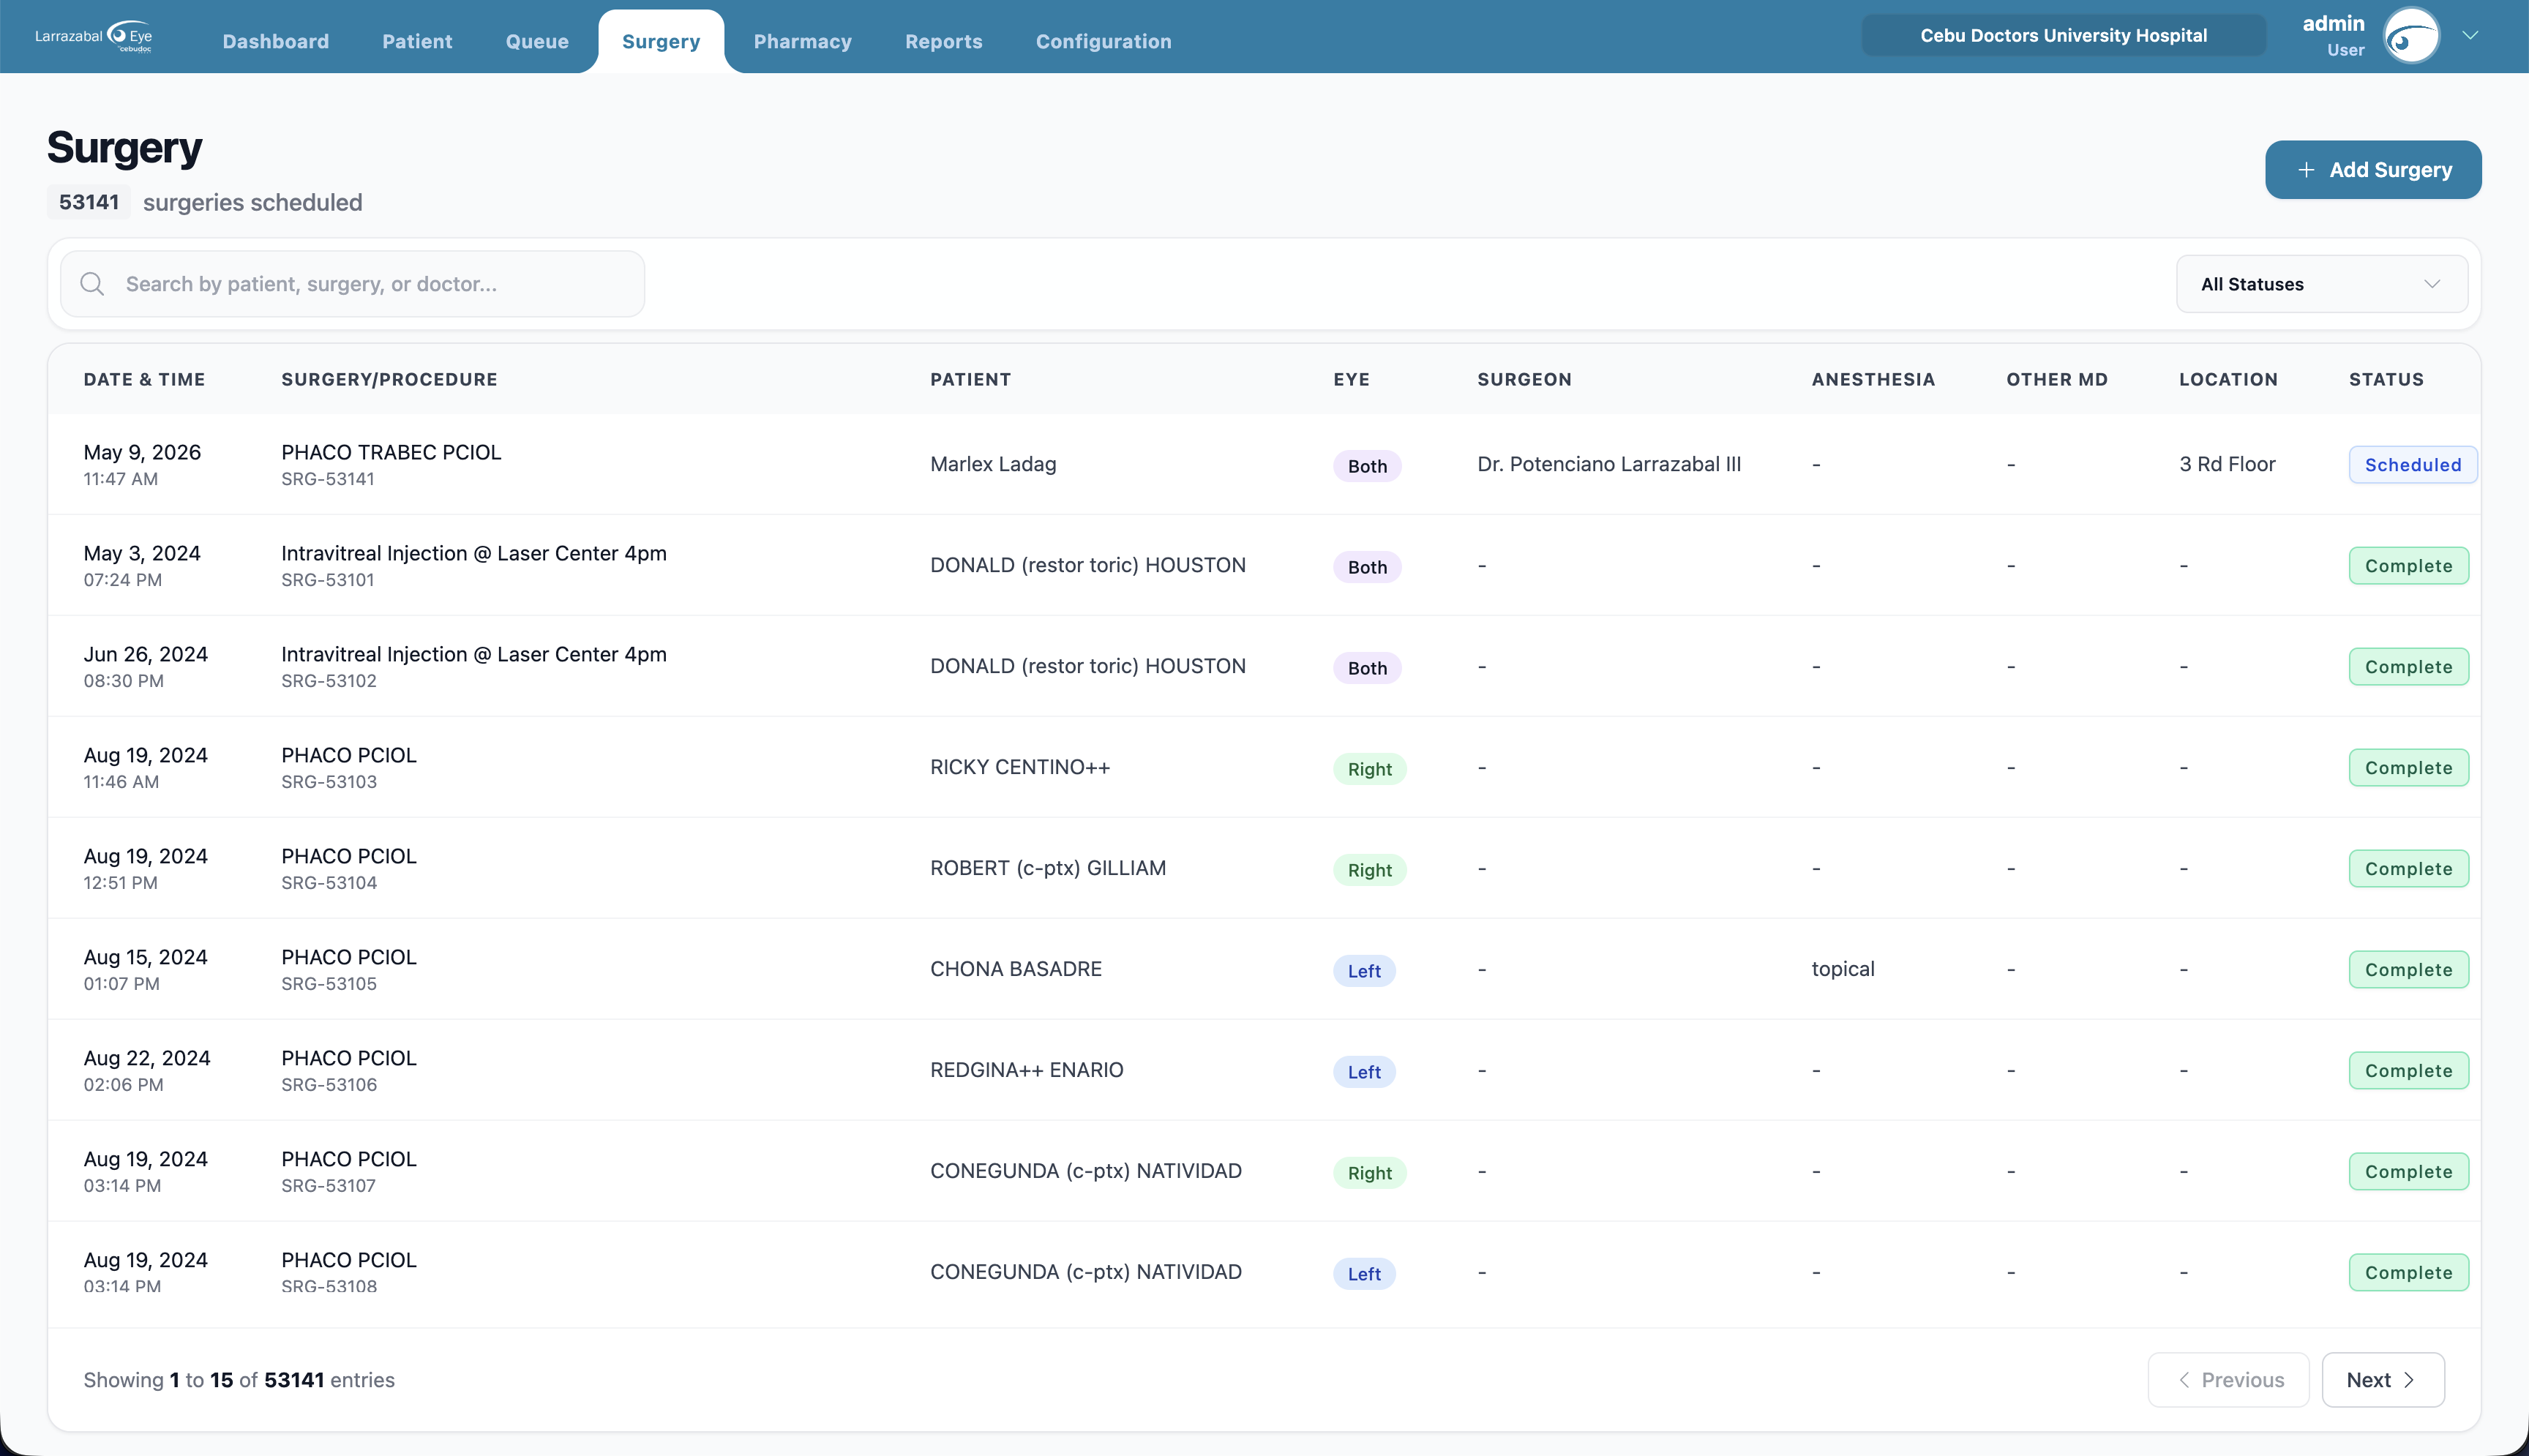
| Column | Notes |
|---|---|
| Date & Time | When the surgery is scheduled. |
| Surgery / Procedure | The procedure name, with a reference number (SRG-###). |
| Patient | The patient's name. |
| Eye | OD (right), OS (left), or OU (both) — color-coded. |
| Surgeon | The operating doctor, with the Other MD (assistant) stacked beneath the surgeon's name when present. |
| Anesthesia | The anesthesia used (e.g. Local, Topical, or a doctor's name). |
| Location | Where the surgery takes place. |
| Status | Scheduled, Completed, Cancelled, etc. |
| Actions | View (eye), Edit (pencil), and Delete (trash). |
Use the search box to find a surgery by patient, procedure, or doctor, and the status filter to show only certain statuses. The table scrolls vertically when there are many rows. Move between pages with the pagination controls.
Click the eye icon (or open the same surgery from the Dashboard upcoming list / calendar) to open the Surgery Details modal — the full schedule, both eyes' IOL details, and the notes recorded on the surgery.
Booking a surgery
Click Add Surgery. The Add Surgery form opens.
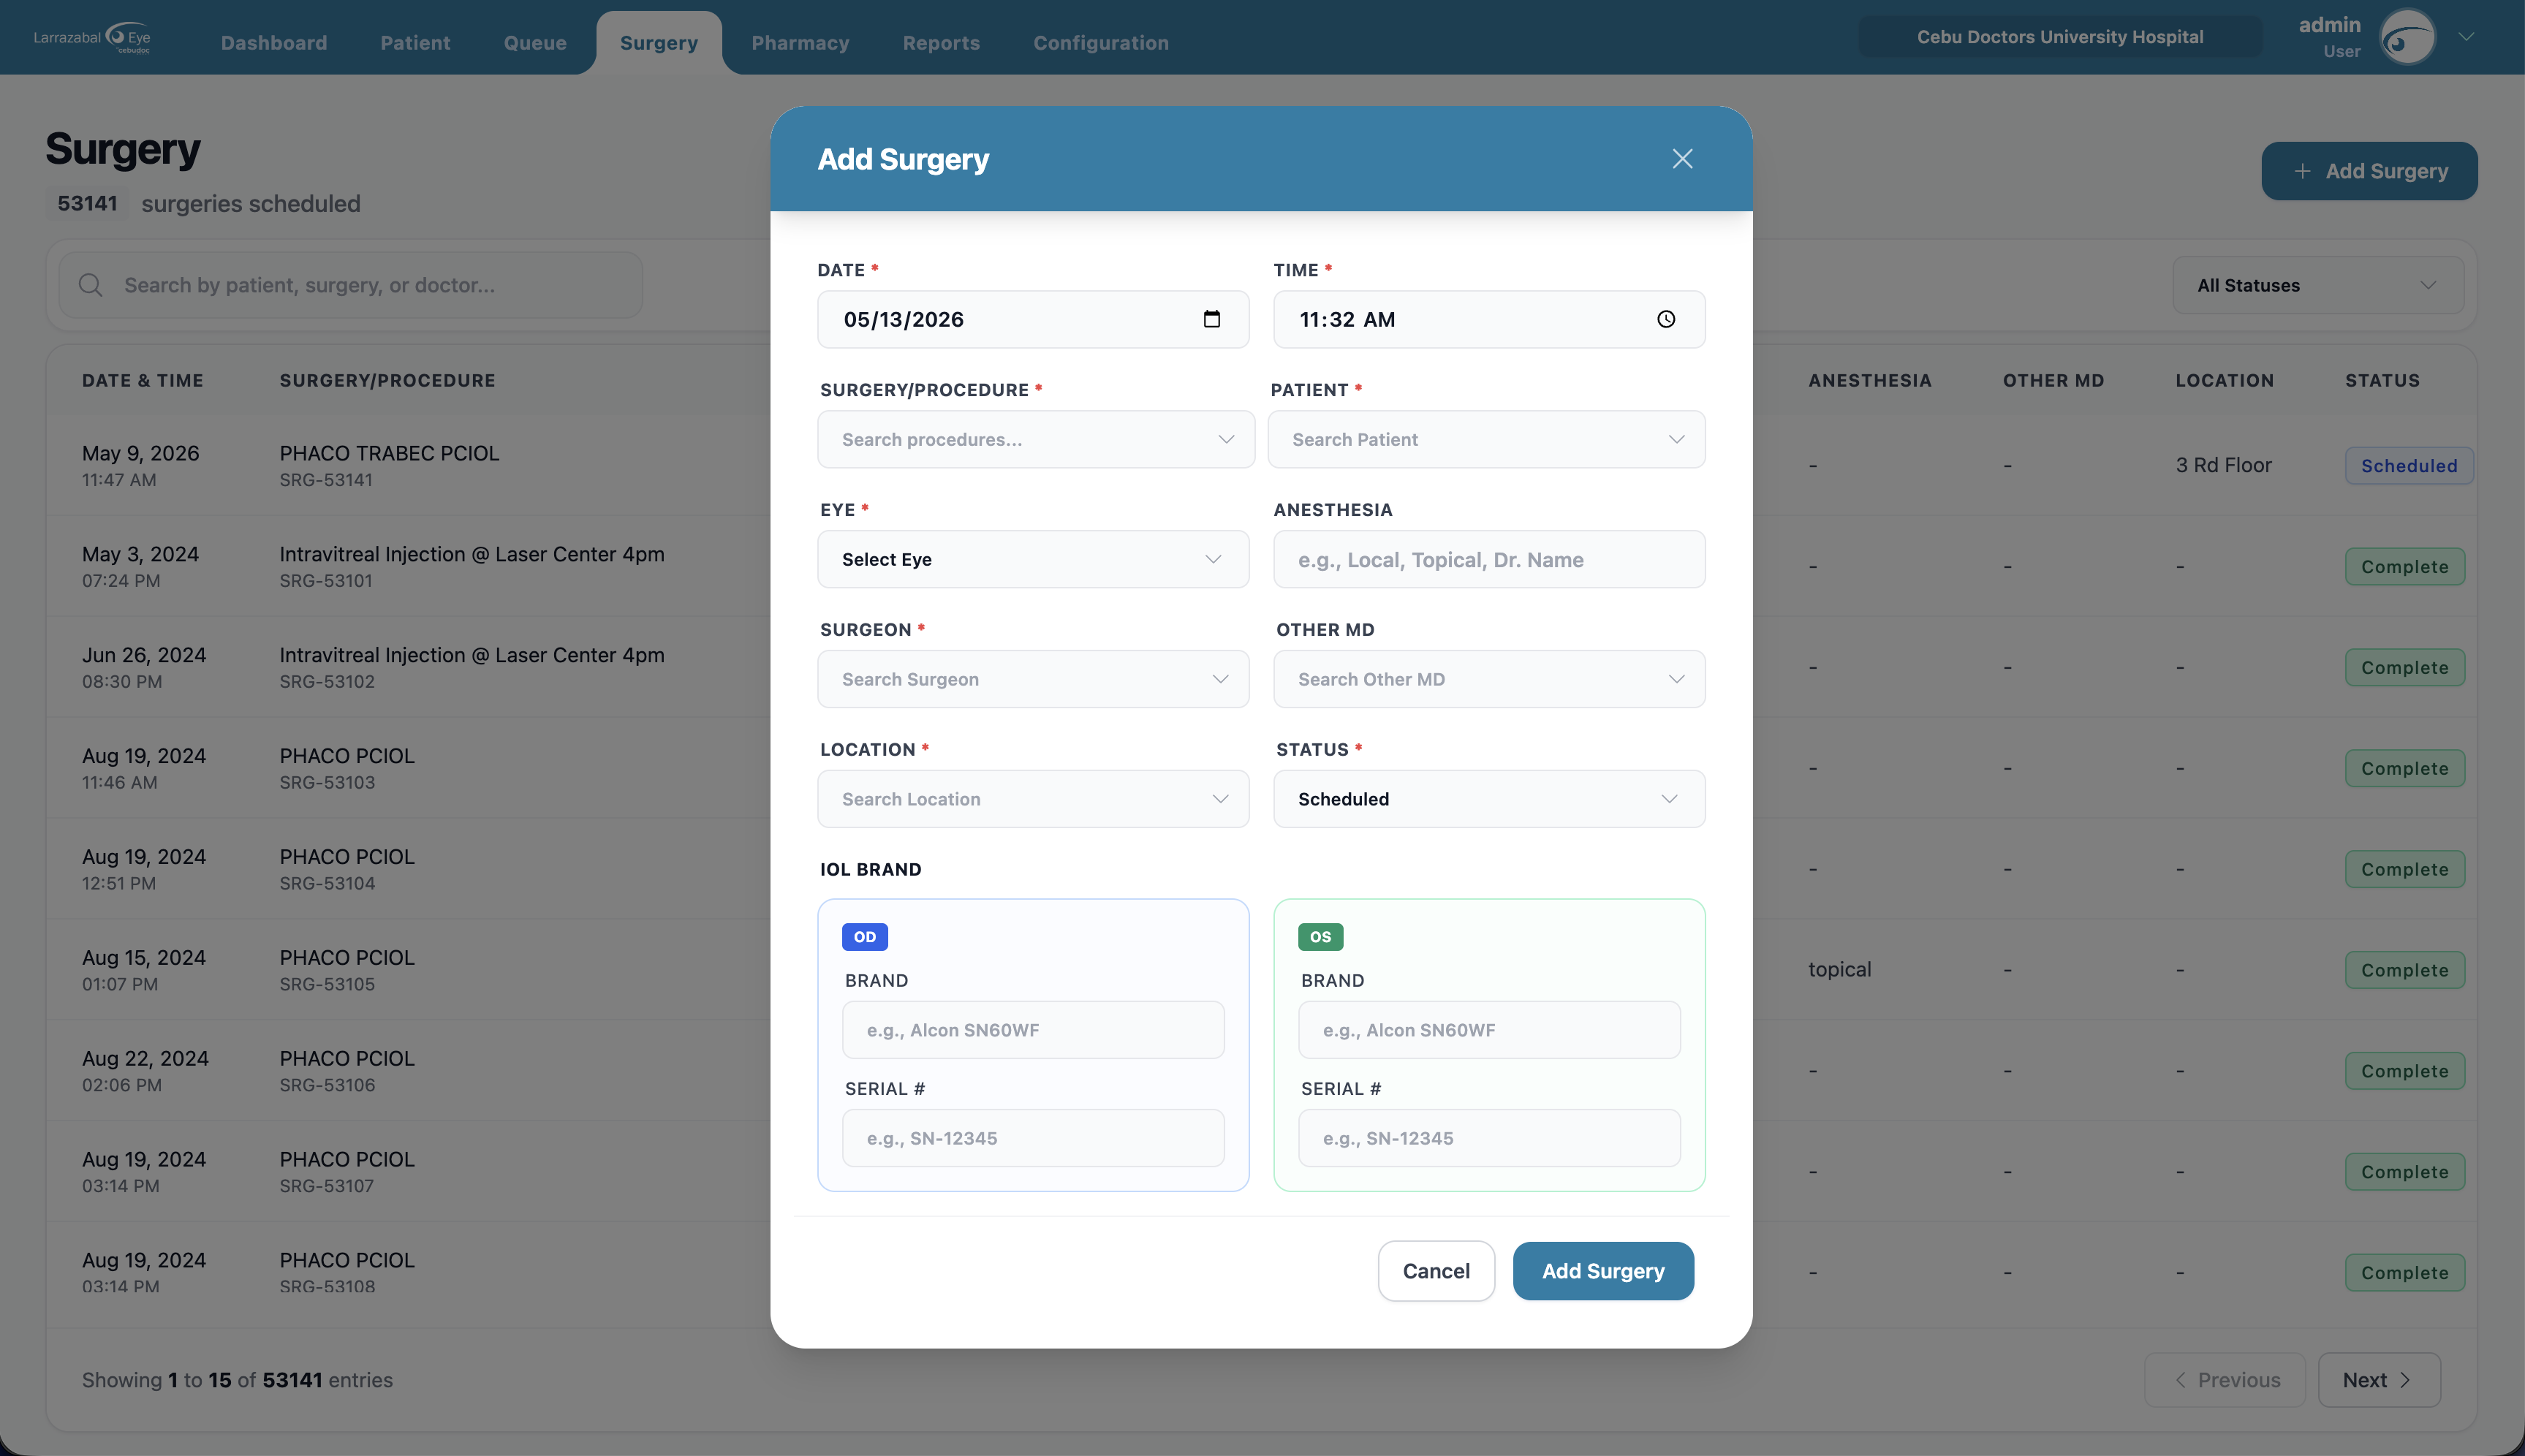
Fill in:
- Date and Time.
- Surgery / Procedure — start typing to search the procedure list.
- Patient — start typing to search; patients appear as "Lastname, Firstname".
- Eye — OD (Right), OS (Left), or OU (Both).
- Anesthesia — free text (for example "Local", "Topical", or a doctor's name).
- Surgeon — search by name.
- Other MD — an assisting physician (optional).
- Location — search the location list. (Locations are set up per branch in Configuration.)
- Status — defaults to "scheduled".
IOL details — two cards, OD (right eye) and OS (left eye). For whichever eye applies, enter the Brand (e.g. "Alcon SN60WF") and Serial # (e.g. "SN-12345").
Notes — a free-text box below the IOL cards for any pre-op notes, instructions for the OR team, or other context.
Click Add Surgery.
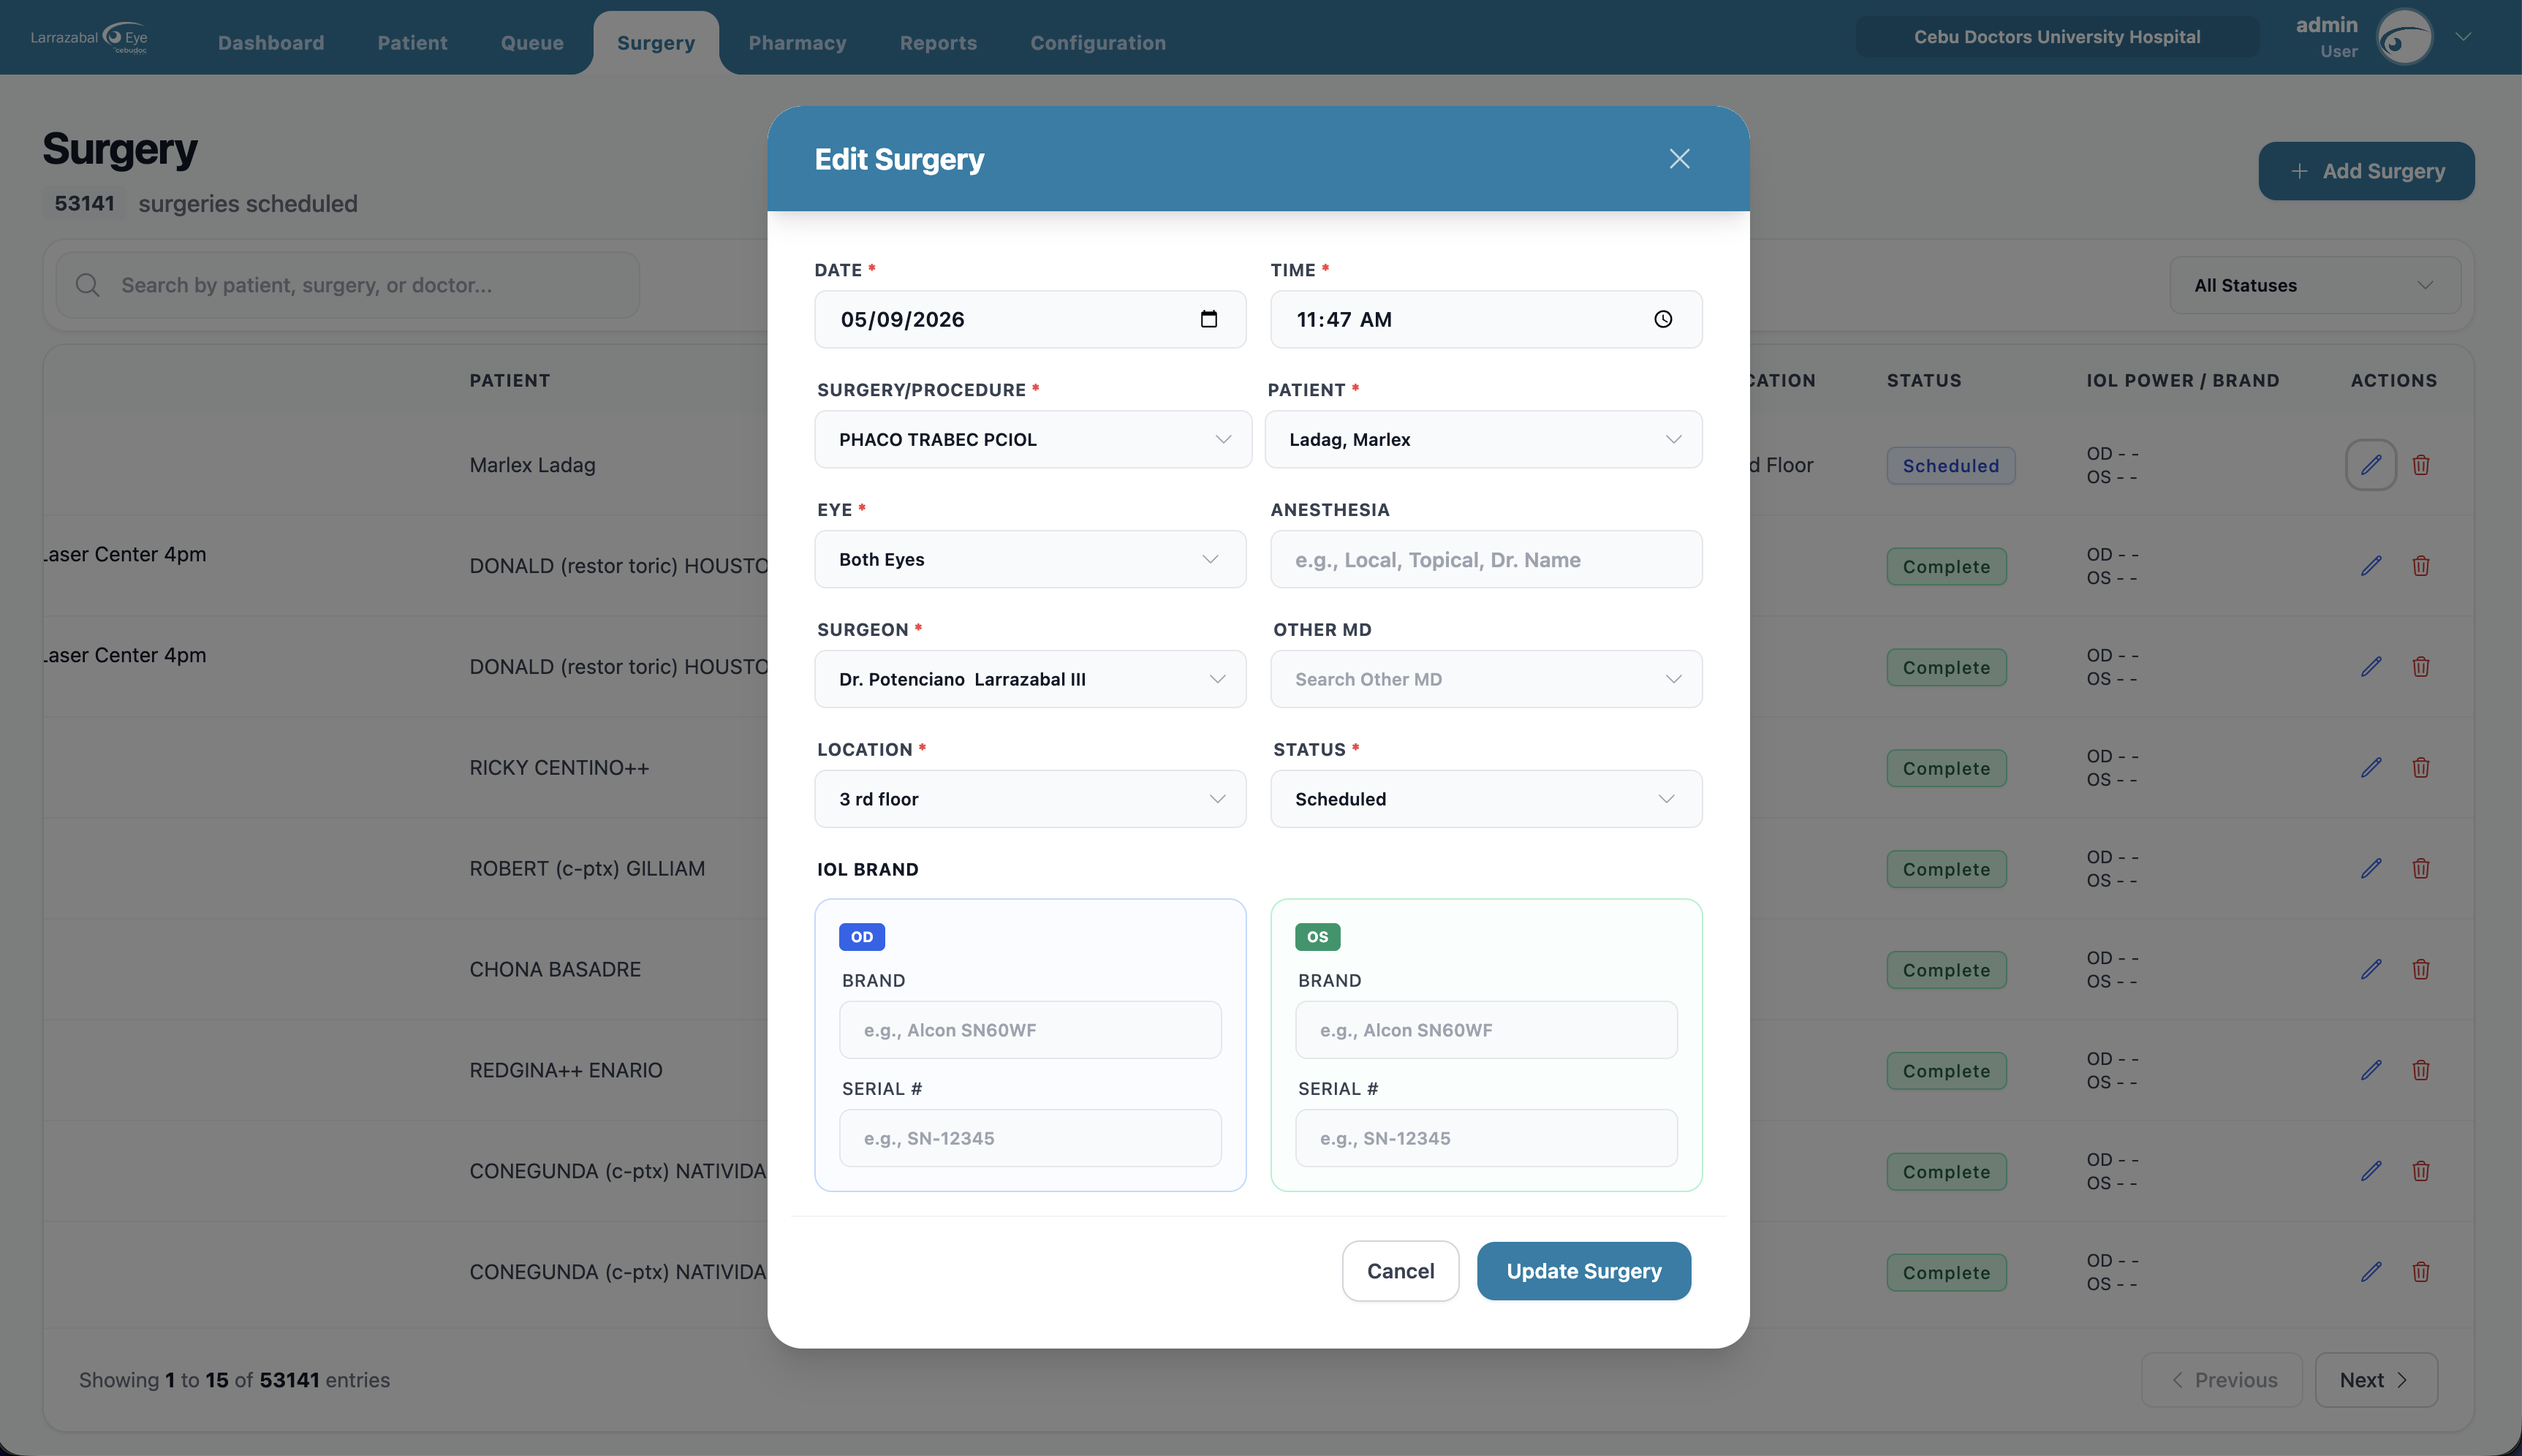
Editing a surgery
Click the pencil icon on the surgery's row. The same form opens as Edit Surgery with everything filled in. Make changes and click Update Surgery.
Deleting a surgery
Click the trash icon on the row. Confirm in the dialog ("Delete Surgery — Are you sure…"). A toast confirms "Surgery schedule deleted successfully".