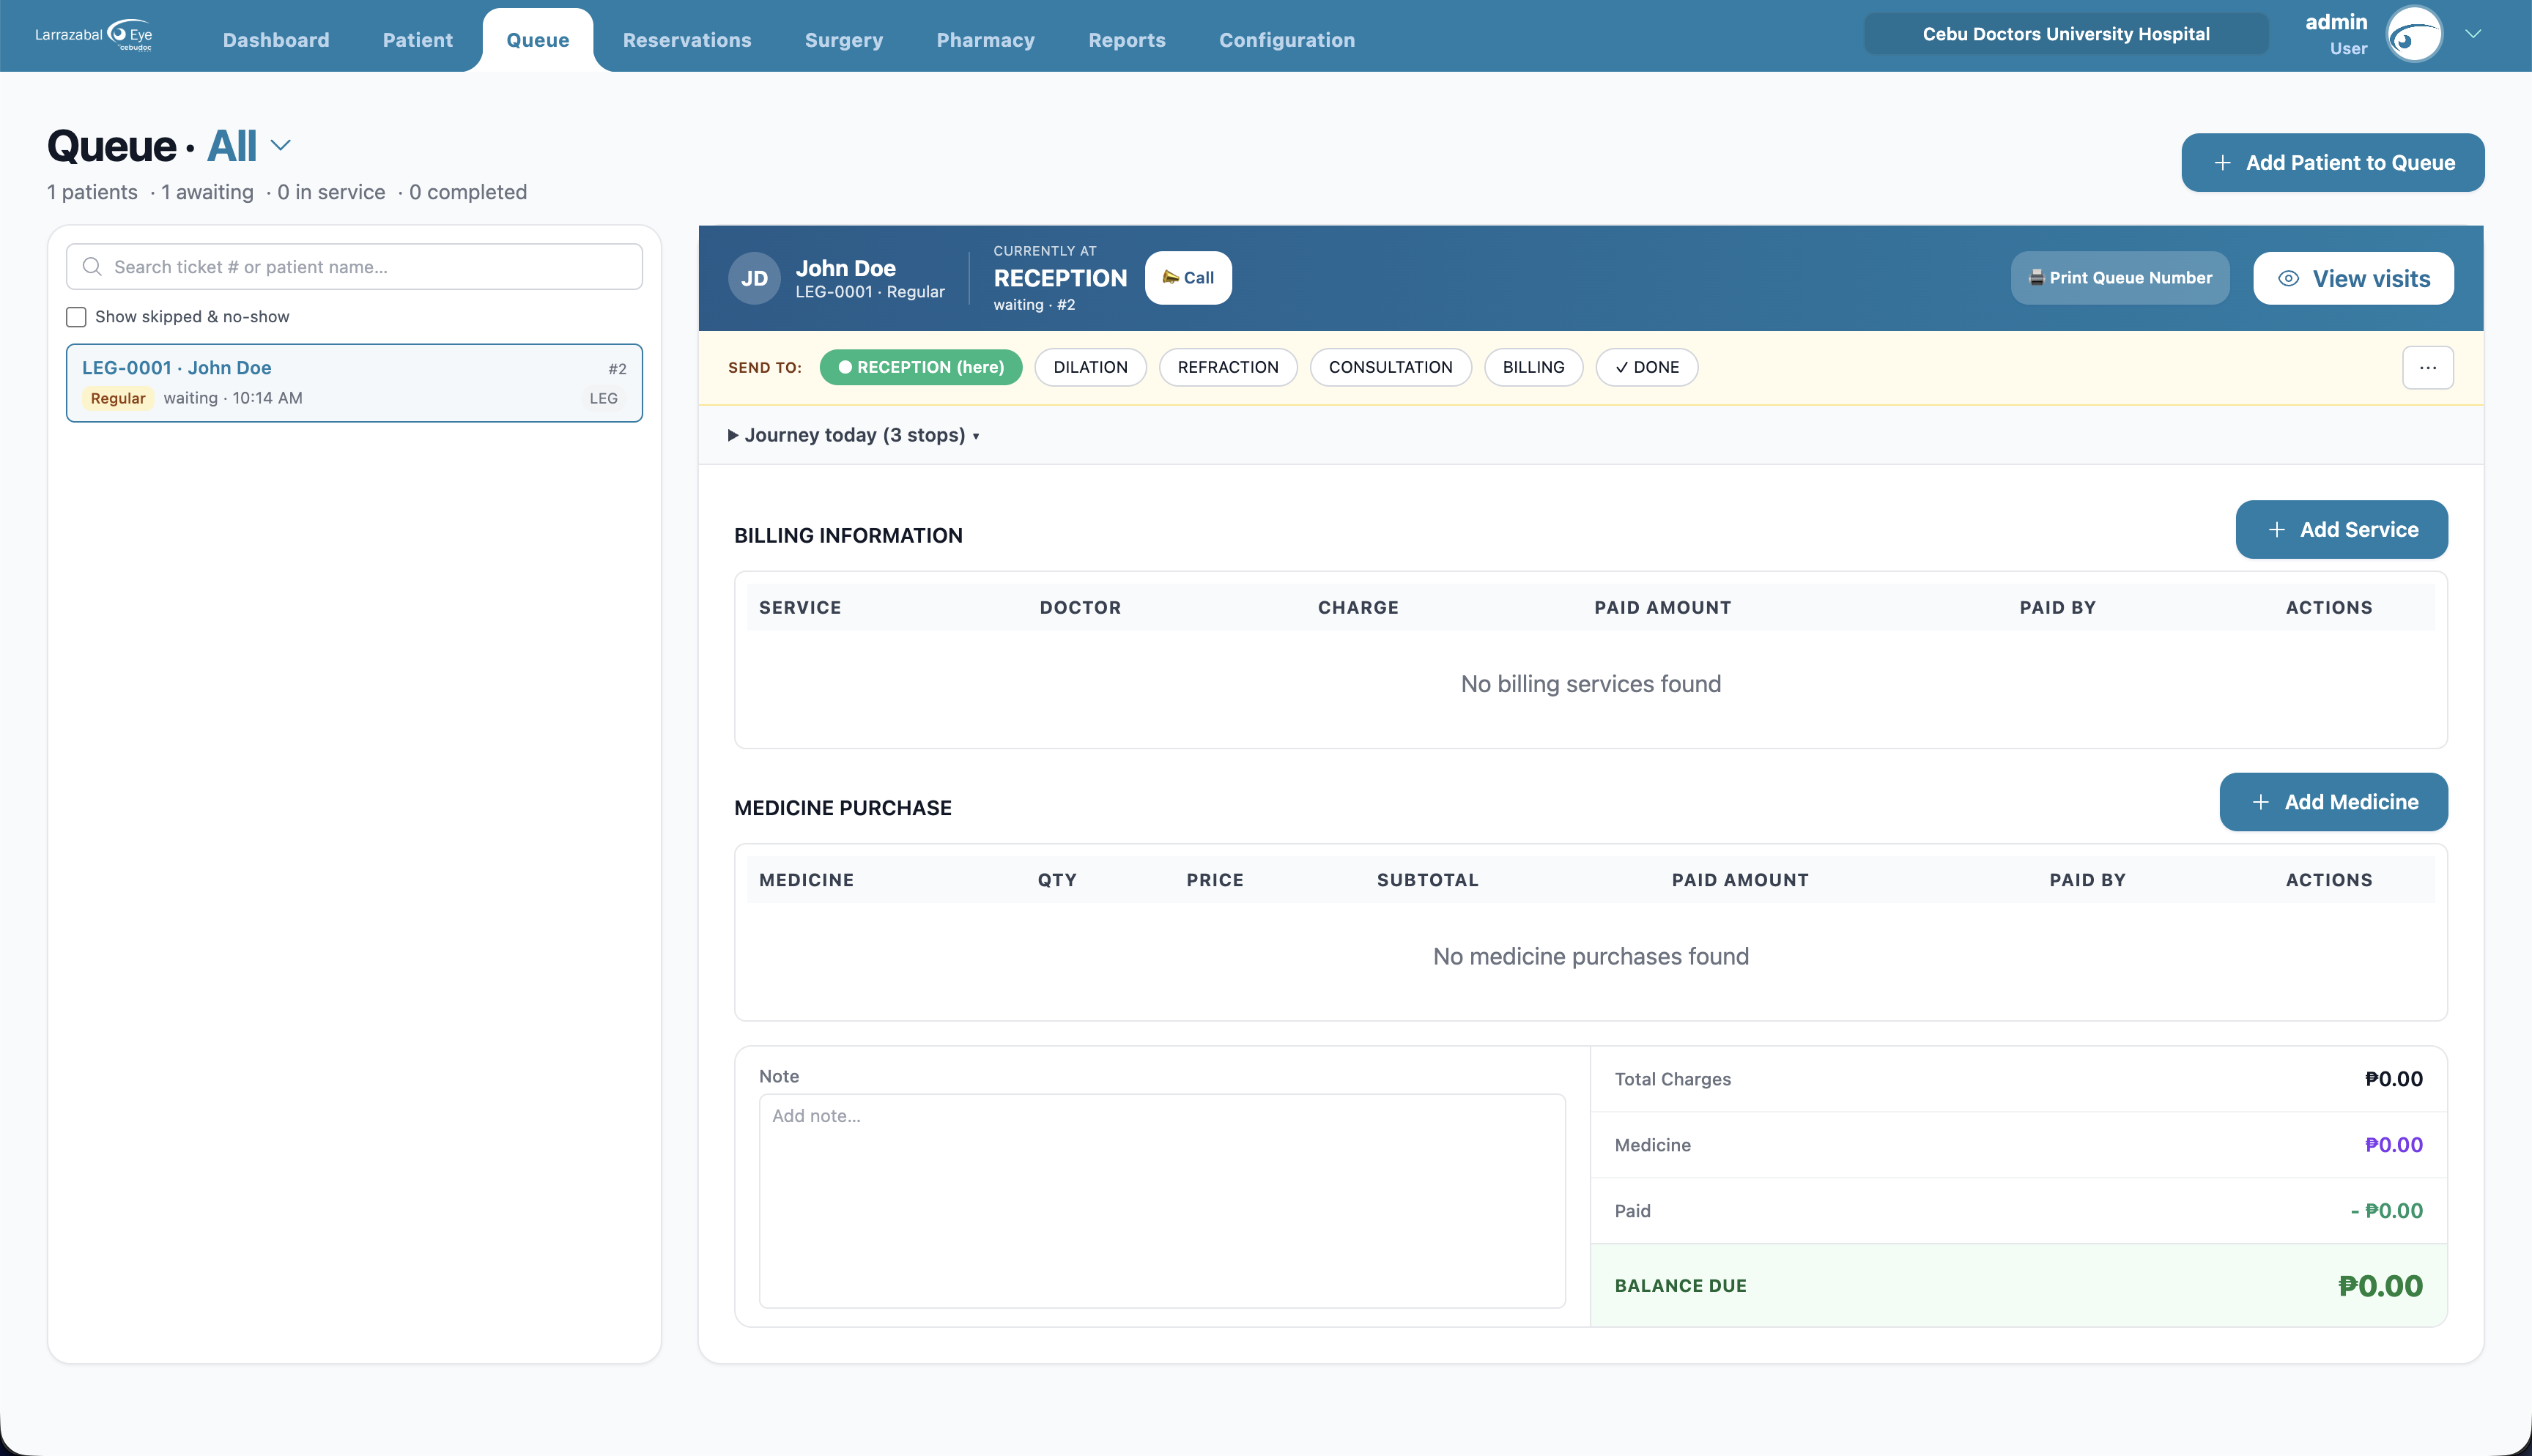
Queue
The Queue page runs the day's patient flow. A patient is added to a service (a workflow such as "Reception"), gets a ticket, and moves through that service's stages (for example Reception → Screening → Doctor → Pharmacy) until they reach the final (terminal) stage.
Choosing a service
The page title reads Queue · Service name (or Queue · All when you're viewing every service at once). Click the service name to open the picker:

The picker lists All (combines tickets from every service — handy at reception for a clinic-wide picture) plus each service with its current count.
The line under the title summarizes the selected service:
1 patients · 1 awaiting · 0 in service · 0 completed
The page header has one button at the top right — + Add Patient to Queue. The print and visits actions are on the selected patient's panel (see below).
The queue list (left side)
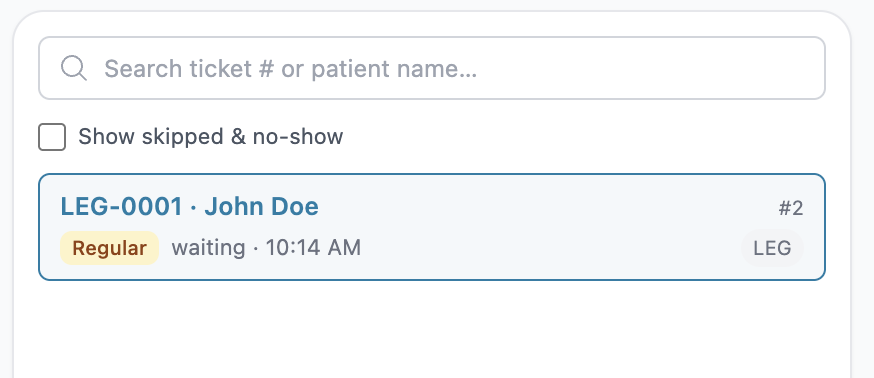
- Search box — placeholder "Search ticket # or patient name…".
- Show skipped & no-show checkbox — off by default. Tickets marked No-show or Skipped are hidden from the list and the counts until you tick this.
- Below that, patients are grouped by stage. Each group header shows the stage name and a count, e.g. "RECEPTION · 5".
- Each ticket card shows: the ticket number and patient name (e.g. LEG-0001 · John Doe), a priority badge (Emergency, PWD, Senior, or Regular), the status and time (e.g. waiting · 10:14 AM), the position number (top-right, e.g. #2), and the service code beneath it (e.g. LEG).
- Click a card to select the patient and load their details on the right.
Adding a patient to the queue
Click Add Patient to Queue. The dialog opens on the Reservations tab.
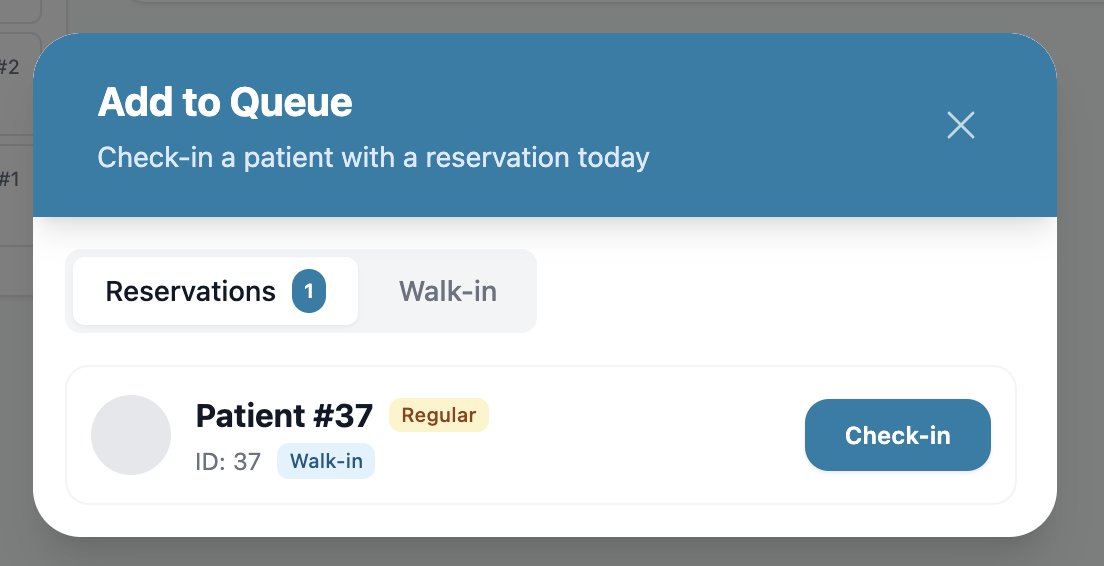
Reservations tab — today's pending reservations are listed with the patient's name, ID, priority, and channel. Click Check-in on any row to turn that reservation into a queue ticket in the current service immediately. A toast confirms "Patient checked in." For full reservation management see Reservations.
Walk-in tab — for patients without a reservation:
- Search for the registered patient and click them.
- If the service has more than one option, pick the Service. The form tells you which stage the patient will enter.
- Choose a Priority (Emergency, PWD, Senior, or Regular — Regular by default).
- Add Remarks if needed.
- Click the submit button.
The patient appears in the queue at the service's first stage.
Use Back to Search to pick a different patient, or Cancel to close.
Working a patient (right side)
Select a patient to see their panel. If nothing is selected it says "No Patient Selected".
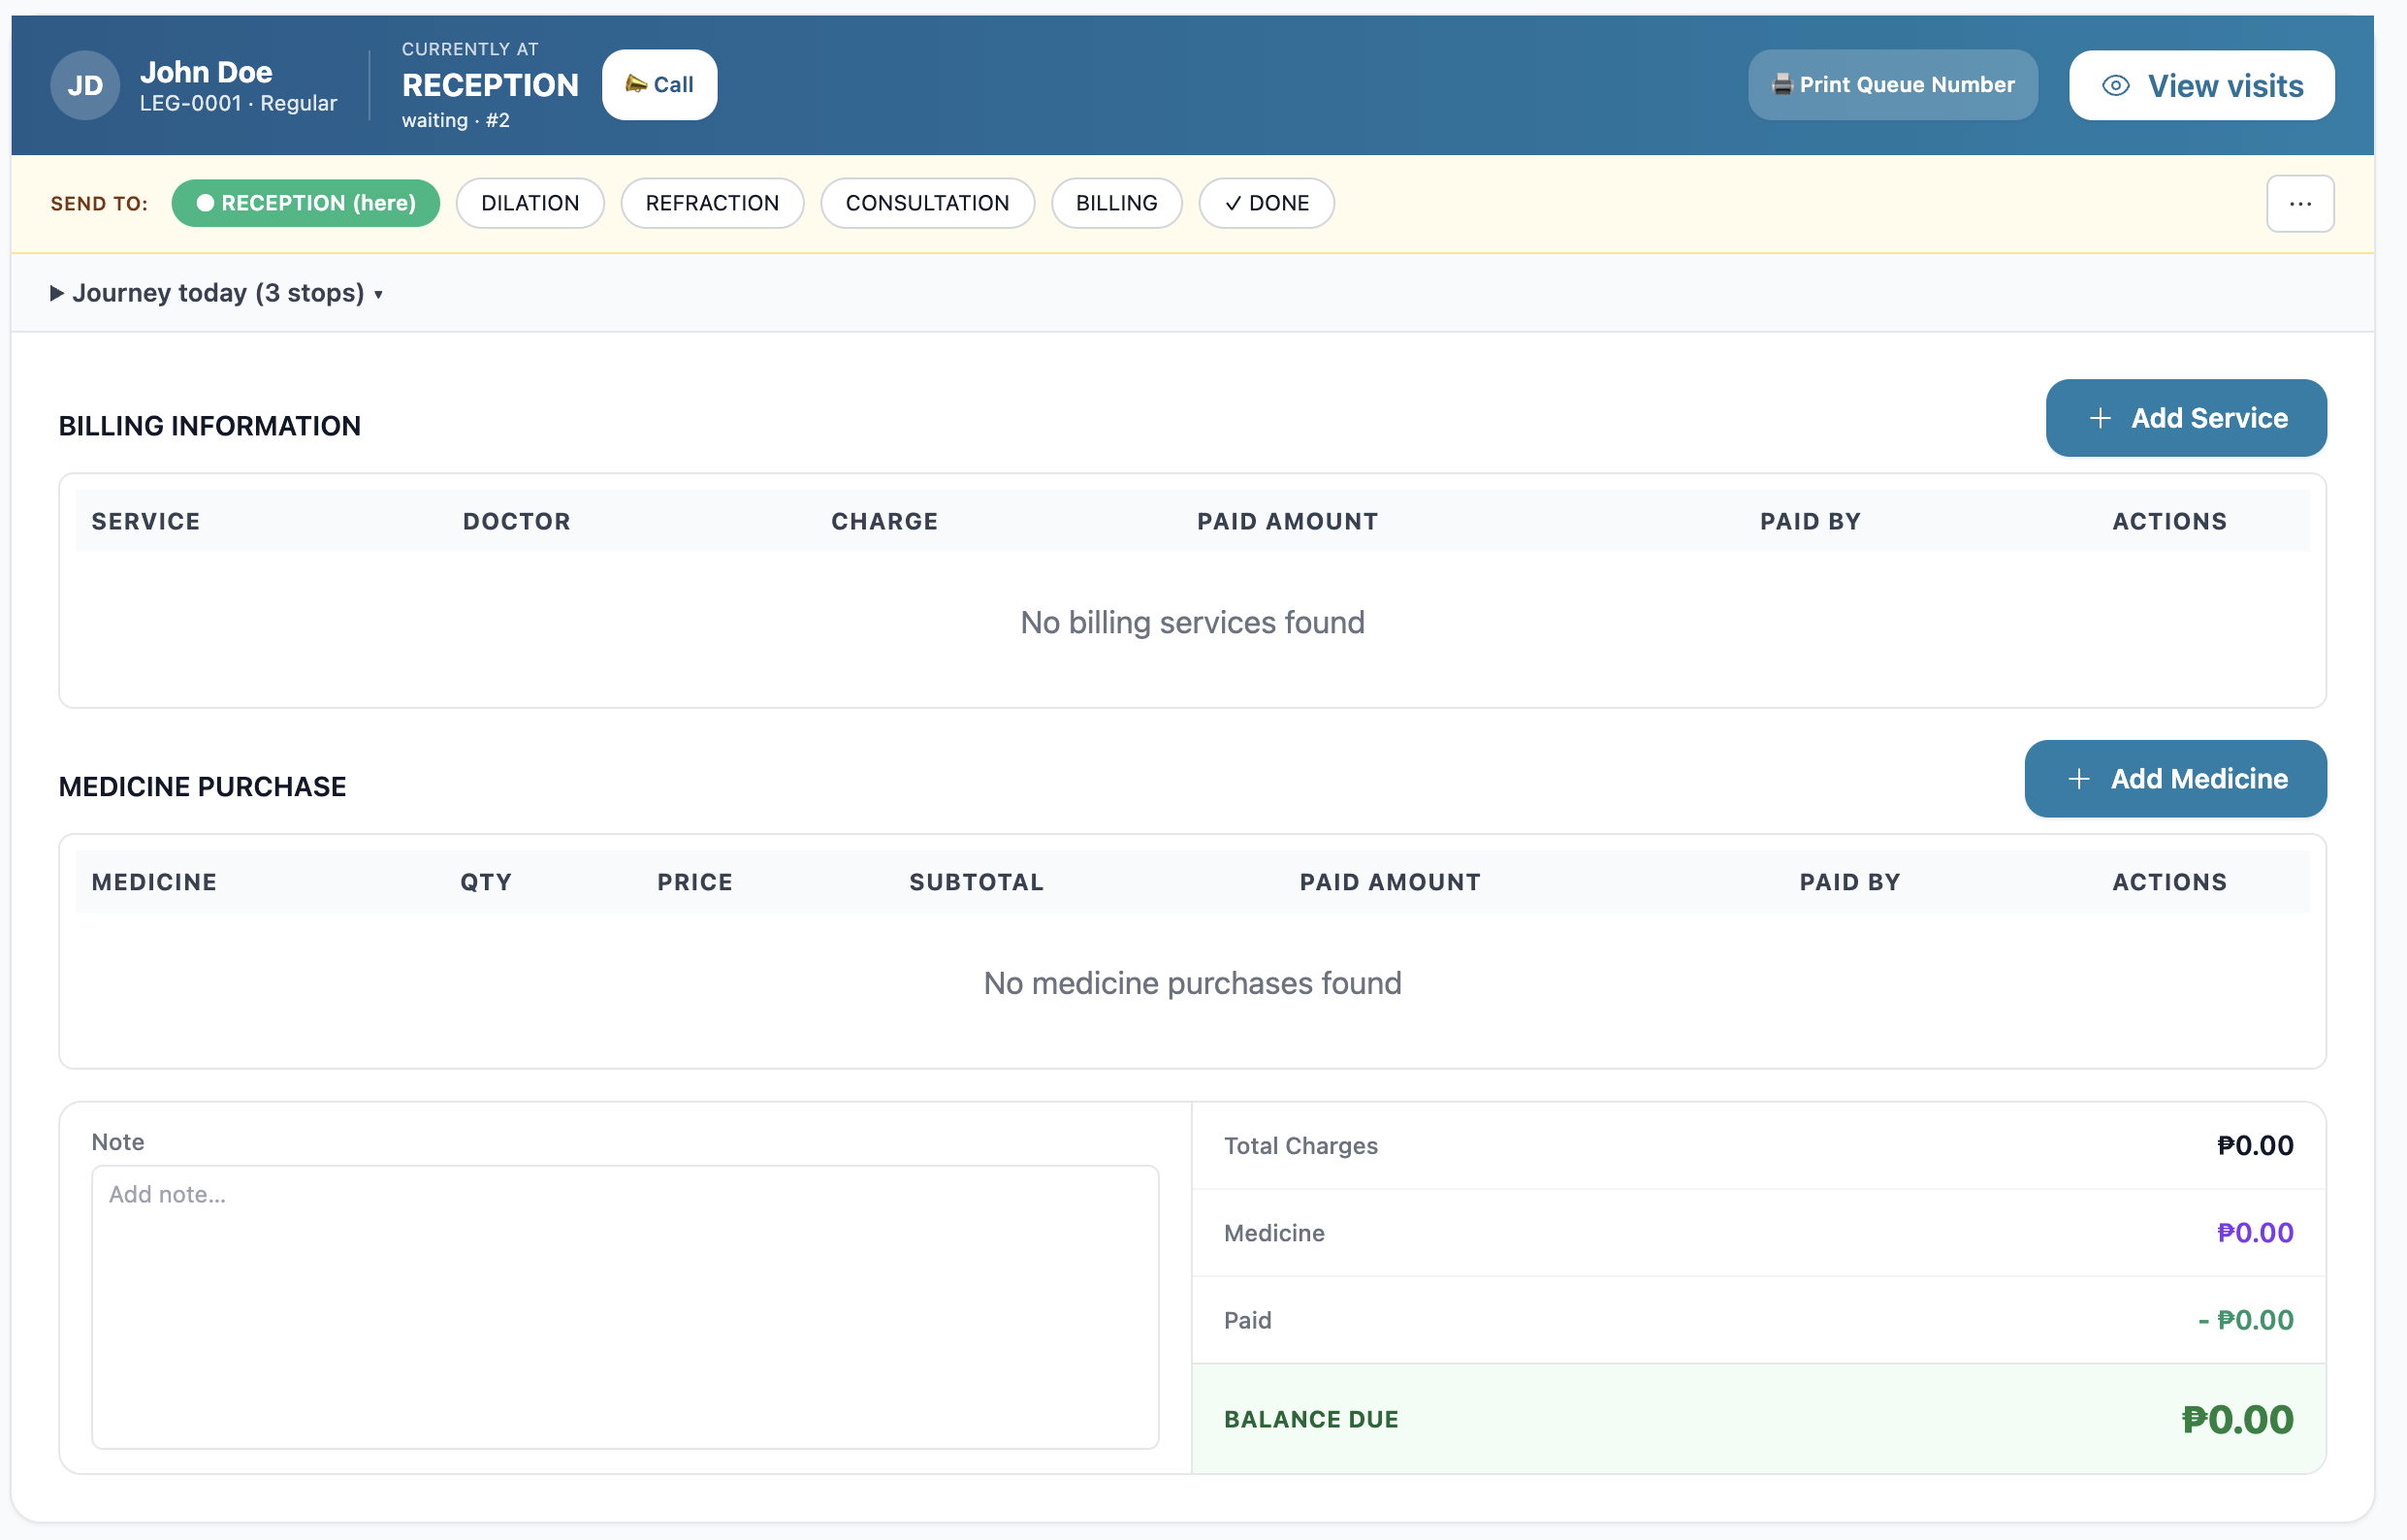
At the top of the panel: the patient's photo, name, ticket number (e.g. "LEG-0001 · Regular"), a Currently at label with the stage name, and their status.
- Call — appears when the patient is waiting. Click it to call them.
- Serve — appears once they've been called. Click it to start serving.
- Print Queue Number — prints the patient's 80 mm thermal queue slip (patient name, ticket number, stage, priority; the branch name is used as the slip title).
- View visits — opens the patient's full medical record.
Moving the patient through stages
A bar labeled Send to: lists every stage of the service as colored pills, with the current stage marked "(here)" and the final stage marked "✓ DONE". Click any other pill to move the patient there. To the right of the bar:
- The ⋯ (more) menu offers Skip this stage, Mark no-show, and Transfer to other service… (move the patient into a different workflow — you'll pick the destination service).
- Send the patient to the ✓ DONE pill to finish the visit when they're at the final stage.
Journey today
A collapsible Journey today (N stops) section under the Send-to bar shows everywhere the patient has been today: each stage, the status changes, timestamps, and how long they spent at each step.
Billing on the queue
The Billing Information section is where you record what the patient owes for this visit.

Services
- Click + Add Service. The table has columns Service, Doctor, Charge, Paid Amount, Paid By, Actions.
- In the new row, pick the Service (searchable), the Doctor who delivered it (searchable), enter the Charge, the Paid Amount, and Paid By (the patient or an insurer/payer).
- Click the save (bookmark) icon on the row. Use the pencil icon to edit a row later, or the trash icon to remove it.
The Doctor column lets the clinic attribute revenue to the right doctor — it powers the Transaction by Doctor report under Reports.
Medicines
The Medicine Purchase table works the same way: click + Add Medicine, choose the Medicine, enter Qty and Price (the Subtotal is worked out for you), then Paid Amount and Paid By. Save, edit, or delete each row with the row icons.
Totals and notes
To the right of the tables you'll see the running totals — Total Charges, Medicine, Paid (deducted), and the remaining Balance Due. There's also a Note box on the left for any notes about the visit.
Some actions (adding to the queue, adding bills, changing stages, viewing the patient panel) are only available if your account has the matching permission (
queue-transactions.*,queue-stages.*). If a button isn't there, you don't have that permission.