Legacy Import
The Legacy Import screen is where you bring historical data from the old clinic system into CPR. It accepts CSV exports from the legacy Larrazabal system, processes them through a background job queue, and writes the results into the live database.
Before you start: Imports write real data into the production database. Rows that succeed cannot be automatically reversed. Read through this page fully, verify your Data Mappings are correct, and make sure you have a database backup before running any import. Only run imports when you know what you are doing.
Required permission: admin.access. All Legacy Import screens are accessible to anyone with admin panel access — no additional permission is required beyond that.
Getting here
Open Admin → Legacy Import in the sidebar (under the Data Migration group). The page heading reads "Legacy Data Import" with the subtitle "Import data from the old clinic system CSV exports."
The related Import History and Data Mappings screens live in the same sidebar group rather than in buttons on this page — open them from the sidebar (or directly via their URLs /admin/legacy-import/history and /admin/legacy-import/mappings).
Batches
Every import run must belong to a batch. A batch groups all the imports for one data set (for example, one clinic branch's full history) so you can track them together in the History screens.
Selecting a batch
The Import Batch section at the top of the page has a dropdown labelled "Import Batch". Select an existing batch from the list. When a batch is selected, its associated branch name appears next to the dropdown.
If you have not yet created a batch, or need a new one for a fresh data set, use the form below the dropdown.
Creating a new batch
In the row labelled "New batch", fill in:
- Batch name — a descriptive name, for example
LarrazabalorBranch 2 Historical. - Branch — select the clinic branch this data belongs to from the dropdown.
Click + Create. The button shows "Creating…" while the request is in flight. Once the batch is created it is automatically selected in the dropdown above.
You must select a batch before you can import any CSV file. An alert reading "Select or create a batch before importing" appears if you try to proceed without one. Until a batch is selected, the import status panels described below remain empty — the page only shows the running/completed status for the currently selected batch.
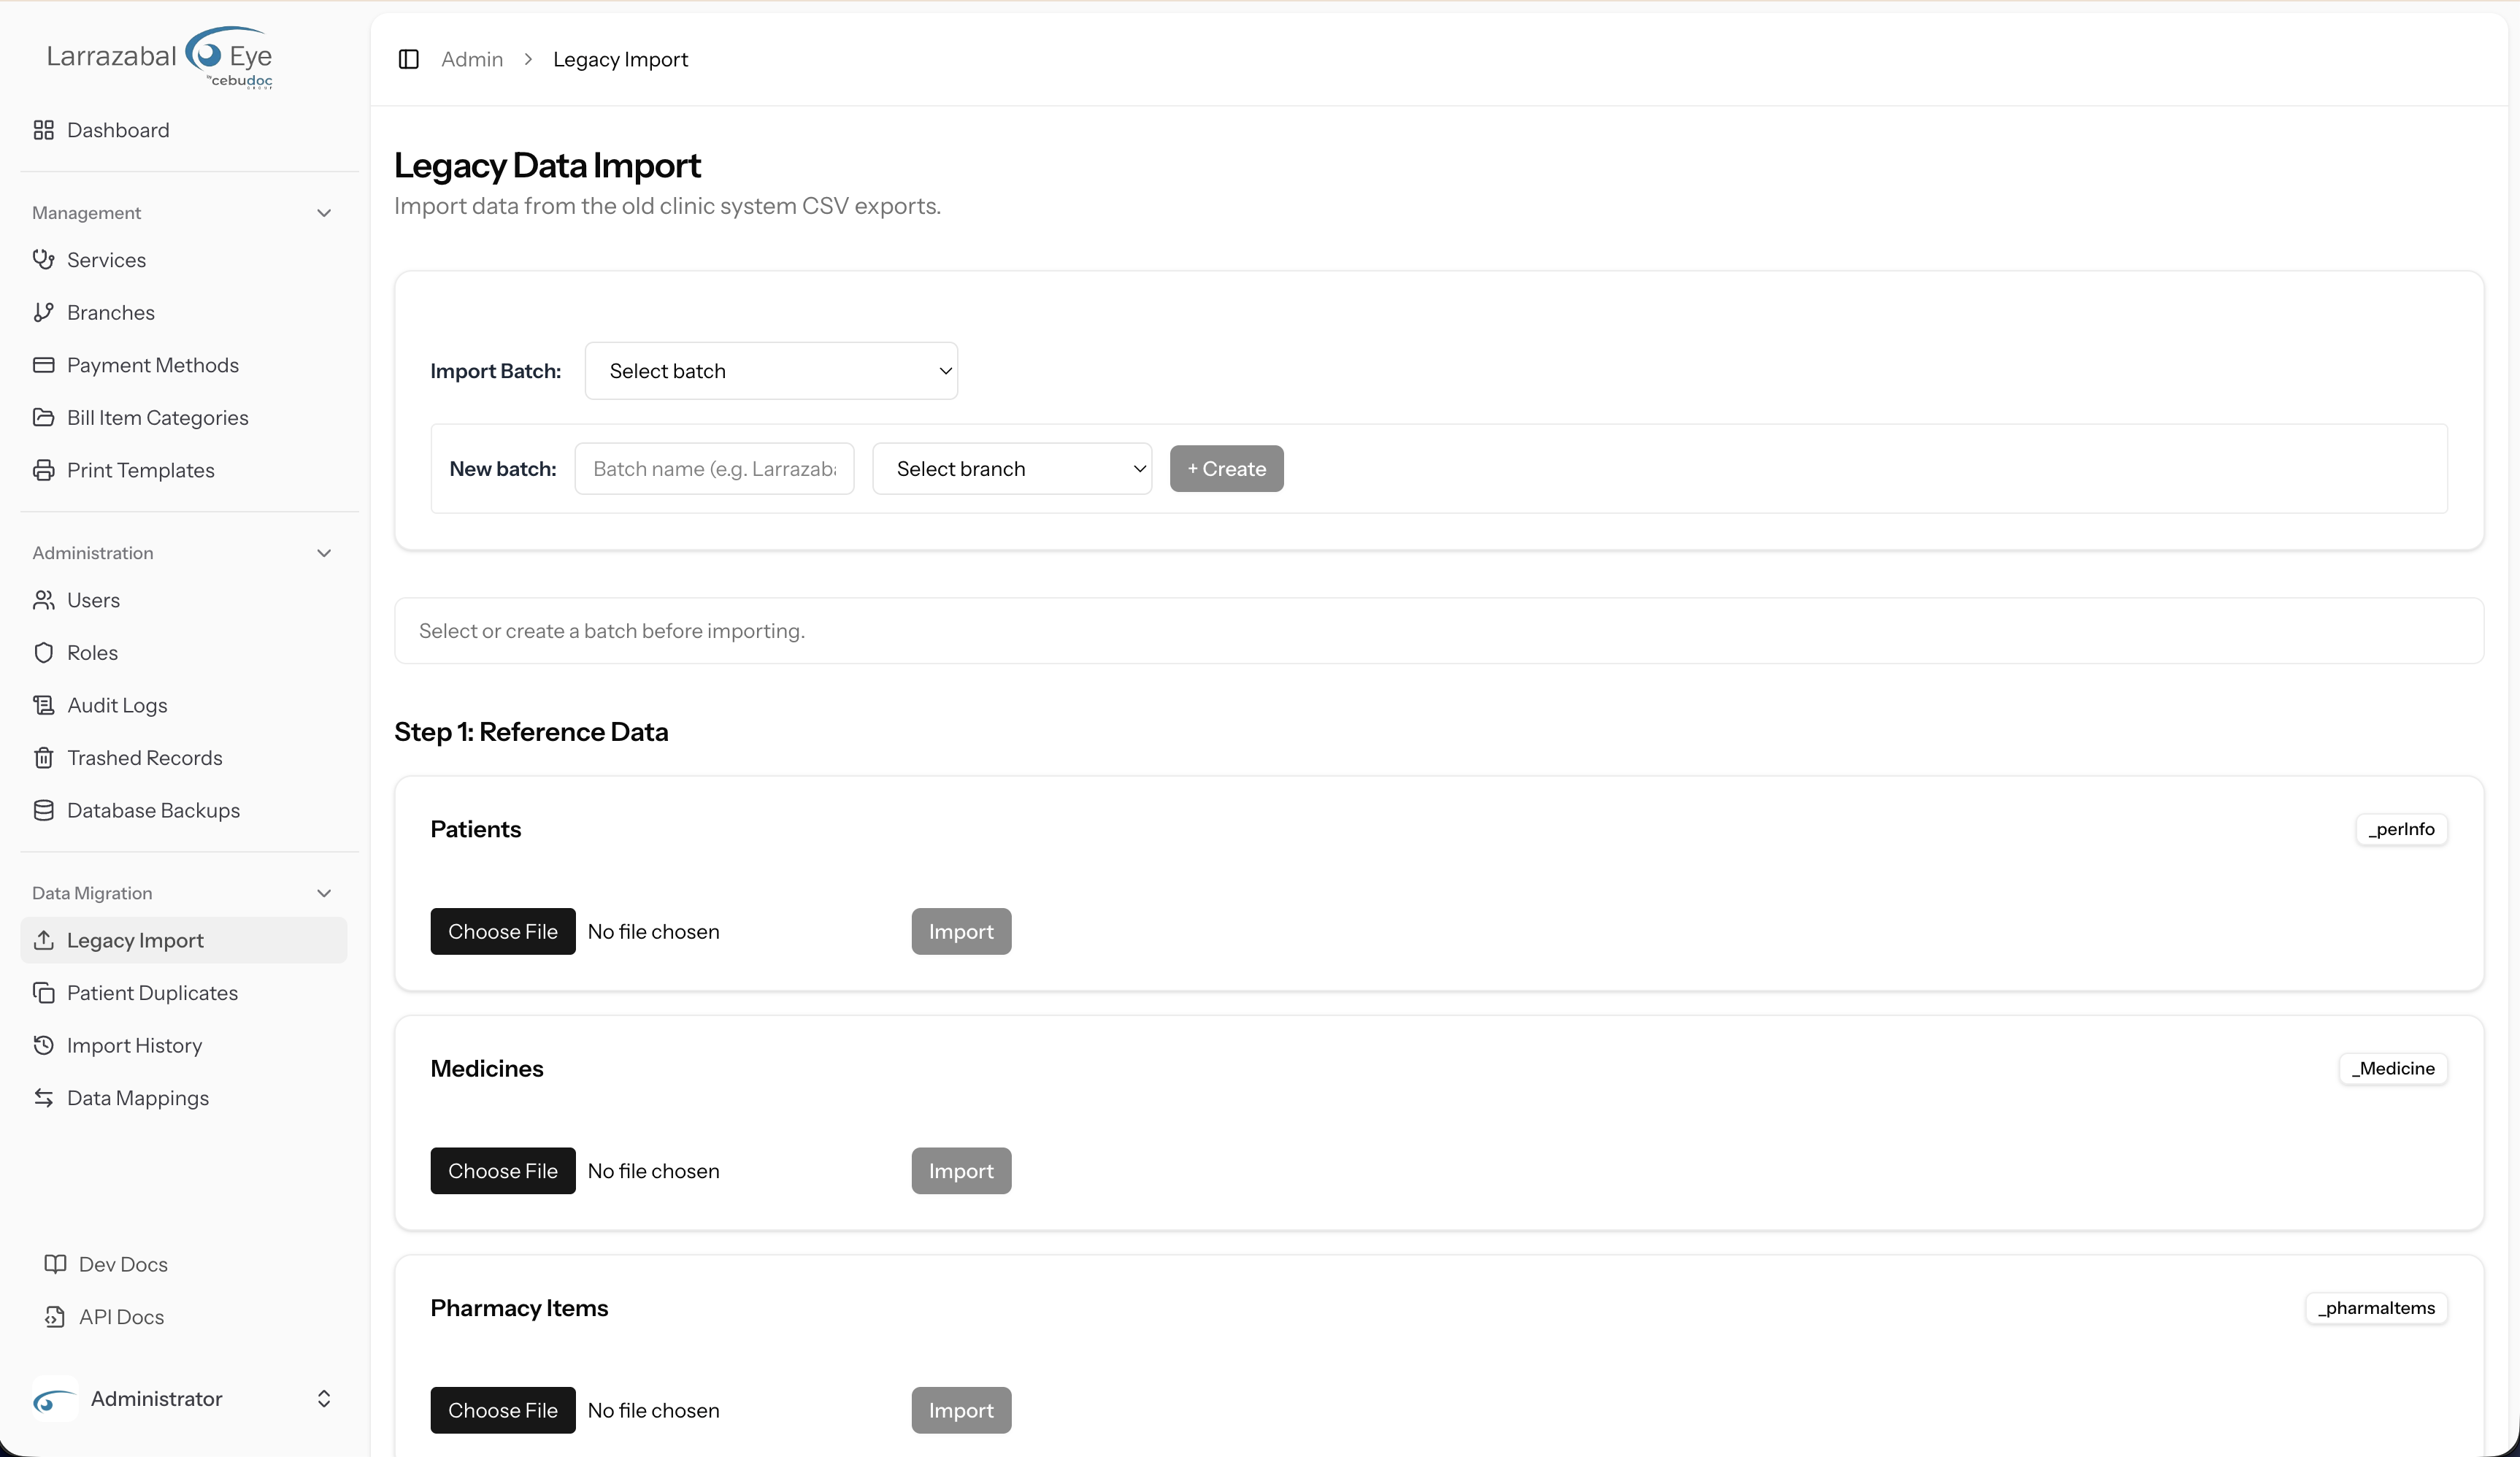
Step 1: Reference Data
The first group of import cards is labelled Step 1: Reference Data. These are data types that apply across all branches and must be imported before Step 2. The cards are:
| Card label | Expected CSV filename hint |
|---|---|
| Patients | _perInfo |
| Medicines | _Medicine |
| Pharmacy Items | _pharmaItems |
| Surgery Types | _SurgeryType |
| Insurance / Responsible | _Responsible |
Each card shows a badge with the CSV filename hint so you can identify the correct export file from the legacy system.
Importing a CSV file
- In the card for the data type you want to import, click the file picker and choose the CSV (or
.txt) file. - After you select a file, a Preview appears below the file picker, showing the total row count, column count, and the first few rows of data. Check this to confirm you have the right file.
- Click Import. The button shows "Uploading…" while the file is sent to the server.
Once the file is accepted, a status panel appears inside the card showing:
- File name — the name of the uploaded file.
- Status badge — one of
pending,processing,completed, orfailed. - A progress bar with a row count (
x / y rows — z%) while the job is pending or processing. - After completion: a count of imported rows (in green) and failed rows (in red), if any.
The page polls the server every two seconds while any job is active, so the progress bar and status update automatically — you do not need to refresh.
Reading errors
If any rows fail, a Show N errors button appears inside the card (showing the failed-row count). Errors are not loaded by default — click the button to fetch them. A "Loading errors…" placeholder is shown briefly while the list is retrieved, after which the button label becomes Hide errors and the error list expands below.
Each error shows:
- The row number in the CSV (if available).
- A short reason describing why the row was rejected.
Click the ▶ caret on any error row to expand it and see the raw CSV data for that row, displayed as a small key/value table. The caret rotates to ▼ when expanded. This helps you identify data quality issues in the source file.
This lazy-load behaviour keeps the page responsive even when an import has thousands of failed rows.
Re-importing
Once an import reaches completed or failed status, a Re-import button appears. Use it to re-run the same import job — for example, after fixing mapping issues or correcting the source file. Clicking Re-import queues a new job and resumes polling.
Step 2: Branch-Specific Data
The second group of cards is labelled Step 2: Branch-Specific Data. These imports require:
- At least one patient to already be imported (i.e. the Patients card in Step 1 has completed successfully), and
- The selected batch has a branch assigned.
If either condition is not met, the Step 2 section is greyed out and an alert explains which requirement is missing ("Import patients first." or "Selected batch has no branch assigned.").
The Step 2 cards are:
| Card label | CSV hint |
|---|---|
| Bill Items | _bilItems |
| Complaints | _Complaint |
| Visual Acuity | _visAcuity |
| Refraction | _Refraction |
| Tonometry | _Tonometry |
| Gonioscopy | _Gonioscopy |
| Funduscopy | _Funduscopy |
| Amsler Grid | _Amsler |
| Slit Lamp | _SlitLamp |
| Exophthalmometry | _Hertels |
| Indirect Ophthalmoscopy | _indOpthal |
| Gross Examination | _Gross |
| EOM | _Eom |
| Radiology | _Radiology |
| Lacrimal Irrigation | _LacIrrig |
| Plans / Impressions | _Plan |
| Prescribed Medicines | _prescripMed |
| Surgery Records | _Surgery |
| Bills | _Bills |
| PRP | PRP |
The file-picker and Import workflow is identical to Step 1.
Patient Photos
The Patient Photos section (below the Step 1 cards) lets you import patient profile photos in bulk.
File naming requirement: Each photo filename (without the extension) must exactly match the patient's ref_no from the legacy system — for example 1.jpg, 42.png. Photos whose filename does not match any imported patient are skipped.
To upload photos:
- Click the file picker (accepts image files; you can select multiple at once).
- Click the Upload N photo(s) button (the button label updates with the count of selected files).
Photos are sent in batches of 20 files at a time. A progress bar shows how many have been sent. After completion, the result shows the number matched (in green) and not found (in red). Any individual errors are listed below.
A batch must be selected before you can upload photos.
Drawings
The Drawings section imports exam annotation drawings (BMP, PNG, or JPG files).
File naming requirement: Each filename must follow a strict format: a 3-letter prefix indicating the exam type, followed by a 6-digit zero-padded ref_no, followed by an 8-digit date in mmddyyyy format. For example: ams00029410302001.bmp.
The supported prefixes are:
| Prefix | Exam type |
|---|---|
ams | Amsler Grid |
eom | EOM |
gon | Gonioscopy |
ind | Indirect Ophthalmoscopy |
slt | Slit Lamp |
grs | Gross Examination |
BMP files are automatically converted to PNG on upload. Files that do not follow the naming format are skipped.
The upload workflow is the same as Patient Photos: select multiple files, click Upload N drawing(s), and a progress bar tracks the batches of 20.
Data Mappings
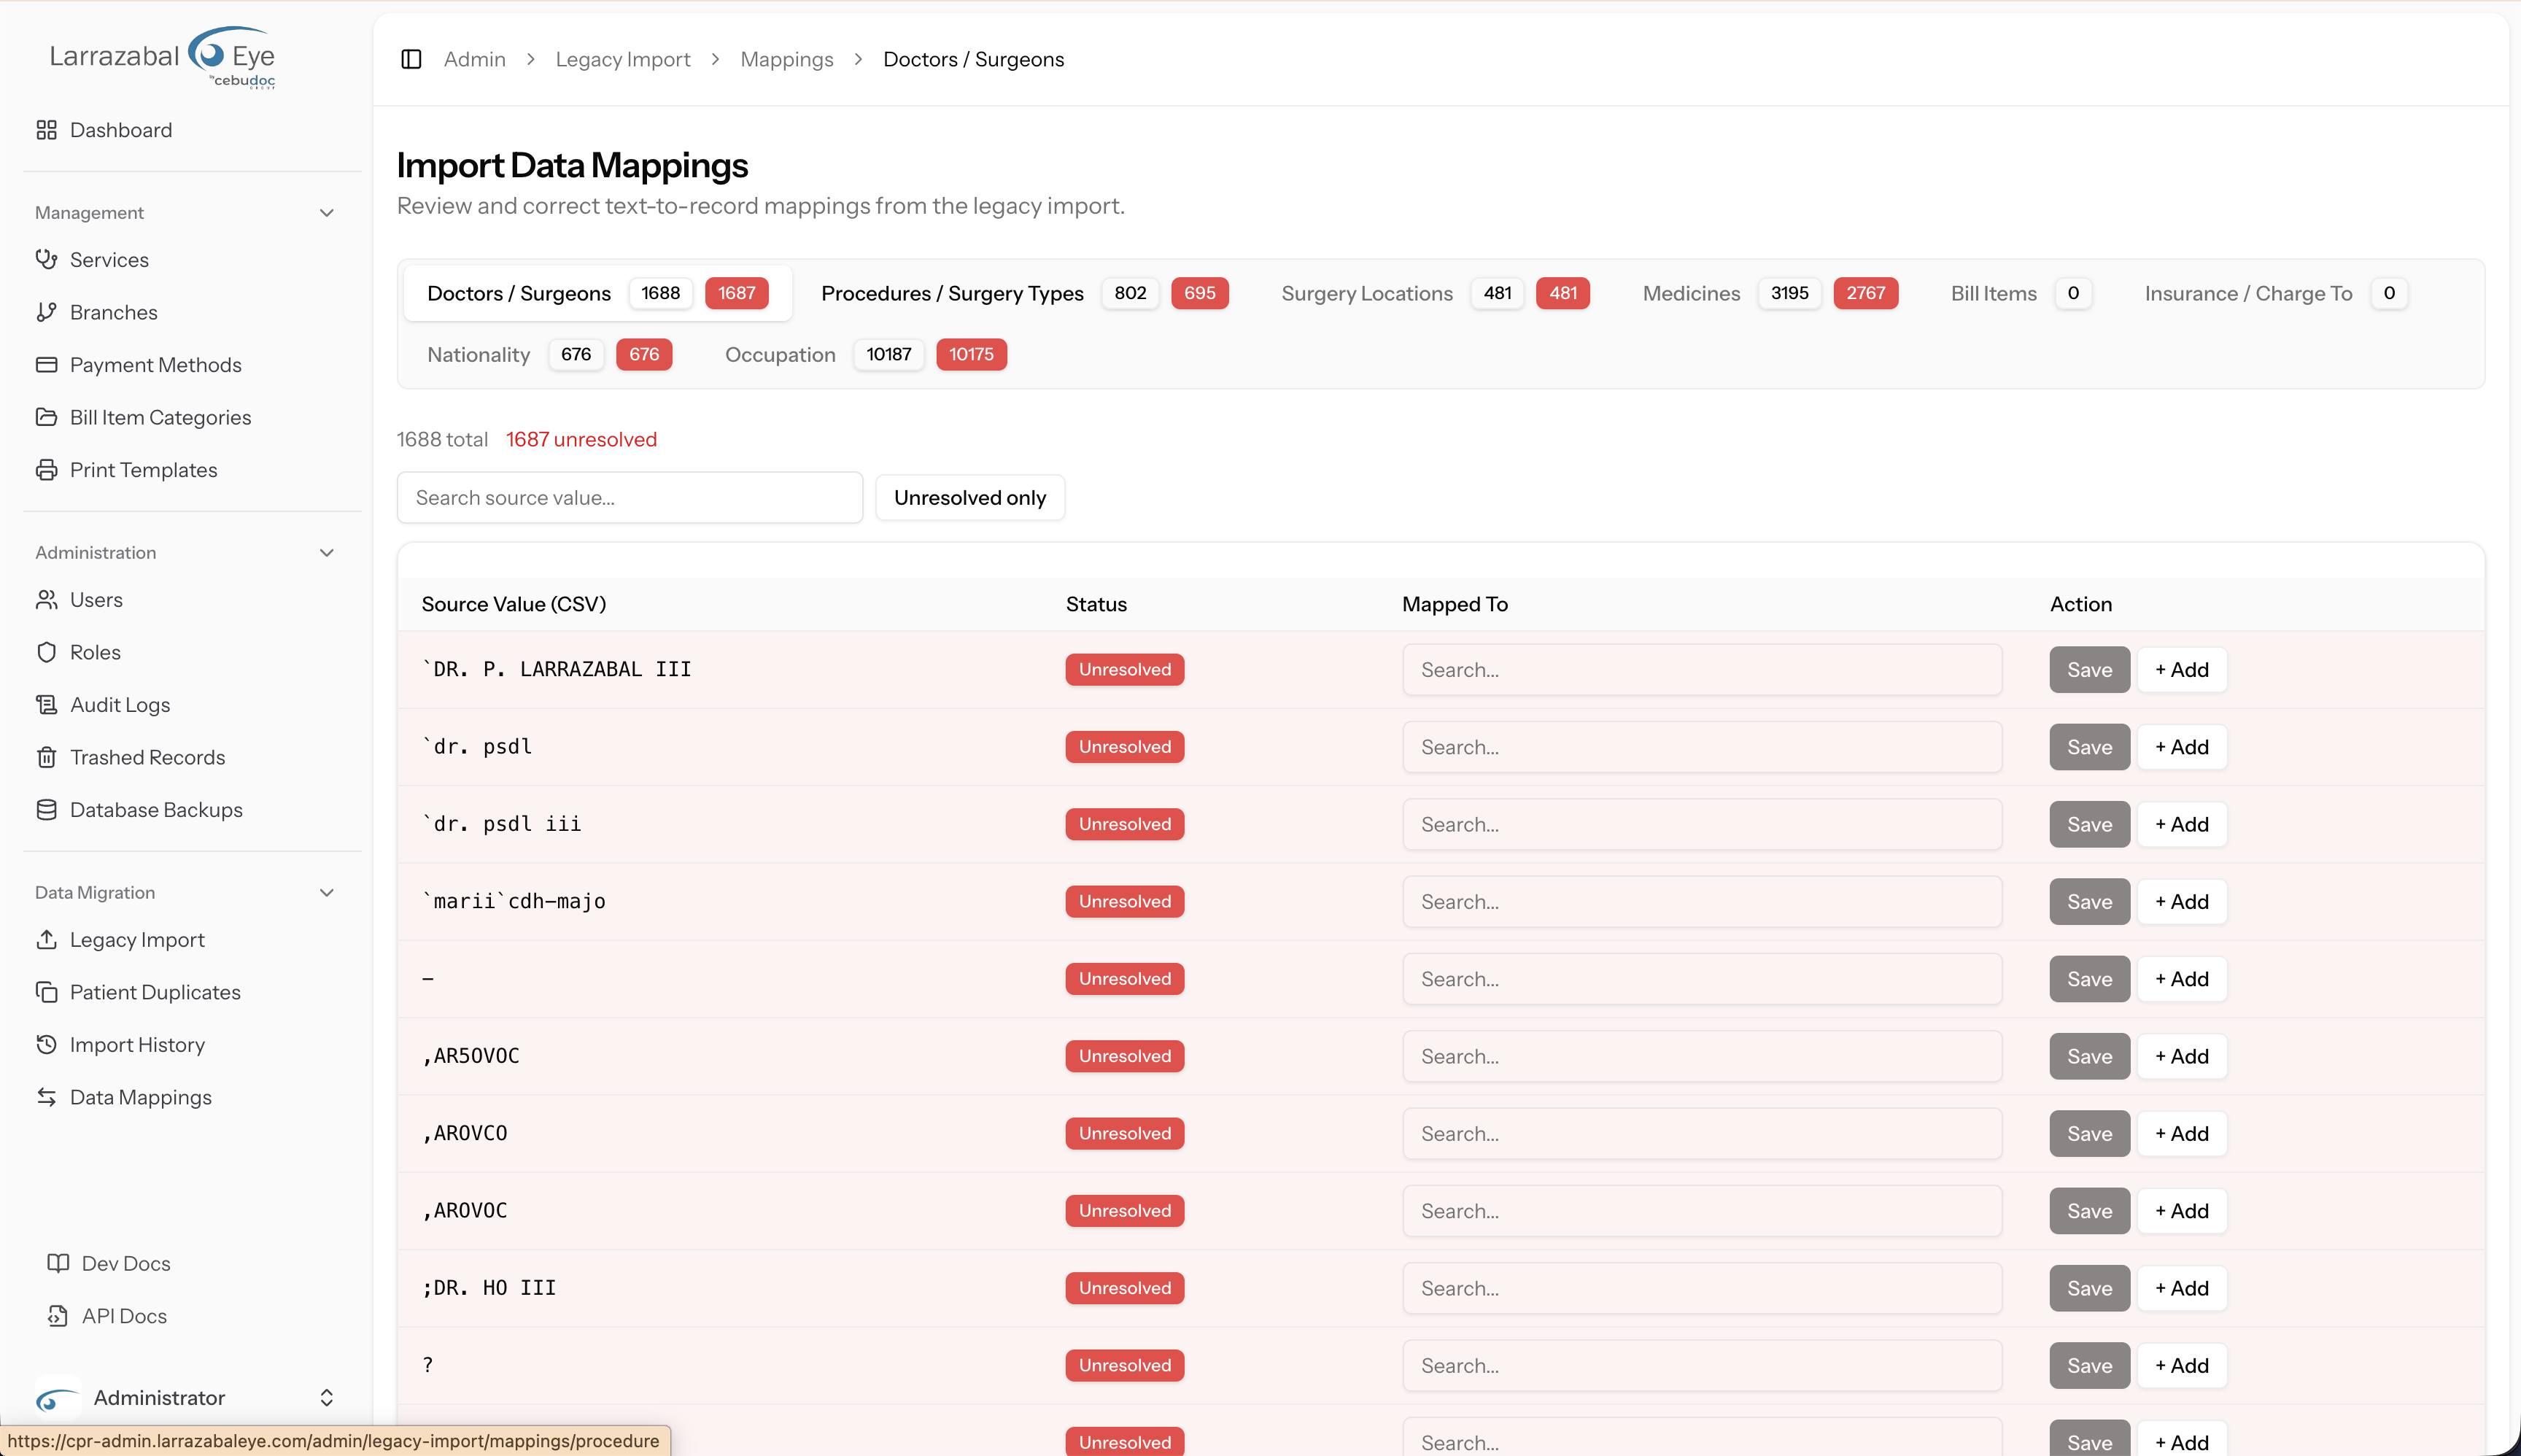
The Data Mappings screen (/admin/legacy-import/mappings) is where you review and fix how values from the legacy CSV files are matched to records in CPR.
During import, when the system encounters a value it does not recognise (for example, a doctor name spelled differently in the old system), it creates a mapping record flagged as Unresolved. Unresolved mappings mean the imported rows that depend on them are written without the linked record — or skipped entirely. You should review and resolve all mappings before running imports, or re-run the import after resolving them.
Mapping types
The screen uses a tab bar — one tab per mapping type. The tabs are:
| Tab | What it maps |
|---|---|
| Doctors | Legacy doctor names → CPR doctor records |
| Procedures | Legacy procedure names → CPR procedure records |
| Medicines | Legacy medicine names → CPR medicine records |
| Bill Items | Legacy bill item names → CPR bill item records |
| Insurance | Legacy insurance/responsible party names → CPR payer records |
| Nationality | Legacy nationality text → CPR nationality values |
Each tab badge shows the total number of mappings for that type. A red badge shows the count of unresolved mappings.
Reading the mapping table
Each row in the table shows:
| Column | What it shows |
|---|---|
| Source Value (CSV) | The exact text as it appeared in the legacy CSV file (monospace font). |
| Status | A badge: Unresolved (red — no match yet), Auto-created (yellow — the system created a new CPR record automatically), or Matched (green — linked to an existing record). |
| Mapped To | A dropdown for you to select the CPR record this source value should link to. |
| Action | Buttons to save or create. |
Unresolved rows are listed first, sorted alphabetically within their group. Resolved rows follow.
Resolving a mapping
- In the Mapped To dropdown, select the correct CPR record that corresponds to the legacy value.
- Click Save. The button shows "Saving…" and the row updates to Matched once done.
Creating a new record and mapping it
For foreign-key types (Doctors, Procedures, Medicines, Bill Items, Insurance), if the legacy value does not correspond to any existing CPR record, an + Add button appears alongside Save. Clicking it prompts you to confirm or edit the name, then:
- Creates a new CPR record with that name.
- Immediately links it to the mapping.
- Updates the row to Auto-created status.
Use this when the legacy value genuinely represents something that does not yet exist in CPR. Review auto-created records afterwards in the relevant configuration screens (for example, the Doctors catalog or Payers list) to ensure they are complete and correctly configured.
Value mappings (Nationality)
The Nationality type works differently — instead of linking to a database record, it maps the legacy text to a target text value. After saving, a note explains that the resolved mapping takes effect on the next import run. Re-upload the relevant CSV file to apply the mapping to rows that were previously skipped.
History
The History screens give you a permanent record of every import that has been run.
Batches list (/admin/legacy-import/history)
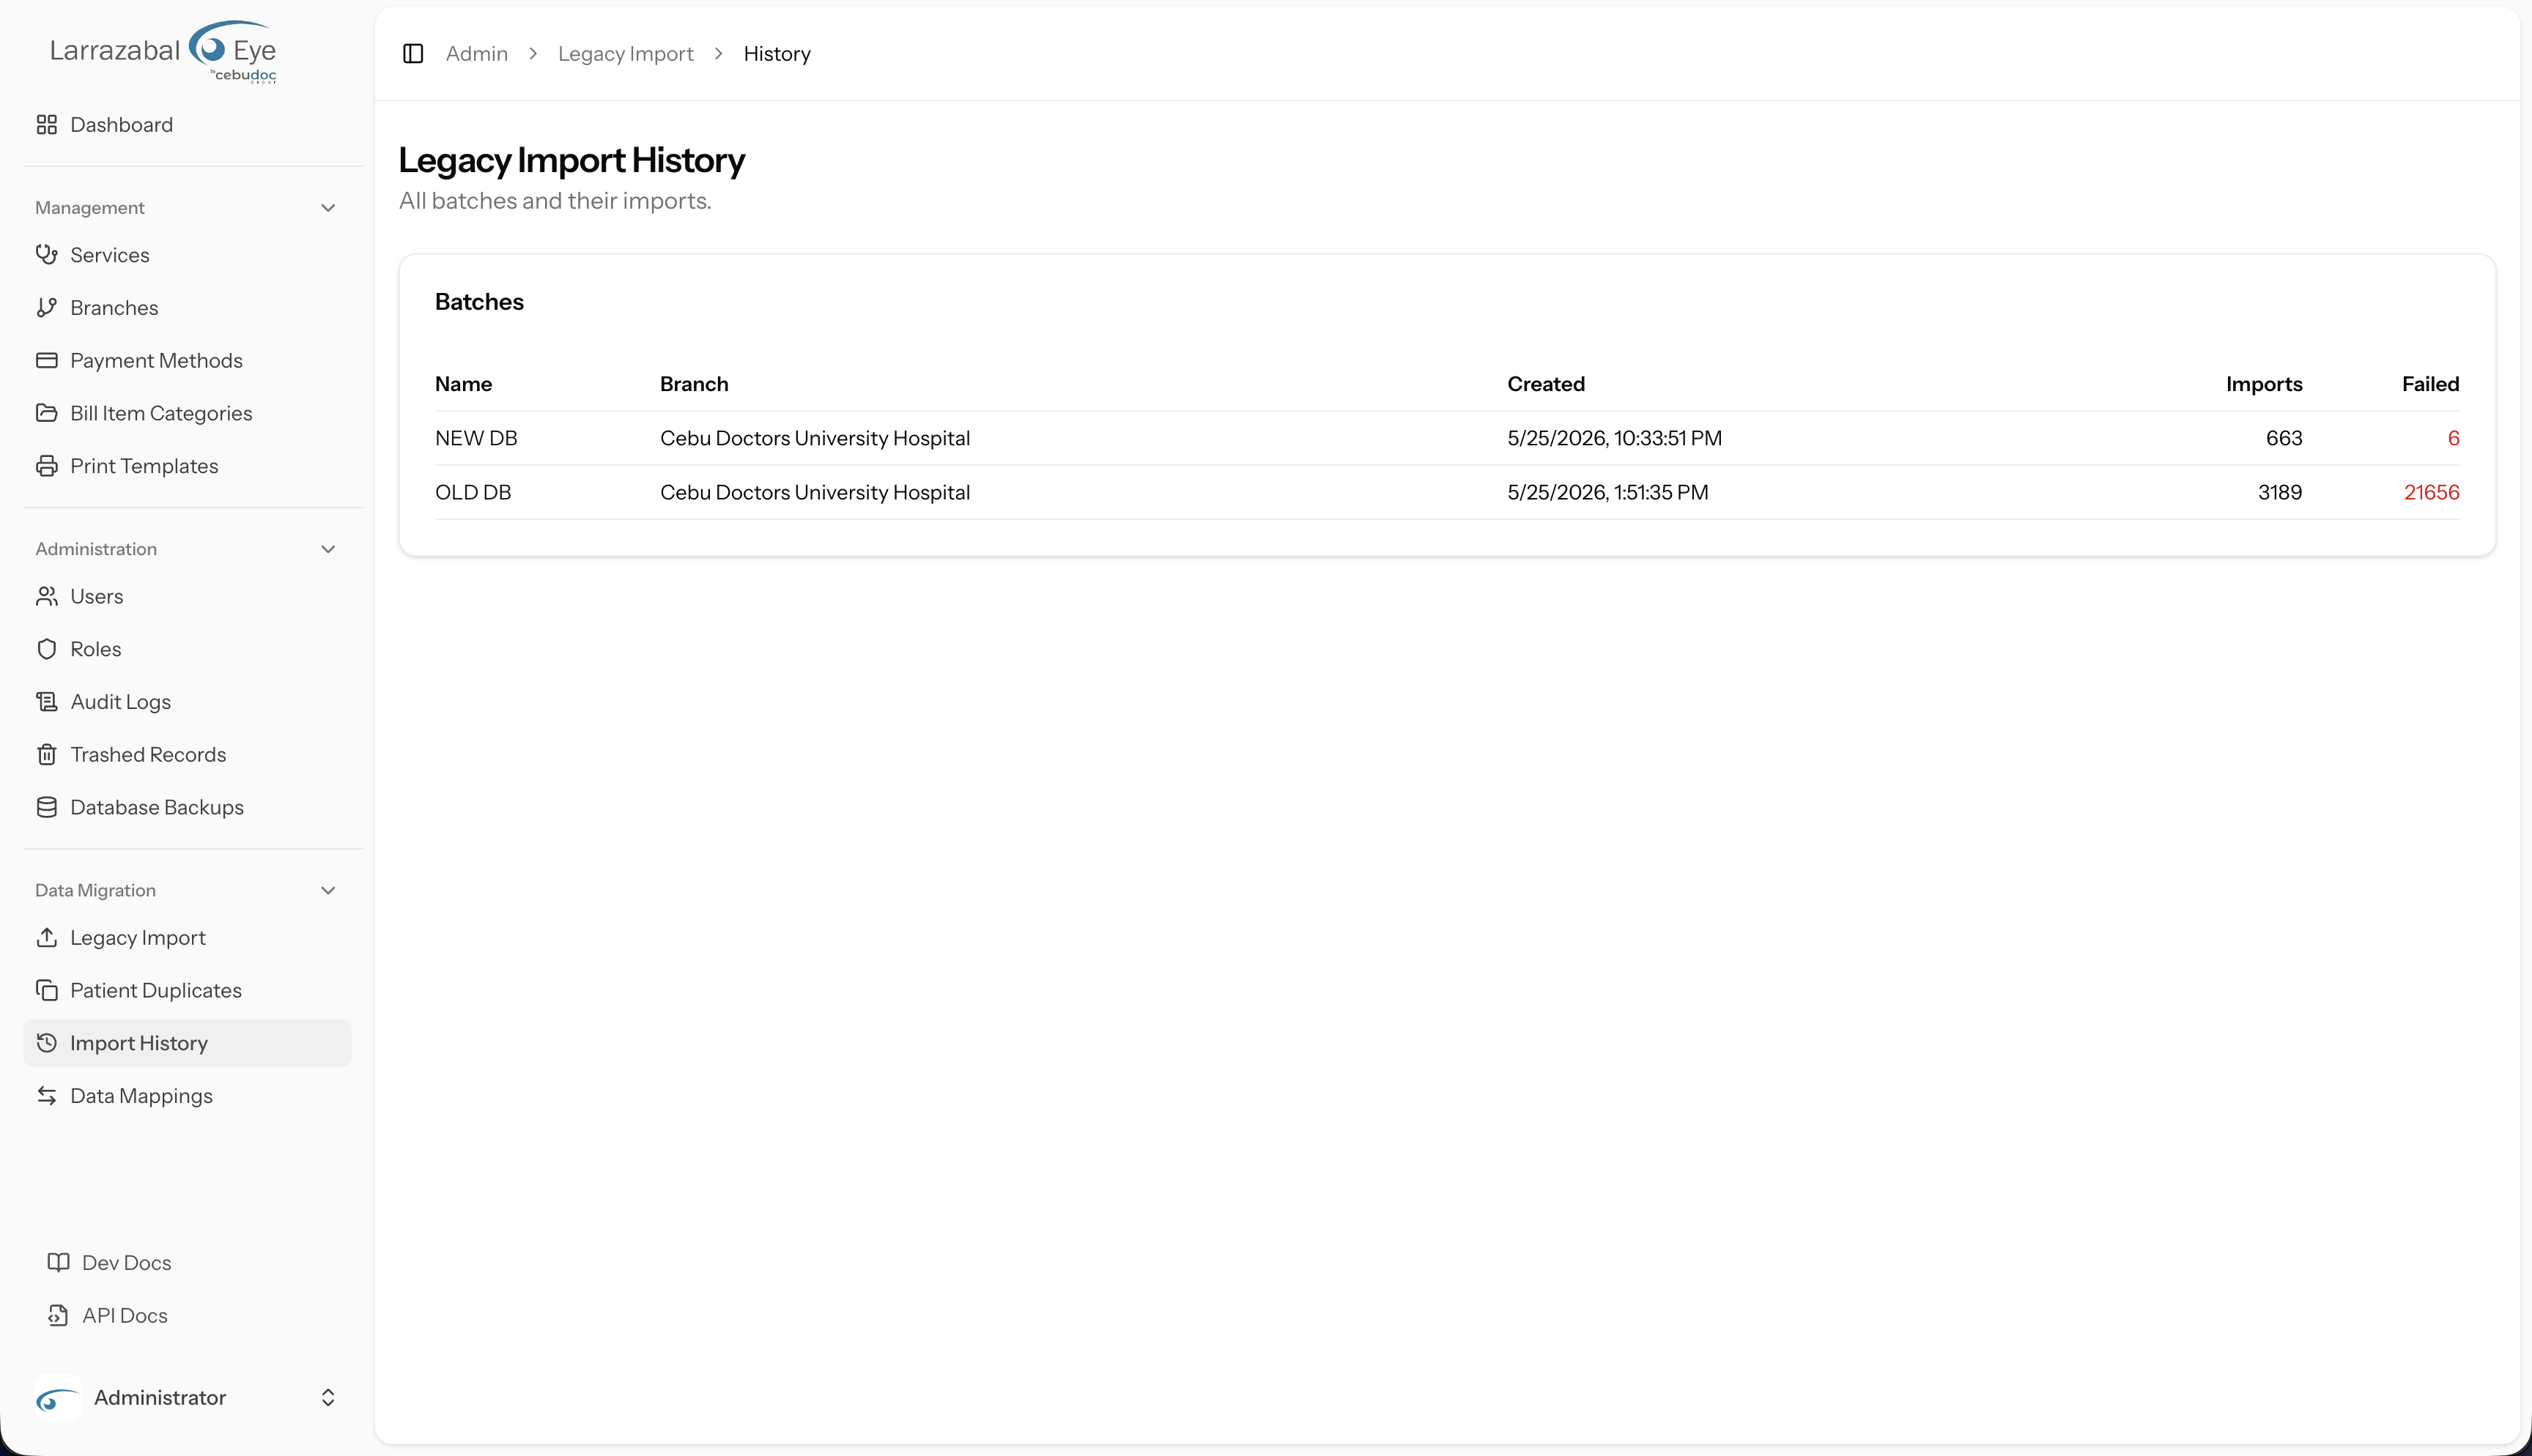
The page heading reads "Legacy Import History" with the subtitle "All batches and their imports."
The table has five columns:
| Column | What it shows |
|---|---|
| Name | The batch name (a clickable link to the batch detail). |
| Branch | The branch associated with the batch. |
| Created | When the batch was created. |
| Imports | Total number of import jobs run within this batch. |
| Failed | Total failed row count across all imports in the batch (shown in red if greater than zero). |
Batch detail (/admin/legacy-import/history/{batch})
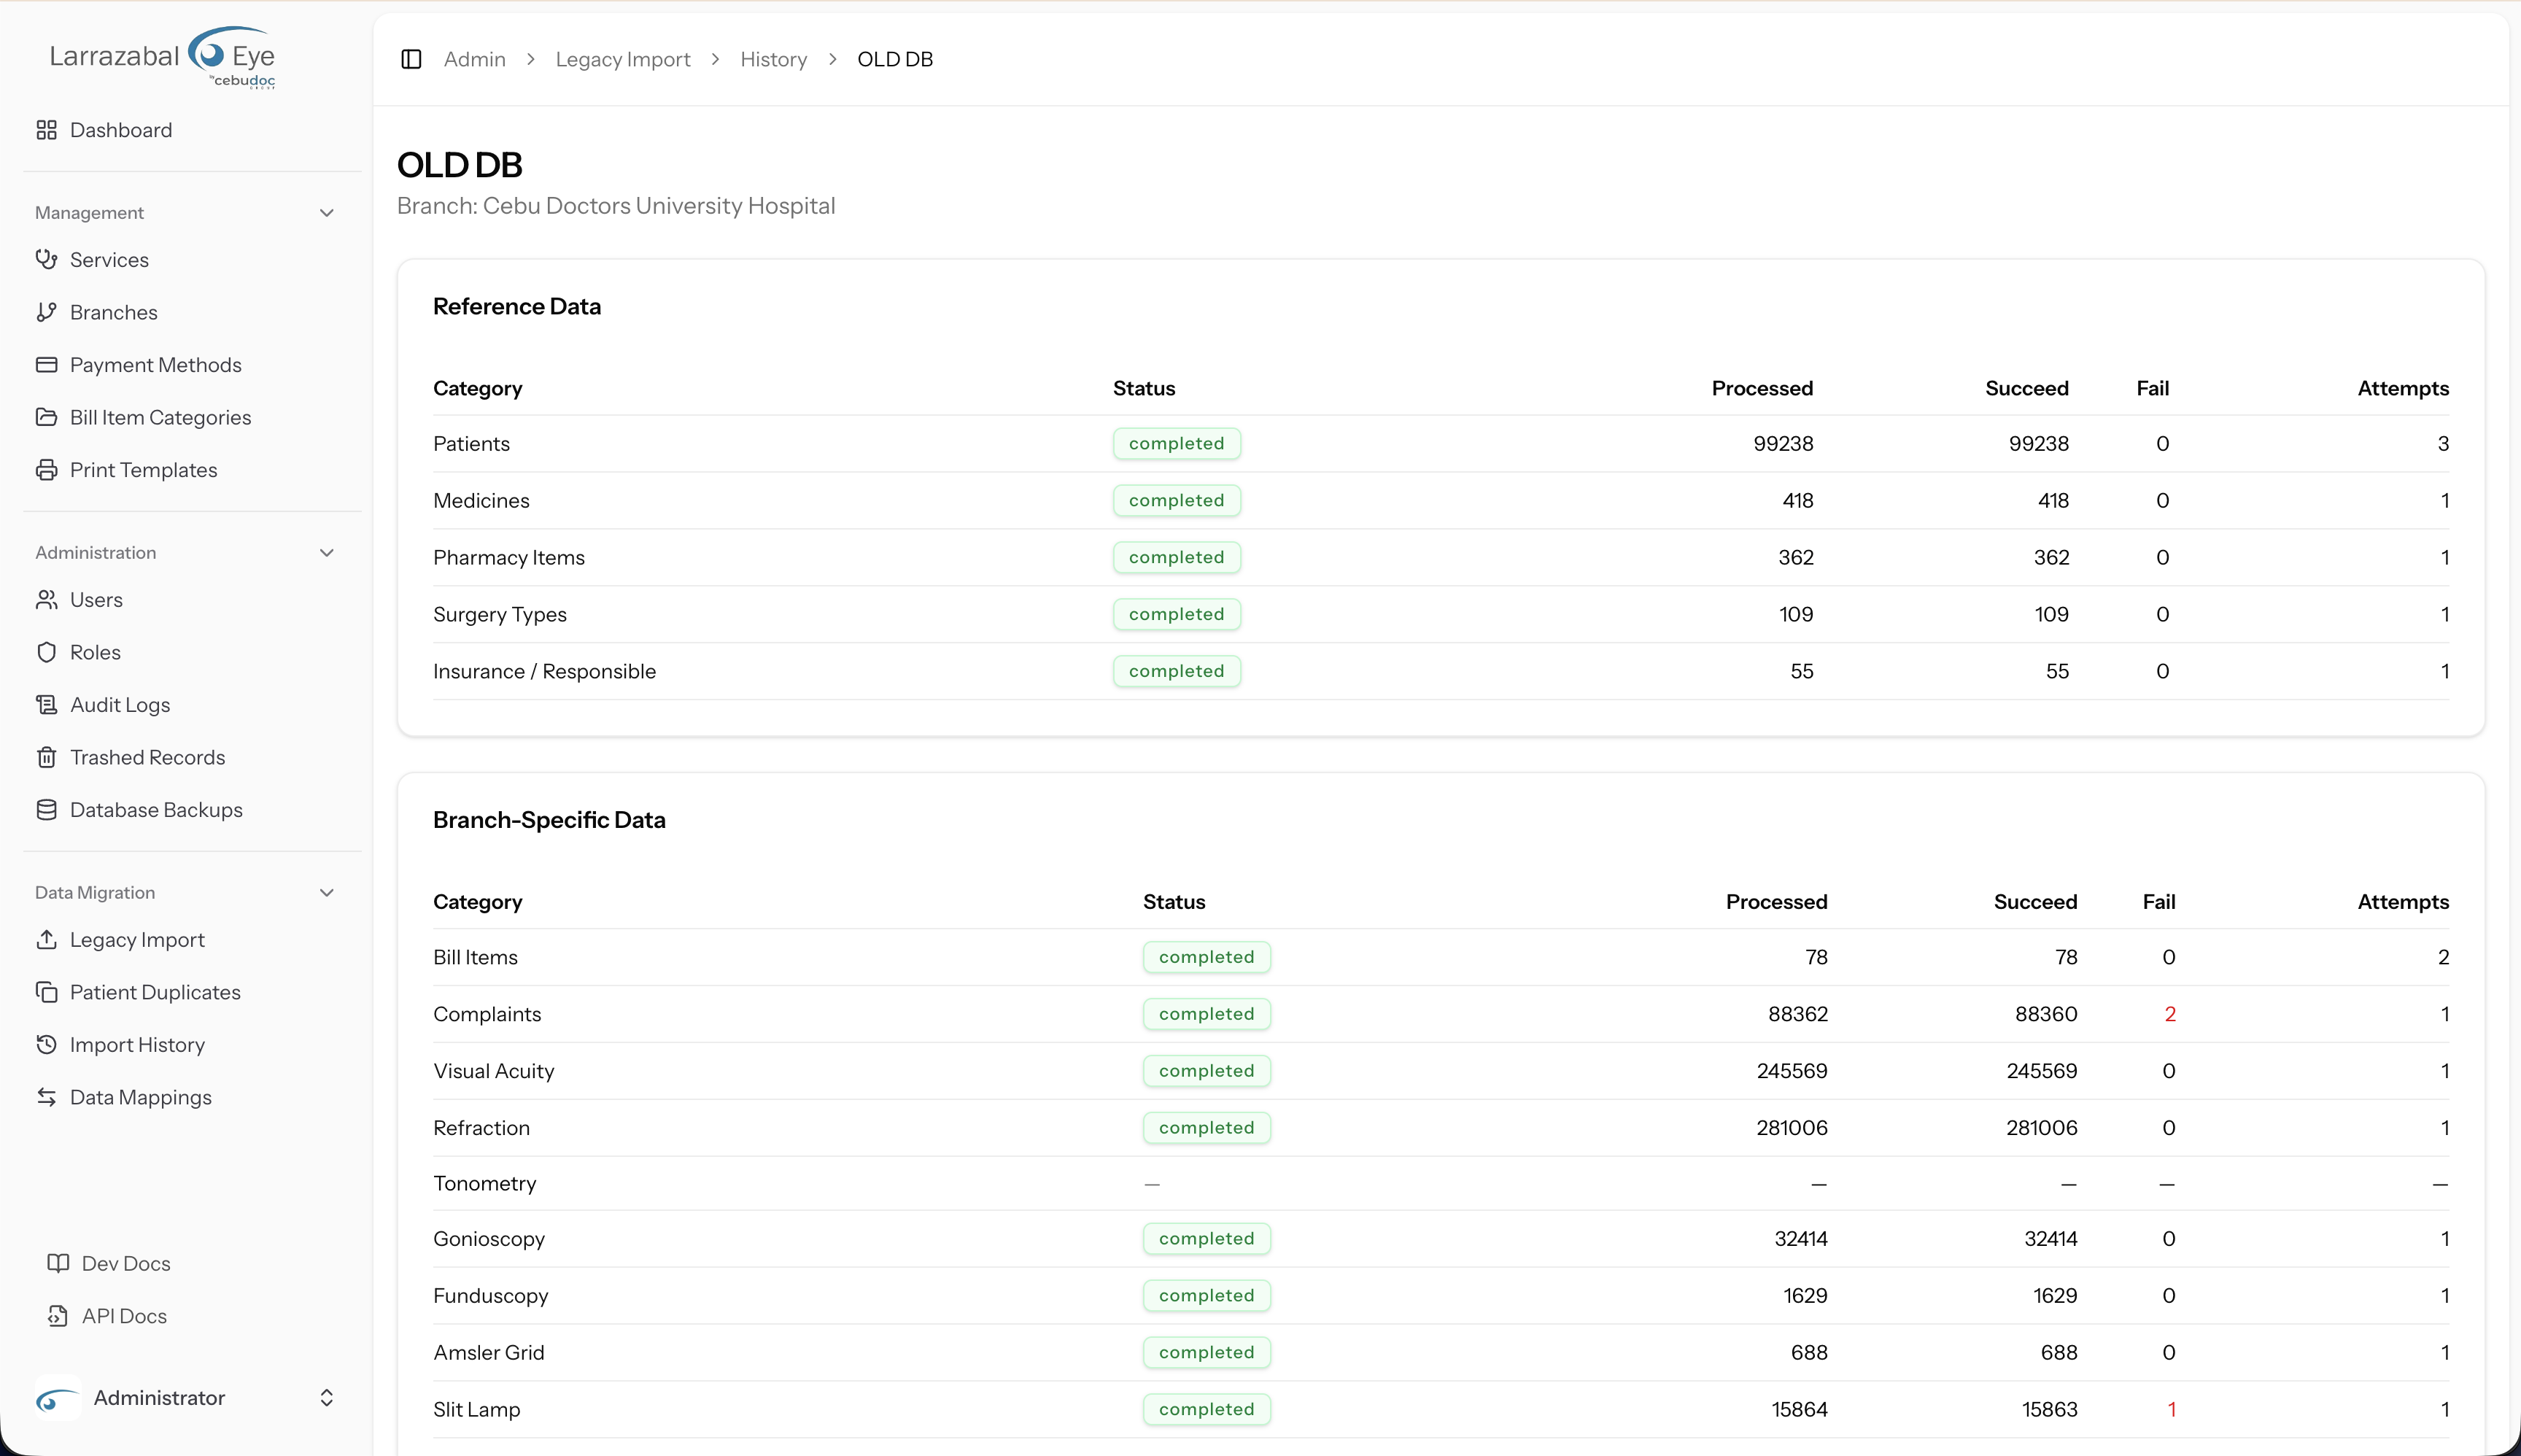
Clicking a batch name opens its detail page. The heading shows the batch name and its branch.
The detail page has two sections — Reference Data and Branch-Specific Data — each a table with one row per import category:
| Column | What it shows |
|---|---|
| Category | The import type (a link to the category detail if at least one import has been run). |
| Status | A badge for the latest import's status (completed, failed, pending, processing). |
| Processed | Total rows processed in the latest import. |
| Succeed | Rows that imported successfully. |
| Fail | Rows that failed (in red if greater than zero). |
| Attempts | How many times this category has been imported (including re-imports). |
Category detail (/admin/legacy-import/history/{batch}/{category})
Clicking a category name opens the row-level detail. This page shows:
- An Import selector dropdown listing every attempt for this category (each identified by its internal ID, filename, and imported/failed counts). Switch between attempts to compare runs.
- A toggle button: Failed only / Show all rows — use "Failed only" to focus on problem rows.
- A Rows table with columns: Row (the CSV row number), Ref No (the patient reference number from the row, if applicable), Status (a green
successbadge or redfailedbadge), and Reason (the error message for failed rows).
Long row lists are paginated.
Recommended import order
- Verify all Data Mappings are resolved (zero unresolved badges on the Mappings tabs).
- Create a batch and select it.
- Import Step 1 types in any order — Patients first, then Medicines, Pharmacy Items, Surgery Types, Insurance.
- Once patients are imported, import Step 2 types in any order.
- Upload Patient Photos and Drawings at any point after the patient import completes.
- Check the History screens for failed row counts. Investigate and resolve errors, then re-import affected categories if needed.
- Check Patient Duplicates — the import process may flag pairs of records that look like the same person.