Branches
A branch is a physical clinic location. Each branch can have its own set of users (the staff who work there), its own set of attached services (the clinical workflows it offers), and within each service its own stage list and stage-level staff assignments. This is the configuration layer that makes the staff Queue page work: a staff member logs in to the clinical app, selects their branch, and sees only the services and stages you have set up here.
Permission required: Your account must have the
branches.accesspermission to see the Branches section in the sidebar and to manage branches.
The Branches list
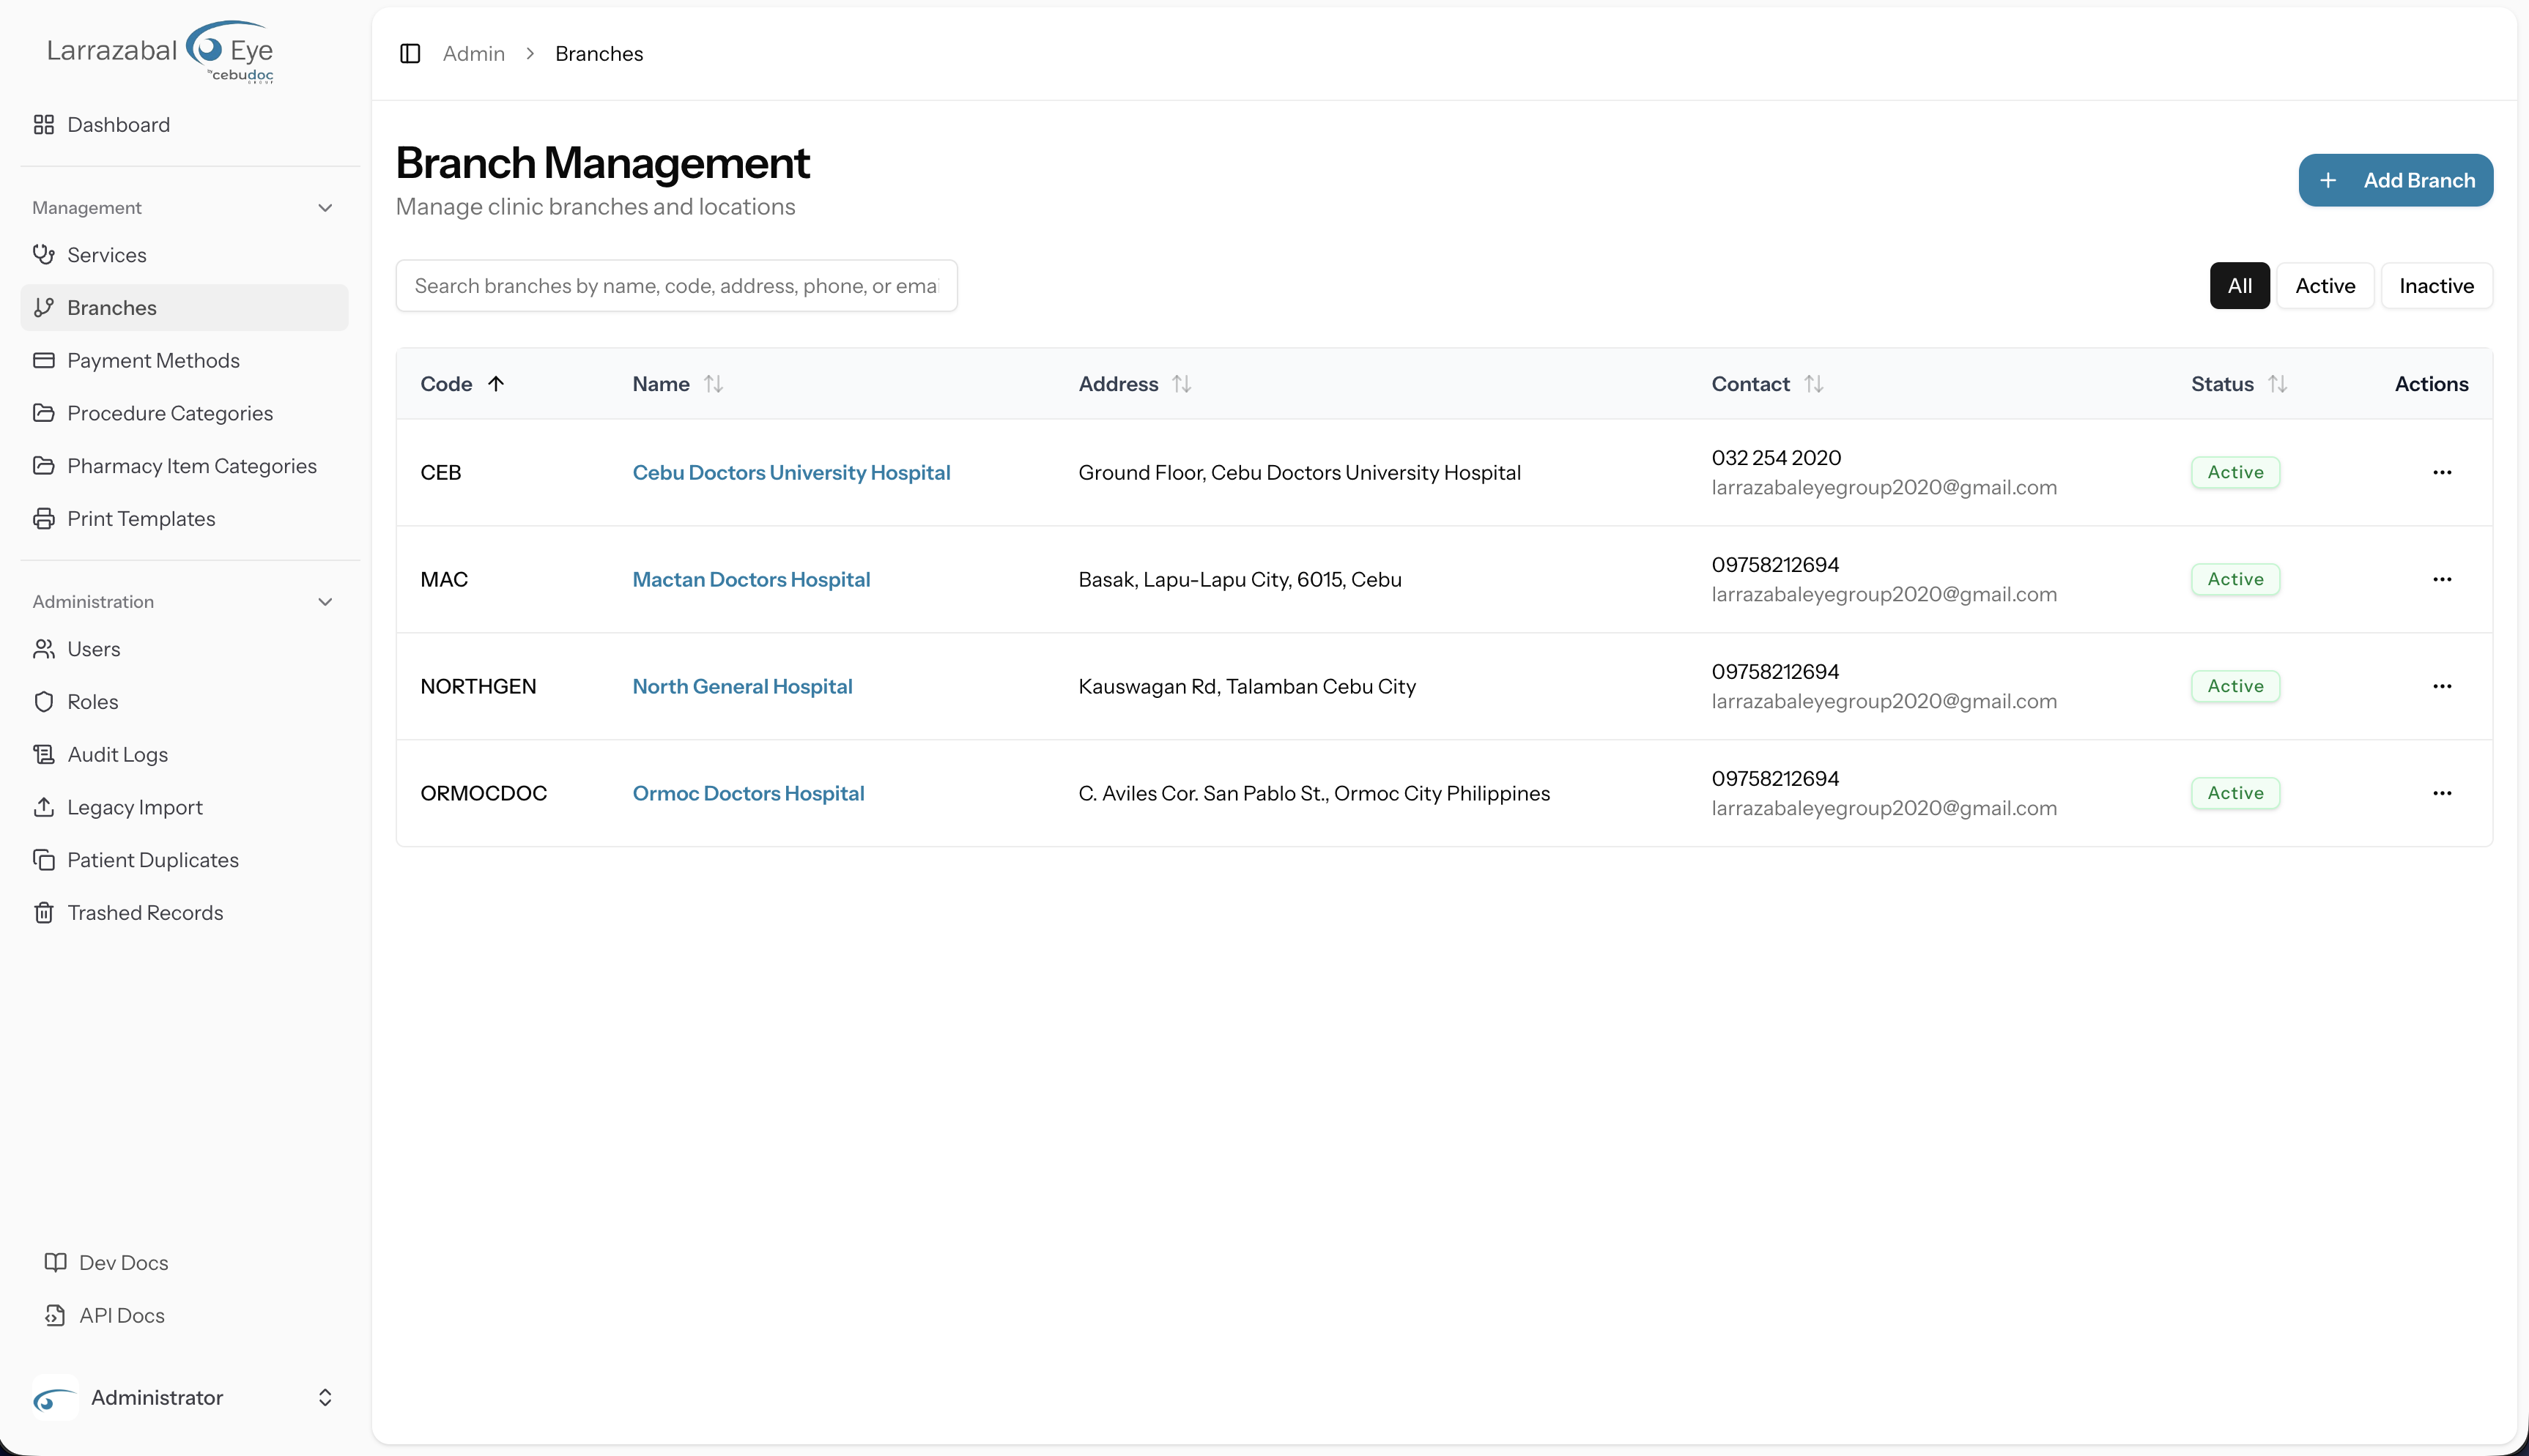
Navigate to Admin › Branches. The page heading reads Branch Management with the subtitle "Manage clinic branches and locations."
The Add Branch button sits in the top-right corner of the heading row.
Search and filters
Below the heading you will find:
- A search box (placeholder: "Search branches by name, code, address, phone, or email…") that filters the table as you type — results update automatically after a short pause.
- Three filter buttons: All, Active, and Inactive. The currently active filter is highlighted. Clicking one immediately reloads the table to show only matching branches.
The table
| Column | What it shows |
|---|---|
| Code | A short identifier for the branch (e.g. MAIN). Sortable. |
| Name | The branch's display name. Clicking the name navigates directly to the branch detail page. Sortable. |
| Address | The branch's street address. Sortable. |
| Contact | The branch's phone number and (on a second line, muted) its email address, if set. Sortable by phone. |
| Status | An Active or Inactive badge. Clicking the badge opens a confirmation dialog to toggle the status without opening the full Edit dialog. Sortable. |
| Actions | A ⋯ (More) button. |
Clicking any sortable column header sorts the table by that column; clicking the same header again reverses the direction; clicking a third time resets to the default sort (Code, ascending).
Actions menu
Click the ⋯ button on any row for:
- View Details — navigates to the branch detail page.
- Edit — opens the Edit Branch dialog.
- Delete — opens the Delete Branch confirmation dialog.
Adding a branch
Click Add Branch. The Create New Branch dialog opens with the subtitle "Add a new clinic branch to the system."
The form fields are:
| Field | Required | Notes |
|---|---|---|
| Branch Name | Yes | The full display name (e.g. "Main Clinic"). |
| Branch Code | Yes | A short identifier used in reports and selectors (e.g. MAIN). |
| Address | Yes | The physical address of the branch. |
| Phone | No | Contact phone number. |
| No | Contact email address. | |
| Active checkbox | — | Checked by default. Uncheck to create the branch in an inactive state. |
Click Create Branch to save or Cancel to discard.
Editing a branch
Click Edit from the ⋯ menu, or click Edit from the branch detail page. The Edit Branch dialog opens pre-filled with the branch's current values.
The form contains the same fields as the create form: Branch Name, Branch Code, Address, Phone, Email, and the Active checkbox.
Click Update Branch to save or Cancel to discard. A confirmation dialog ("Save changes? — Apply your changes to this branch?") opens before the save is committed; click Save changes to confirm. On success a "Branch updated" toast appears.
Activating and deactivating a branch
You can toggle a branch's active status in three ways:
- Click the status badge on any row in the Branches list. A confirmation dialog titled Update Branch Status asks "Are you sure you want to activate/deactivate the branch name?" Click Confirm or Cancel.
- From the Edit dialog — uncheck the Active checkbox and click Update Branch.
- From the branch detail page — a button in the top-right of the detail header shows the current status (Active or Inactive). Clicking it opens a confirmation dialog titled Activate Branch or Deactivate Branch: "Are you sure you want to activate/deactivate branch name?" Click Activate/Deactivate or Cancel.
An inactive branch remains in the system with all its configuration intact; it simply is no longer selectable by staff in the clinical app.
Deleting a branch
Click Delete from the ⋯ menu or click the Delete button on the branch detail page. A dialog titled Delete Branch asks: "Are you sure you want to delete branch name? This action cannot be undone."
Click Delete Branch to confirm, or Cancel to go back. On success a "Branch deleted" toast appears.
Guard: If the branch still has users assigned to it, the delete will be blocked and you will see an error: "Cannot delete branch with assigned users. Please reassign users first." Remove all users from the branch (see Assigning users to a branch below) before attempting to delete it.
The branch detail page
Click a branch name in the list, or choose View Details from the ⋯ menu, to open the branch detail page.
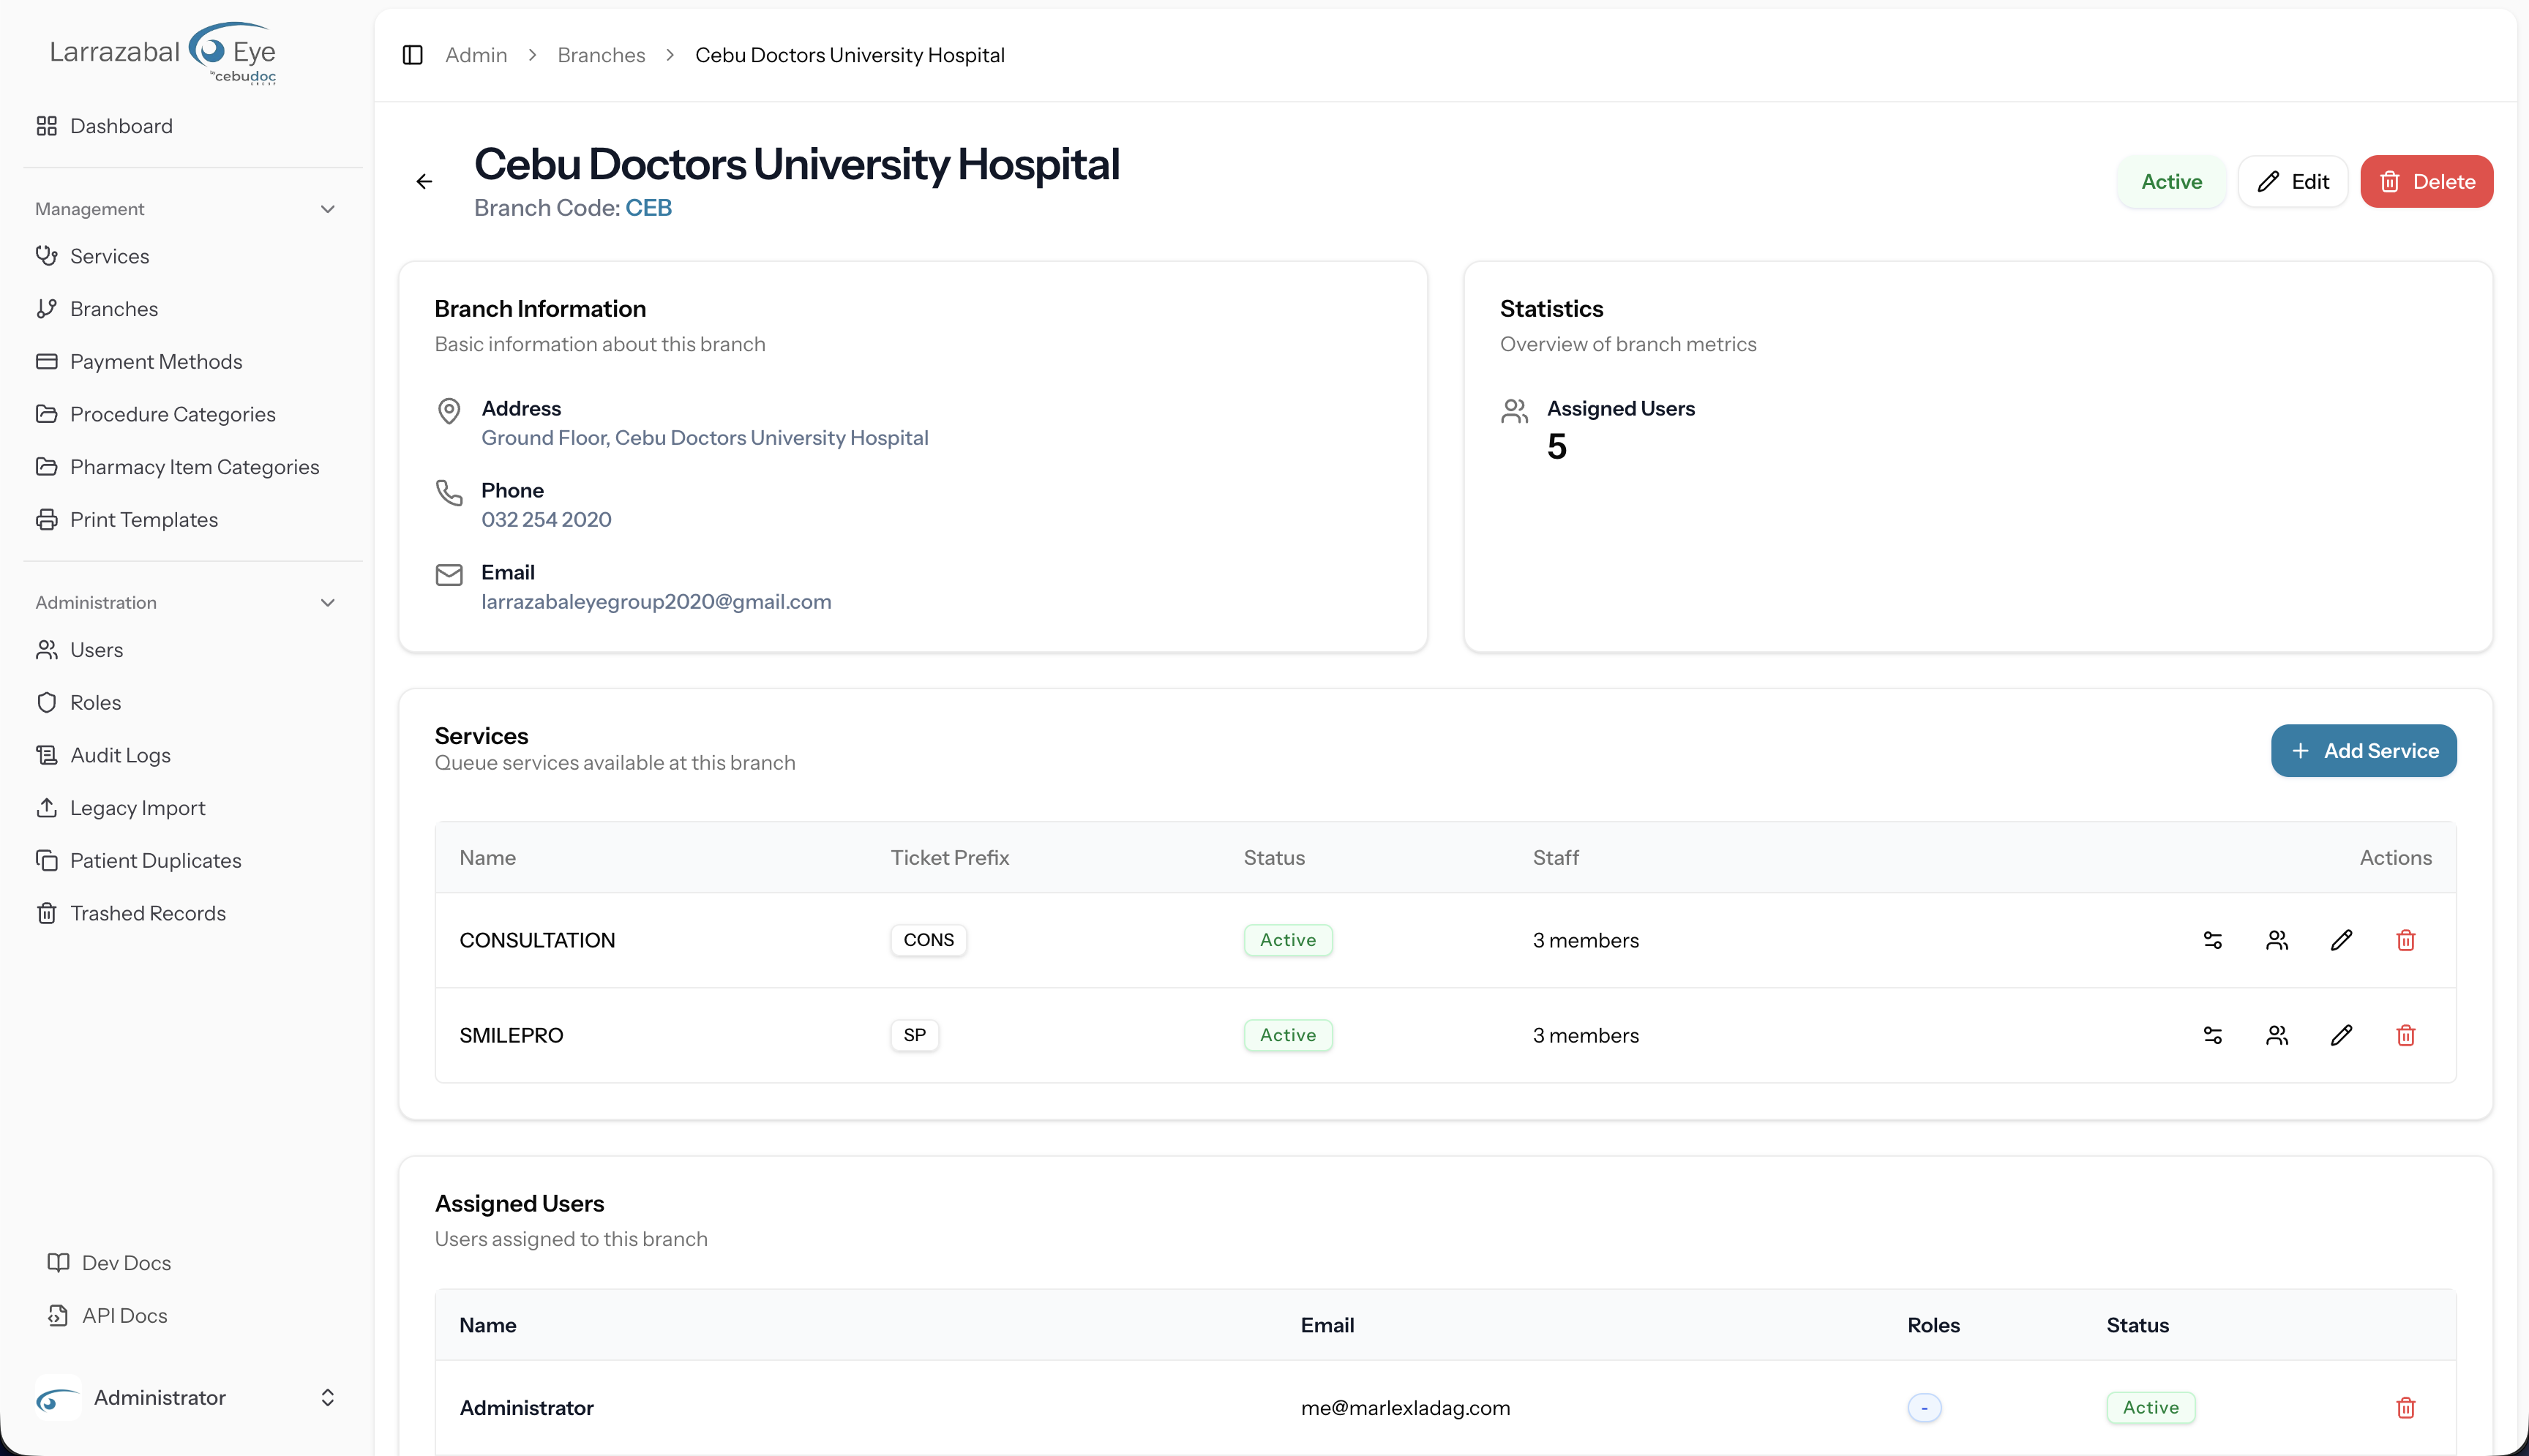
The page header shows the branch name, its code, and — in the top-right — a status button and Edit and Delete buttons. A back arrow navigates back to the Branches list.
The detail page is divided into several cards:
Branch Information
Shows the branch's Address, Phone (if set), and Email (if set).
Statistics
Shows the count of Assigned Users for a quick overview of how many staff are attached to this branch.
Services
A table listing every service attached to this branch, with columns:
| Column | What it shows |
|---|---|
| Name | The service's display name. |
| Ticket Prefix | The code badge used as the queue ticket prefix. |
| Status | Active or Inactive badge (per-branch status). |
| Staff | How many staff members are assigned to this service at this branch (e.g. "3 members"). |
| Actions | A row of icon buttons: a settings icon (manage stages), a users icon (manage service staff), a pencil icon (edit), and a trash icon (delete). |
An Add Service button in the card header lets you attach a new service to the branch.
Assigned Users
A table listing users currently assigned to this branch, with columns Name, Email, Roles, and Status. Each row has a trash icon to remove that user.
Below the table (or instead of it, if the table is empty), a user selector dropdown and an Add button let you attach additional users.
Assigning users to a branch
Users who will work at a branch — receptionists, nurses, doctors, pharmacists, and so on — must be assigned to it. Only users assigned to a branch appear in the pool from which you can add service staff and stage staff.
On the branch detail page, scroll down to the Assigned Users card.
- To add a user: Select a user from the "Add a user…" dropdown (which lists all active users not already attached to this branch, shown as "Name (email)") and click Add. The user immediately appears in the table above.
- To remove a user: Click the trash icon on the user's row. A confirmation dialog titled Remove User asks: "Are you sure you want to remove name from this branch? This action cannot be undone." Click Remove to confirm, or Cancel to go back.
If all active users are already assigned, the dropdown is replaced by the message "All active users are already assigned to this branch."
For information about managing user accounts, roles, and permissions, see Users and Roles & Permissions.
Attaching a service to a branch
On the branch detail page, click Add Service in the Services card header. A dialog titled Attach Service opens with the subtitle "Attach an existing service to this branch."
The form contains:
| Field | Required | Notes |
|---|---|---|
| Service | Yes | A dropdown listing all active global services that are not yet attached to this branch (shown as "Name (CODE)"). If all services are already attached, the dropdown is replaced by "All available services are already attached to this branch." |
| Active checkbox | — | Checked by default. Controls whether the service is active at this branch. |
Click Attach Service to confirm, or Cancel to discard.
Once attached, the service appears in the Services table on the branch detail page. You can then configure its stages.
Editing an attached service
Click the pencil icon on a service row. A dialog titled Edit Service opens with the subtitle "Update per-branch settings for service name." The only editable per-branch setting is the Active at this branch checkbox. Click Update Service to save or Cancel to discard. A confirmation dialog ("Save changes? — Apply your changes to this branch service?") opens before the save is committed; click Save changes to confirm. On success a "Service updated" toast appears.
Removing an attached service
Click the trash icon on a service row. A confirmation dialog titled Delete Service asks: "Are you sure you want to delete service name? This action cannot be undone." Click Delete to confirm, or Cancel to go back. On success a "Service removed" toast appears.
Removing a service from a branch deletes its stage list and staff assignments for that branch. The global service definition (on the Services page) is not affected.
Configuring a branch service's stages
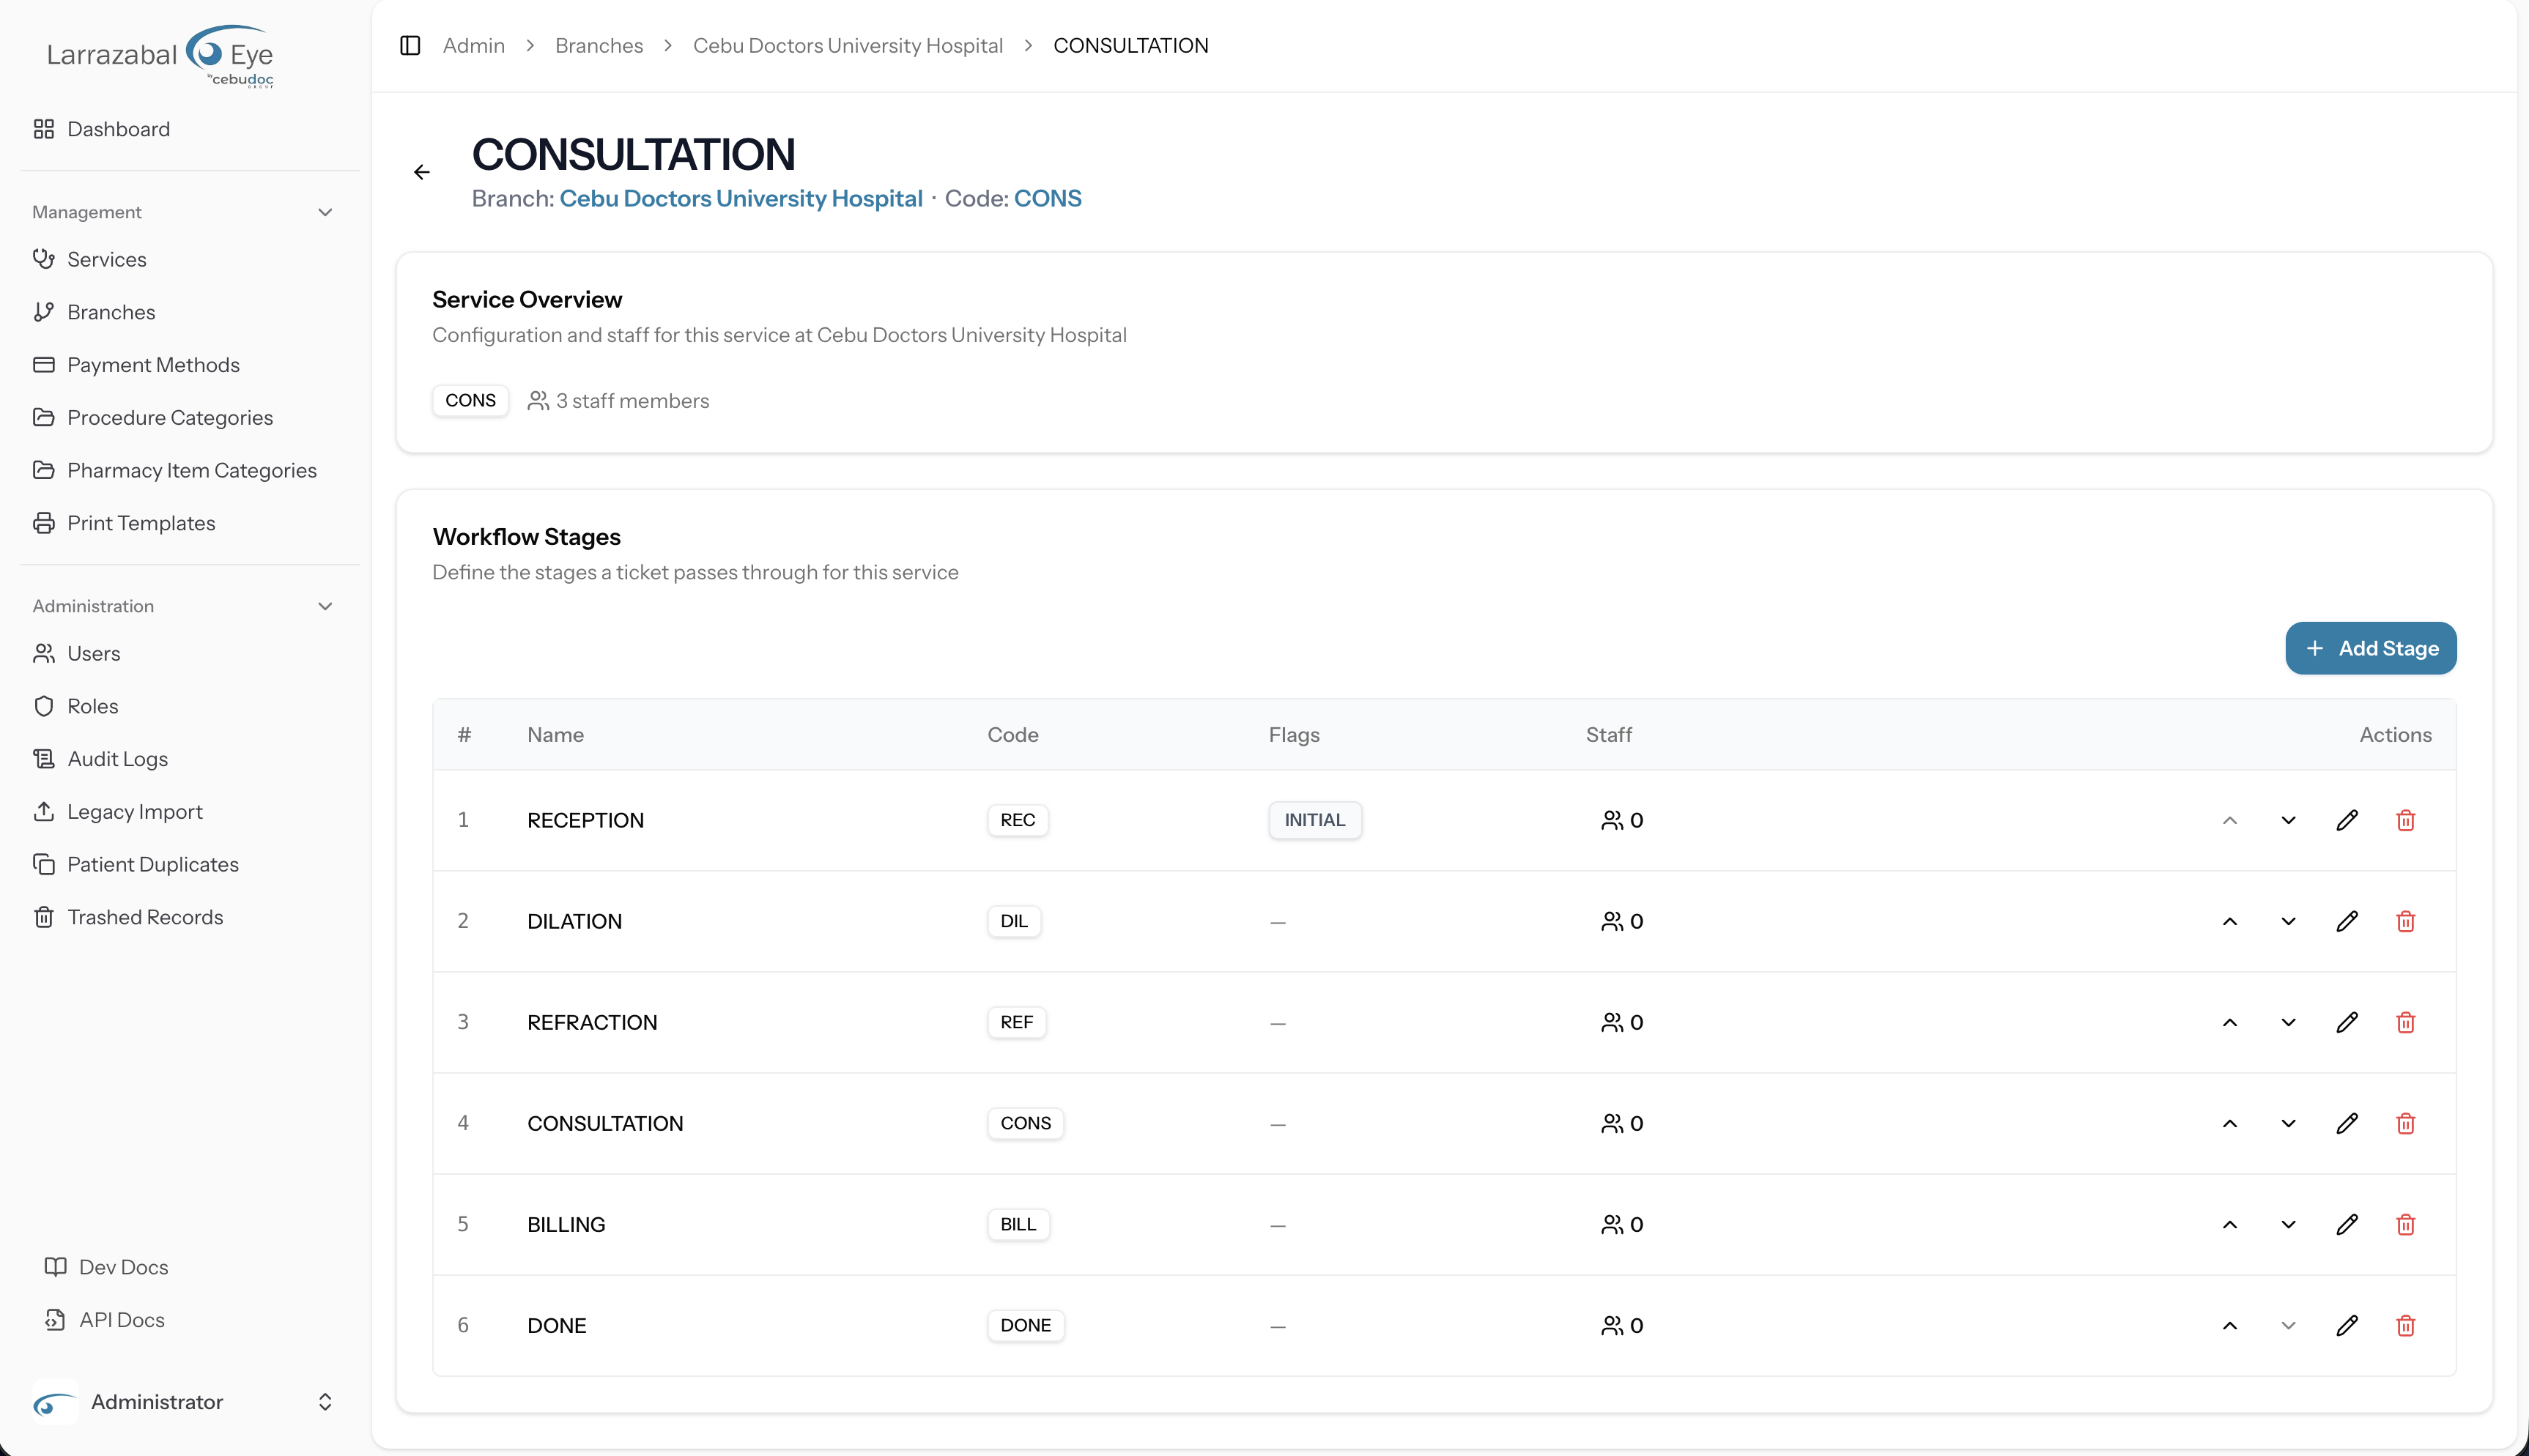
Click the settings icon on a service row in the branch detail page to open the service configuration screen. The breadcrumb trail shows Admin › Branches › Branch Name › Service Name.
The page shows a Service Overview card (displaying the service code and how many staff members are assigned to it) and a Workflow Stages card below it with the card description "Define the stages a ticket passes through for this service."
The stage list
Stages are displayed in a table ordered by their Position number, with columns:
| Column | What it shows |
|---|---|
| # | The position number (1, 2, 3, …). |
| Name | The stage's display name (e.g. "Reception", "Triage", "Doctor"). |
| Code | A short uppercase code badge (e.g. RECEPTION). |
| Flags | INITIAL and/or TERMINAL badges, or a dash if neither applies. |
| Staff | A users icon with a count of assigned staff. Click it to expand or collapse the staff panel for that stage (see Assigning staff to a stage). |
| Actions | Up and down chevron buttons to reorder, a pencil to edit, and a trash to delete. |
Adding a stage
Click Add Stage in the toolbar above the table. The Add Stage dialog opens.
Fields:
| Field | Required | Notes |
|---|---|---|
| Name | Yes | Human-readable stage name (e.g. "Triage"). Maximum 120 characters. |
| Code | Yes | Short uppercase identifier, maximum 16 characters (e.g. TRIAGE). Must be unique within this branch service. |
| Position | Yes | Integer determining order in the workflow. Defaults to one after the last existing stage. You can set this manually and then use the reorder buttons to adjust. |
| Initial stage toggle | — | Off by default. Mark this as the entry point of the workflow. Only one stage can be the initial stage; turning this on for a new stage automatically clears the flag from any previously initial stage. |
| Terminal stage toggle | — | Off by default. Mark this as the end of the workflow. A stage can be both initial and terminal (for a single-stage service). |
Click Add Stage to save, or Cancel to discard.
What "initial" and "terminal" mean
- The initial stage is where a patient enters the service. When a staff member adds a patient to the queue on the Queue page, the patient is placed at the initial stage automatically.
- The terminal stage ends the patient's journey in this service. When a patient reaches the terminal stage and staff click Complete, their visit is finished. The Complete & advance → button in the queue moves the patient to the next stage; when they are already at the terminal stage, it becomes simply Complete.
There can only be one initial stage per service. If no stage is explicitly marked as initial, the system automatically promotes the lowest-position stage.
Editing a stage
Click the pencil icon on a stage row. The Edit Stage dialog opens pre-filled with the stage's current Name, Code, Position, Initial stage, and Terminal stage values. Make your changes and click Save Changes, or Cancel to discard. A confirmation dialog ("Save changes? — Apply your changes to this stage?") opens before the save is committed; click Save changes to confirm. On success a "Stage updated" toast appears. (Adding a new stage does not show the confirmation dialog — the create action submits directly.)
Reordering stages
Click the up chevron (▲) or down chevron (▽) buttons on a stage row to move it one position up or down in the list. The first stage's up chevron and the last stage's down chevron are disabled. The reorder is saved immediately — no confirmation is needed.
Requires the
service-stages.managepermission in addition tobranches.access.
Deleting a stage
Click the trash icon on a stage row. A dialog titled Delete Stage asks: "Are you sure you want to delete stage name? This action cannot be undone." Click Delete Stage to confirm, or Cancel to go back. On success a "Stage deleted" toast appears.
Guard: If the stage has patient visit history, the delete is blocked and an error message appears: "Cannot delete a stage that has visit history." You can edit the stage (rename or reposition it) but not remove it if patients have already passed through it.
Requires the
service-stages.managepermission.
Assigning staff to a service and to individual stages
There are two levels of staff assignment for a branch service:
Service-level staff
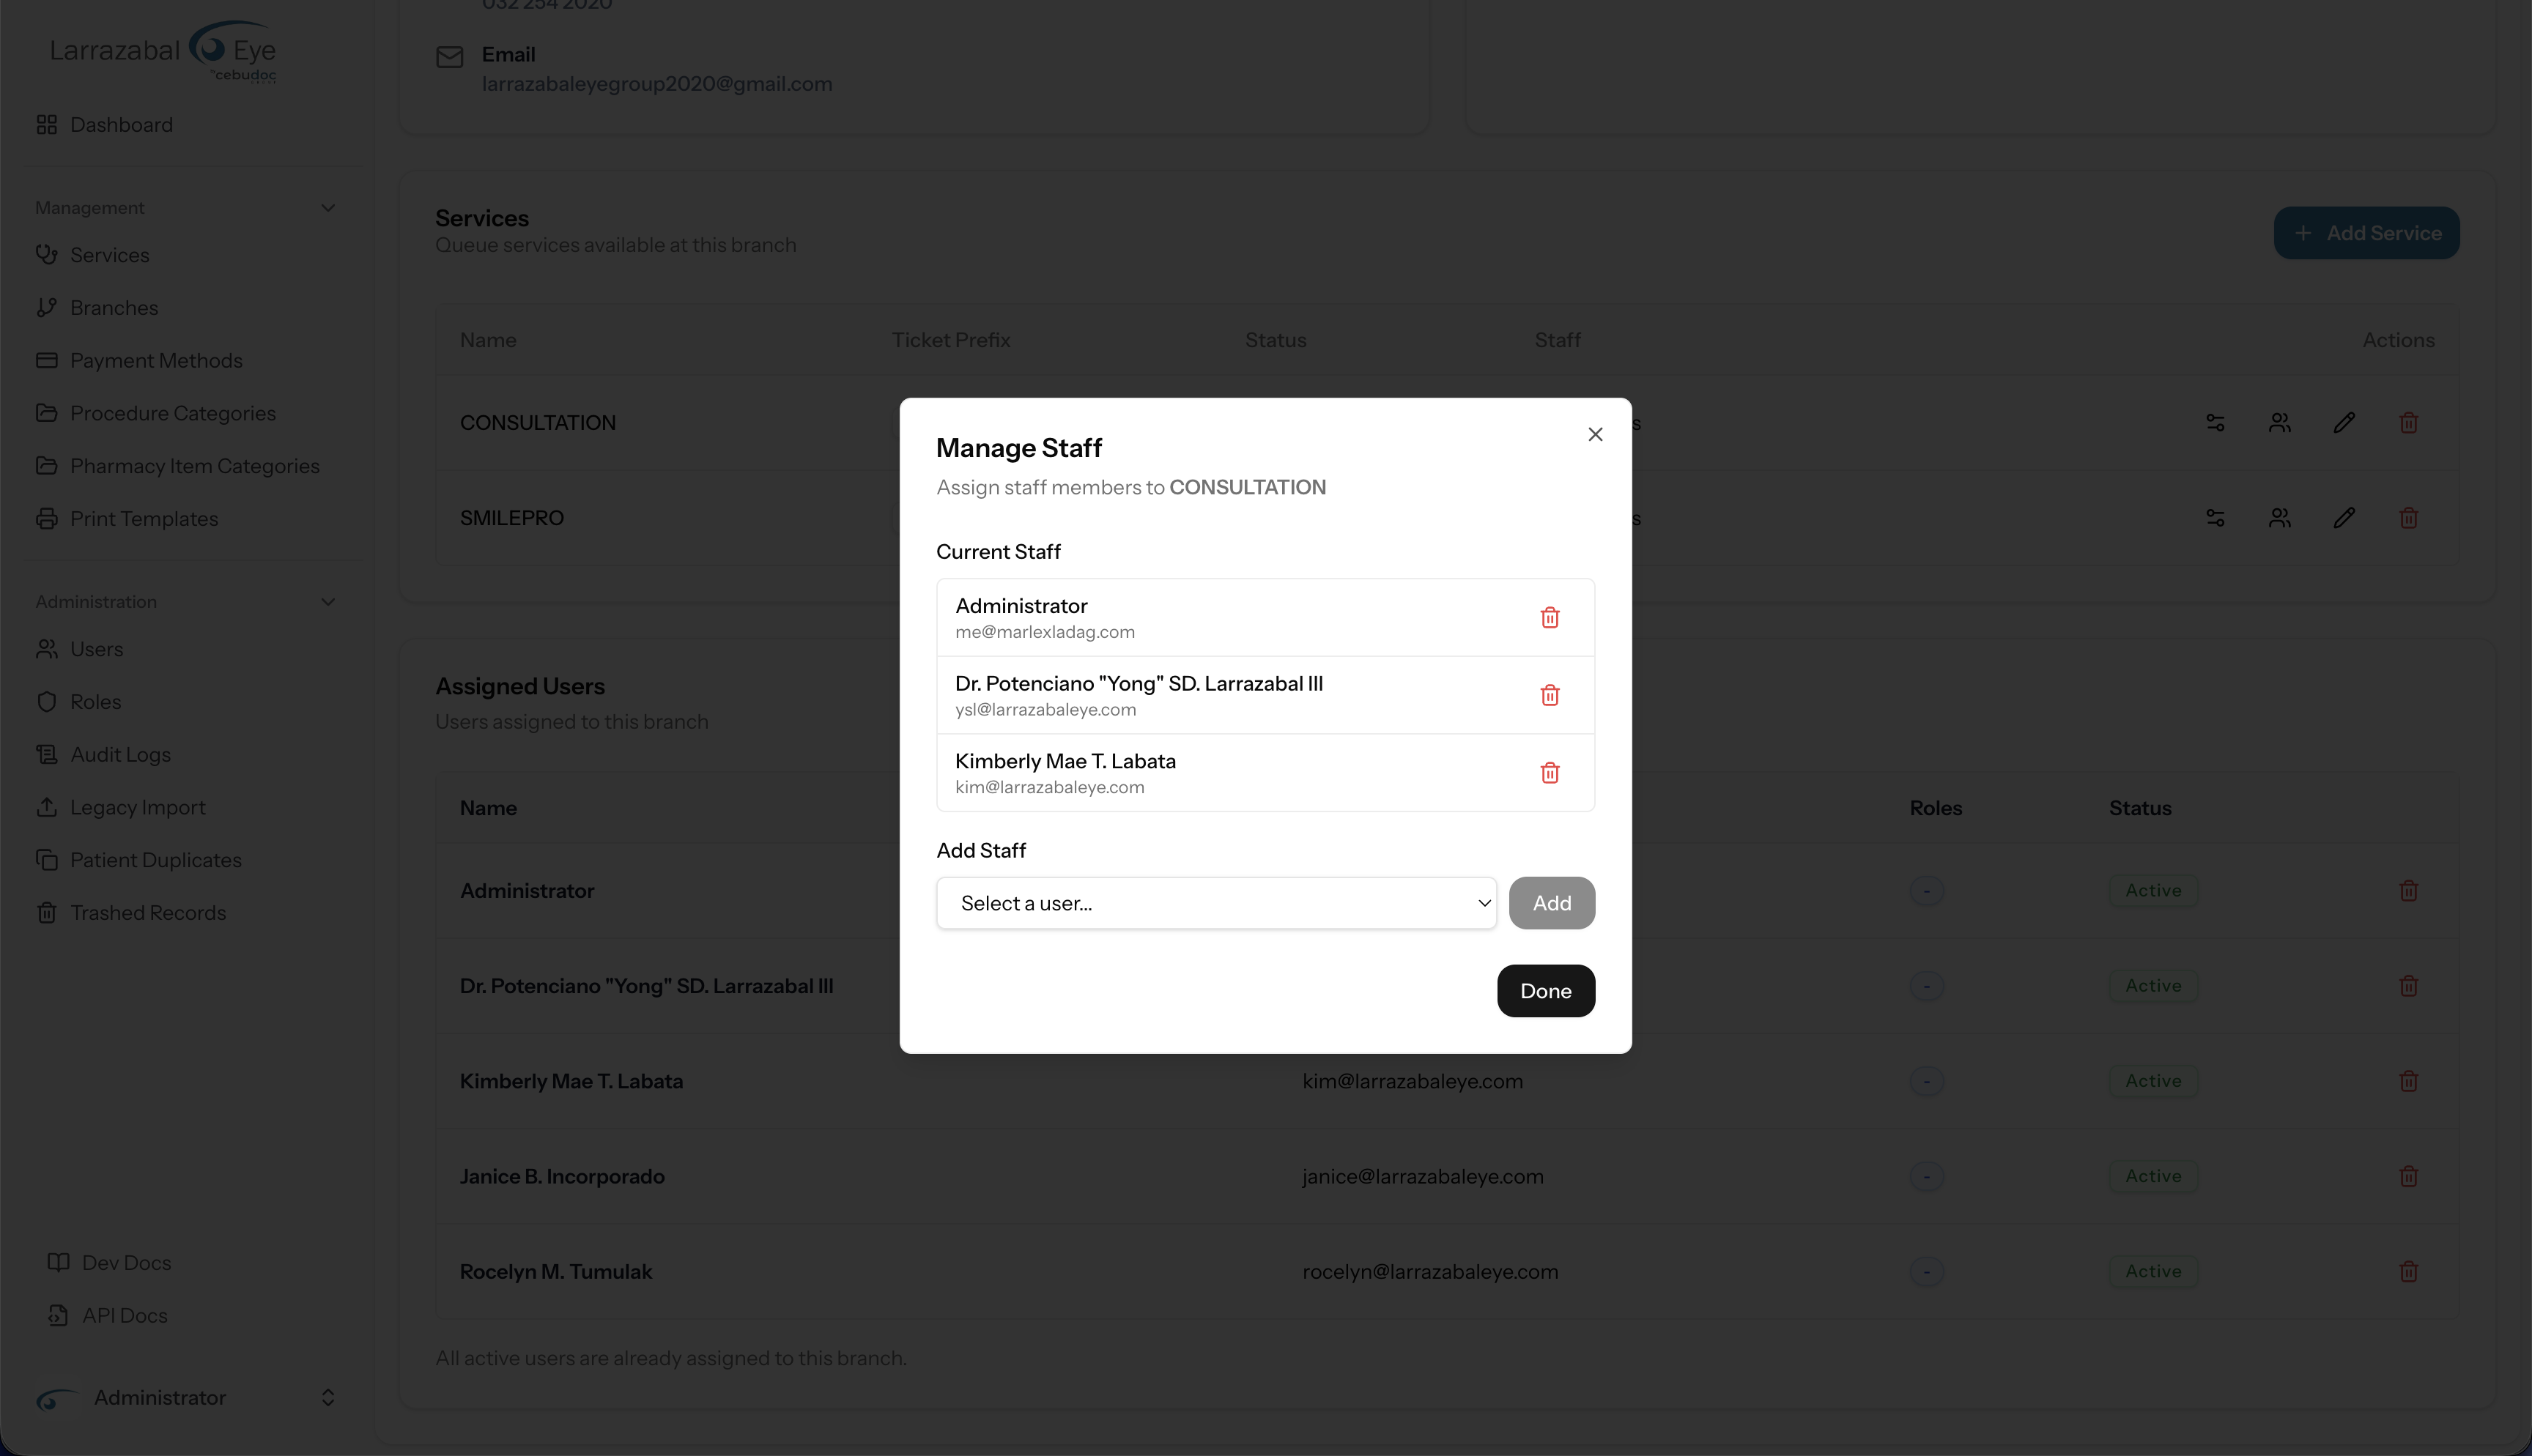
On the branch detail page, click the users icon on a service row. A Manage Staff dialog opens with the subtitle "Assign staff members to service name."
The dialog shows Current Staff — a list of currently assigned users with a trash icon to remove each one — and an Add Staff section with a dropdown ("Select a user…") listing branch users not yet assigned to this service, plus an Add button.
Only users who are already assigned to the branch appear in the dropdown. If no branch users exist yet, the dialog shows "No users are assigned to this branch. Assign users to the branch first."
Adds and removes take effect immediately — the Current Staff list updates in place after each action while the dialog stays open. You do not need to close and reopen the modal to see the latest assignments.
Click Done to close the dialog.
Service-level staff have access to the service in the queue but are not automatically assigned to any particular stage.
Stage-level staff
On the service configuration screen, click the users icon (staff count) on any stage row to expand an inline staff picker below that row. This StageStaffPicker panel shows:
- Name badges for each user already assigned to the stage, each with an × button to remove them.
- A "Select a user to assign…" dropdown listing branch users not yet assigned to this stage, and an Assign button.
Only users assigned to the branch appear as candidates. If all branch users are already assigned to the stage, the dropdown is replaced by "All branch users are already assigned to this stage."
Click the users icon again to collapse the panel.
Why stage-level staff matters: The Queue page in the clinical app shows a staff member only the services and stages they are assigned to. Assigning a user to a specific stage means they will see and work that stage's queue — for example, assigning a pharmacist only to the Pharmacy stage means they see only the Pharmacy column in the queue, not Reception or Doctor.
Stage staff operations require the
service-stages.managepermission.