Services
Services define the named clinical workflows — such as "OPD", "Consultation", or "Surgery" — that are available across your clinic. Each service acts as a template: you create it here at the global level, then attach it to one or more Branches. The actual stage list and staff assignments for each service live on the branch, not here.
Permission required: Your account must have the
services.accesspermission to see the Services section in the sidebar. All read and write actions on this page share the same permission gate.
The Services list
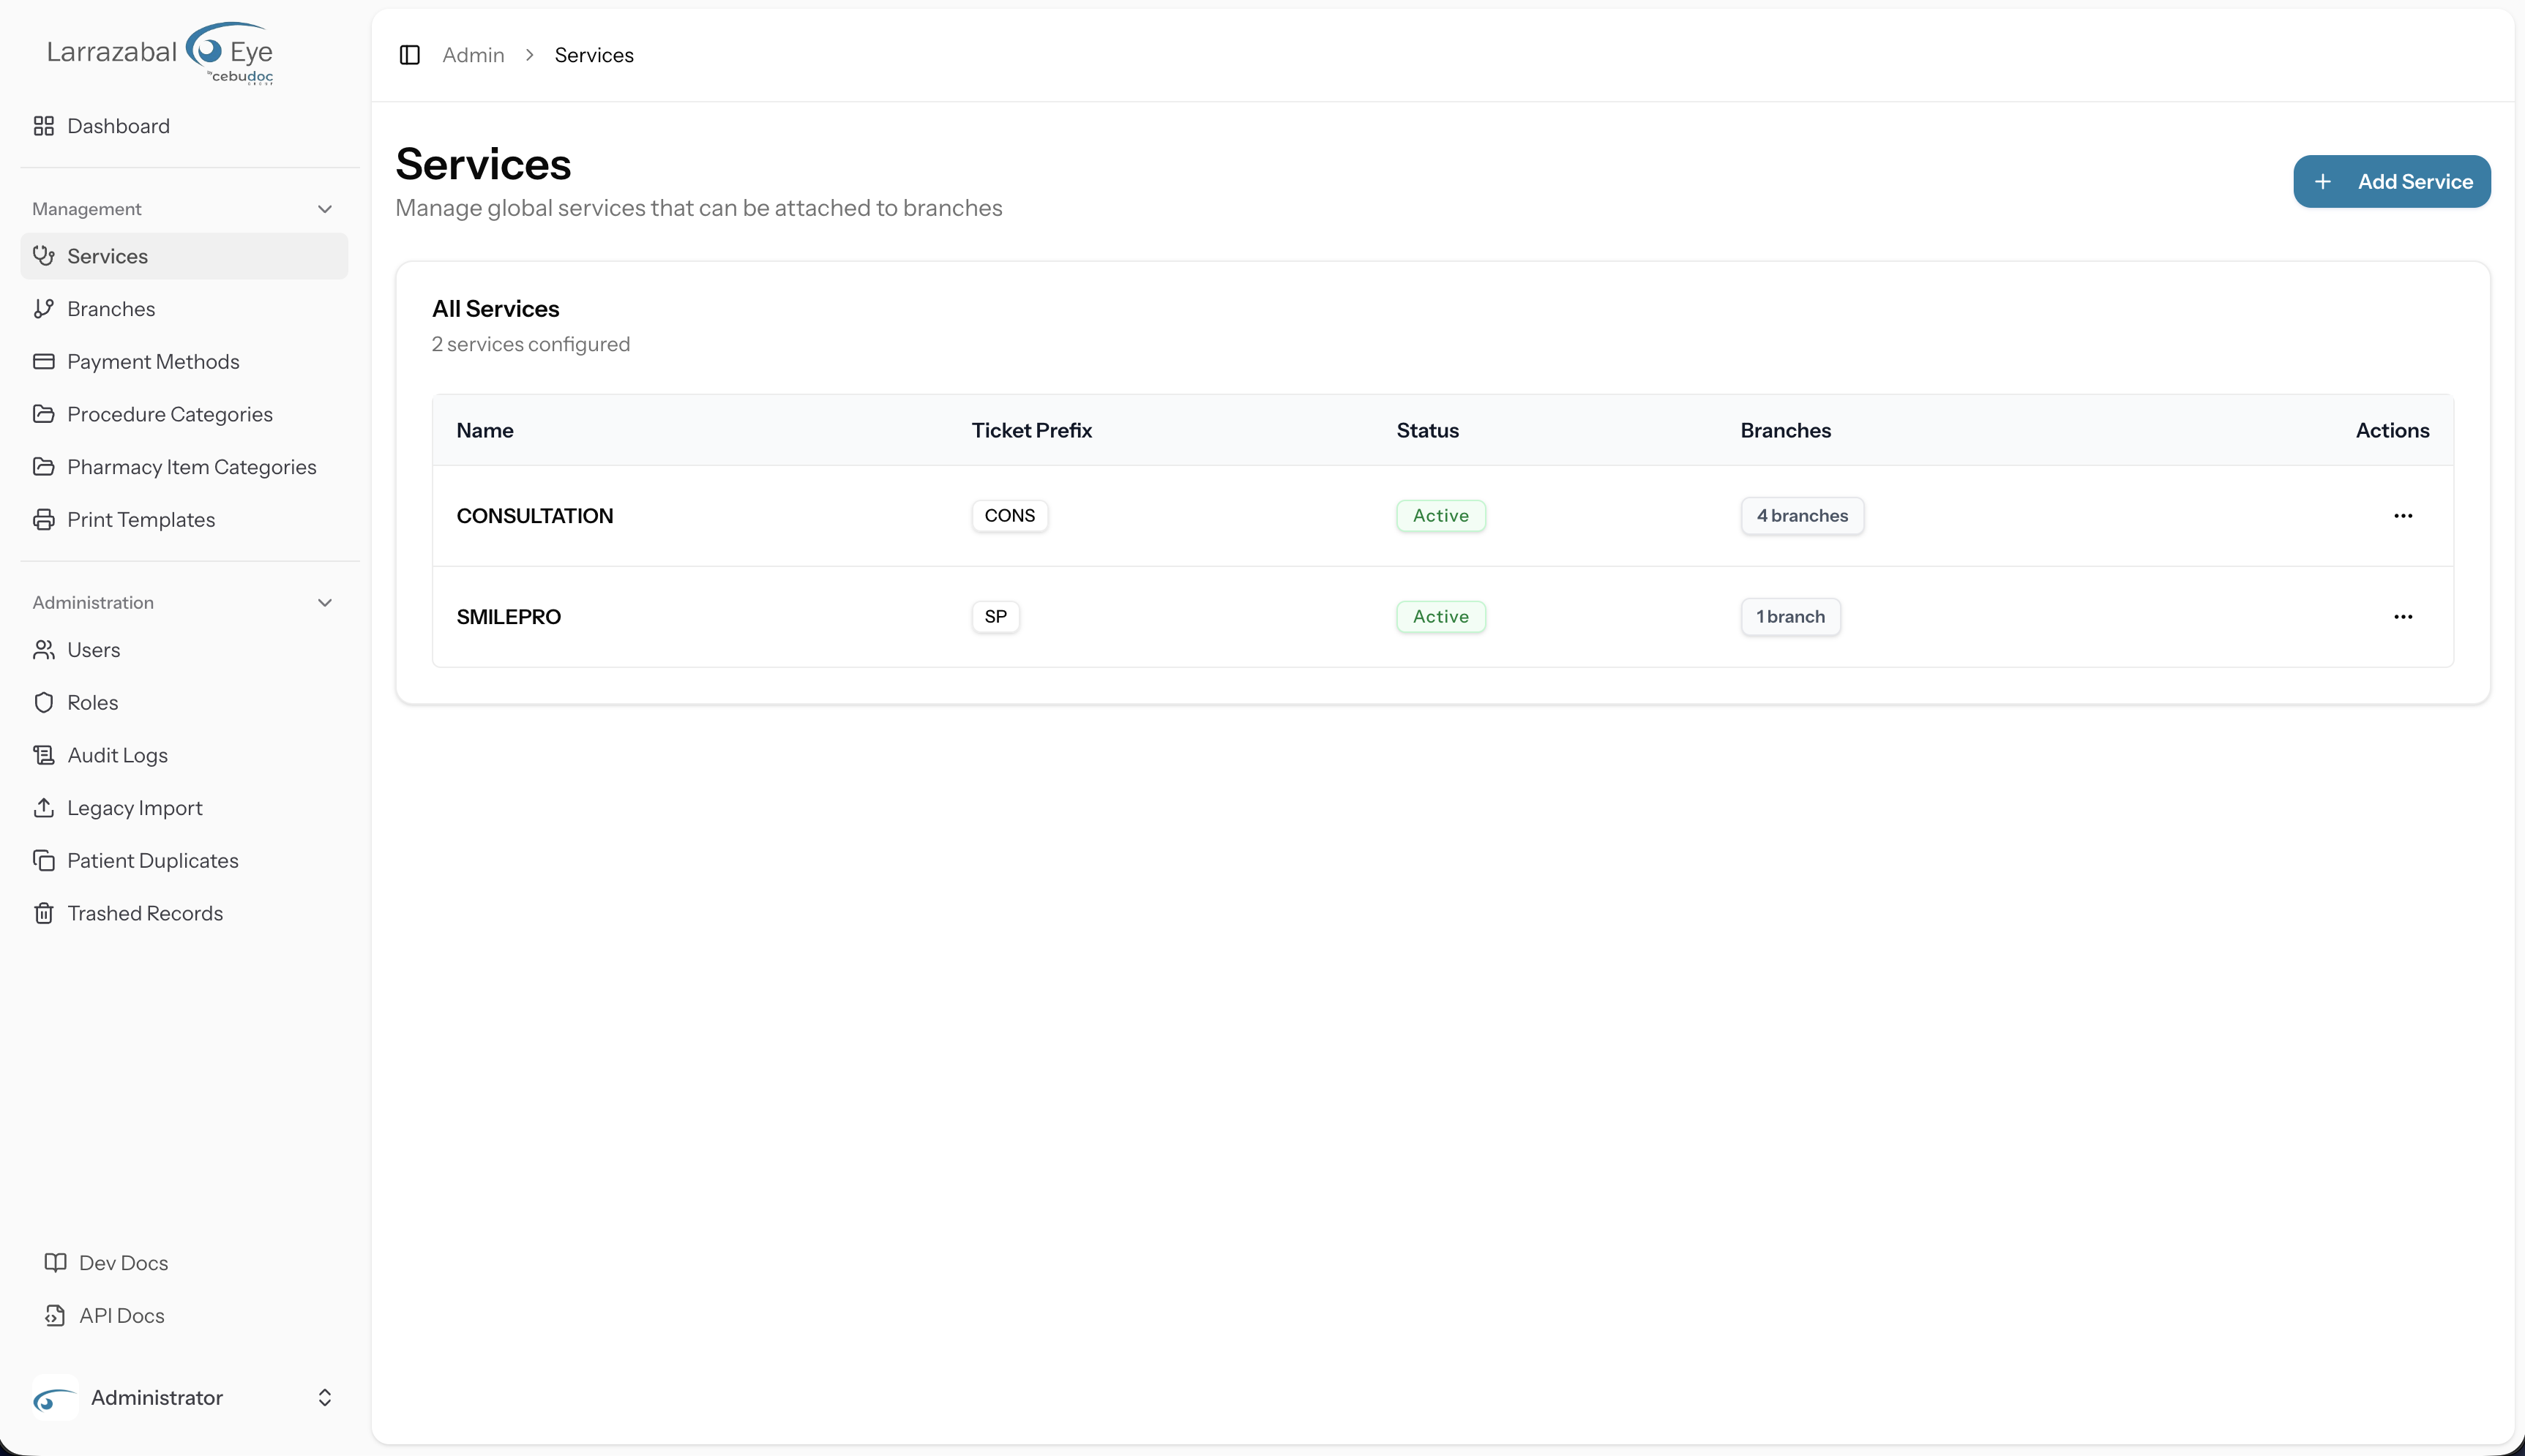
Navigate to Admin › Services in the left sidebar. The page heading reads Services, with the subtitle "Manage global services that can be attached to branches."
The Add Service button sits in the top-right corner of the heading row.
Below the heading, a card labeled All Services shows the full catalog. The card description shows a count of how many services are currently configured (e.g. "3 services configured"). If no services exist yet, the card body shows the message "No services yet. Add one to get started."
When records exist, they appear in a table with the following columns:
| Column | What it shows |
|---|---|
| Name | The service's display name (e.g. "OPD"). Rendered as a link — click it to open the Edit Service dialog. |
| Ticket Prefix | A short code badge used to prefix queue ticket numbers (e.g. a prefix of OPD produces tickets OPD-001, OPD-002, …). |
| Status | An Active or Inactive badge. |
| Branches | A badge showing how many branches this service is currently attached to (e.g. "2 branches"). |
| Actions | A ⋯ (More) button that opens a dropdown menu. |
The table is not paginated or searchable on this screen — all services are shown at once, sorted alphabetically by name.
Actions menu
Click the ⋯ button on any row to open a dropdown with:
- Edit — opens the Edit Service dialog.
- Delete — opens the Delete Service dialog. This item is disabled (grayed out and not clickable) when the service is currently attached to one or more branches.
Adding a service
Click Add Service. A dialog titled Add Service opens with the subtitle "Create a new global service that can be attached to branches."
The form contains three fields:
| Field | Required | Notes |
|---|---|---|
| Service Name | Yes | The human-readable name shown to staff in the queue (e.g. "Consultation"). |
| Ticket Prefix | Yes | A short uppercase code used as the queue ticket prefix (e.g. CONSULT → ticket CONSULT-001). Whatever you type is automatically uppercased. The help text under the field reads "Used as queue ticket prefix, e.g. CONSULT-001". |
| Active checkbox | — | Checked by default. Uncheck it to create the service in an inactive state. |
Click Create Service to save. Click Cancel to discard.
On success, the dialog closes and the new service appears in the table.
Editing a service
Click the service name in the table, or Edit from the ⋯ menu on any row. The Edit Service dialog opens, pre-filled with the service's current Service Name, Ticket Prefix, and Active state.
Make your changes and click Update Service. Click Cancel to discard. A confirmation dialog ("Save changes? — Apply your changes to this service?") opens before the save is committed; click Save changes to confirm. On success a "Service updated" toast appears.
Changing the Ticket Prefix affects all future tickets issued under this service. It does not retroactively renumber tickets already in the queue.
Activating and deactivating a service
The Active checkbox in the Edit Service dialog controls whether the service is active. Unchecking it and saving marks the service Inactive (the status badge in the table switches to the muted "Inactive" style).
An inactive global service can still be attached to branches, but branch administrators may also set per-branch active/inactive status independently — see Branches › Attaching a service.
Deleting a service
Click Delete from the ⋯ menu. A dialog titled Delete Service asks you to confirm: "Are you sure you want to delete service name? This action cannot be undone."
Click Delete to proceed. Click Cancel to go back. On success a "Service deleted" toast appears.
Guard: If the service is attached to any branch, the Delete option in the ⋯ menu is disabled — you cannot click it. You must detach the service from all branches before you can delete it. To detach a service from a branch, go to that branch's detail page (see Branches › The branch detail page).
What happens next: branches and stages
Creating a service here makes it available to attach to branches. Once attached, a branch gets its own instance of the service, complete with its own ordered list of stages (e.g. Reception → Screening → Doctor → Pharmacy) and its own staff assignments.
All of that per-branch configuration — adding stages, reordering them, marking which is the initial and terminal stage, and assigning staff — happens on the Branches page, specifically on the branch service configuration screen.
Staff members then see their assigned services and stages on the Queue page in the clinical app.